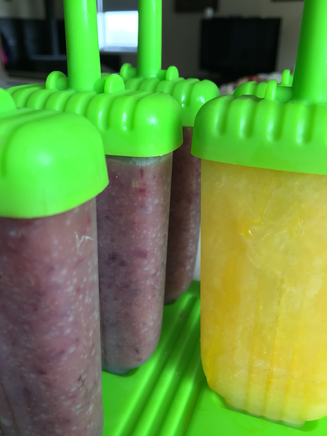
 I love popsicles, and so does my 3 year old. But 100% juice popsicles can be expensive. I was buying the 100% juice ones at Walmart for 5 dollars a box and that was starting to get pricey! Popsicles are great for little ones who have a sore throat or just need a little more liquid intake for them during the day, so instead of the store bought ones, I turned to making my own! It's super easy and very cost effective in the long run. Here is how I make yummy, homemade, kid friendly, healthy popsicles!
Step 1: Invest in a popsicle mold. There are many kinds out there that range in price from $5-$20, but this one is very simple to use and inexpensive. I bought it online at Walmart.com. It's called the CookArt Ice Pop Popsicle Mold and it makes 6 popsicles. They didn't sell it in the store, but it had free shipping on it. The cost I paid was $8.99. Step 2: Get creative! For my daughter, her digestive system is pretty sensitive, so I opt in making grape juice and orange juice popsicles the most for her. To do this, just pour the juice into the mold and freeze for simple juice pops, or get fancy by making your own concoction of juice varieties! Using over-ripe fruit to make popsicles! One method that I like to do that not only uses up over-ripe fruit that you may otherwise toss, but it also makes for a yummy, healthy treat for your kids without throwing out fruit! Step 1: Take your washed, over-ripe fruit ( this includes any kind of fruit that may be either: bruised, a little mushy but never rotten-such as grapes, blueberries, bananas, & strawberries) and toss in ziplock baggies and freeze. The beauty with over-ripe fruit, is that it is super sweet from the sugars it builds, thus making it perfect for popsicles! Step 2: Once you have built up enough frozen fruit, you can pull it out of the freezer to thaw. Step 3: After an hour or so, the fruit should be almost thawed. Take your fruit and puree it in your blender. Once it's blended to your liking, you can fill your molds and freeze! There you have it, healthy popsicles for you and your kids :) Enjoy!
0 Comments
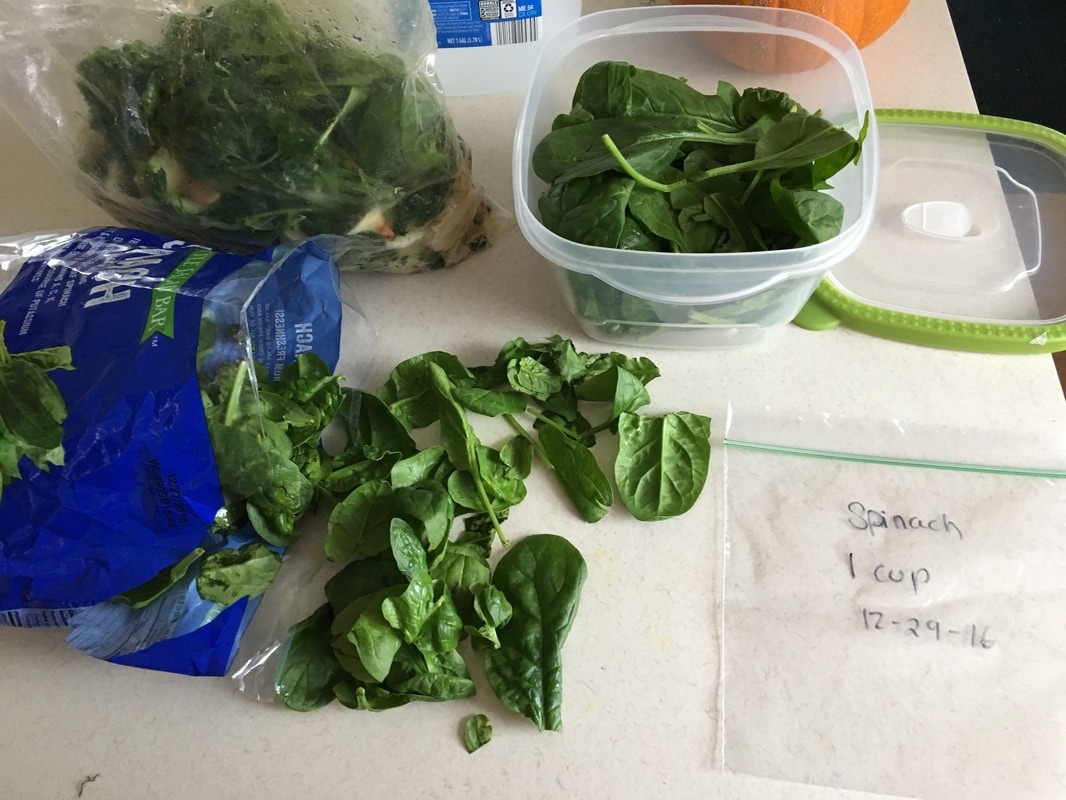 If you've ever bought a big bag of spinach, you've probably had this happen: You buy it and use it in a salad or in a meal and just a few days later, it's wilty and mostly unusable. I had this happen several times and when it did happen, I ended up giving the spinach to the chickens. Well this time, I wanted to try another way of saving my bag of spinach before it went to the birds. I normally buy the pre-washed stuff, it saves time and who doesn't loves saving time? This is what I did with any leftover spinach I'd have in the bag after using it for it's original purpose. I would put a large portion in a Tupperware with a clean paper towel on top of the spinach to absorb any excess moisture from being in the fridge, and that would keep for a few more days. Then the rest of the spinach would go into small ziplock bags in 1 cup measurements, dated, and labeled. Try to get out all of the excess air from the bag, then pop it into the freezer. It is important that you select near perfect pieces of spinach to put into the freezer so that they keep their nutritional content at peak. Any wilty looking pieces that weren't near perfect, went into my veggie scraps bag or to the chickens. Now this way, no spinach goes to waste! You can use the frozen spinach in soups, and if you need to cut the spinach, they are super easy to cut when they are half frozen. Keep on Frugal-ling!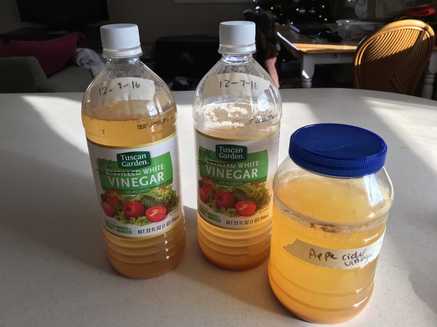 This is the easiest method I have found for making your very own Homemade Apple Cider Vinegar ( or HACV) and it starts with apple scraps! At first, you will need:
 Then, once you have filled your bag, you can place the apple scraps into your crocks or containers to age. This is what you will need for the next step;
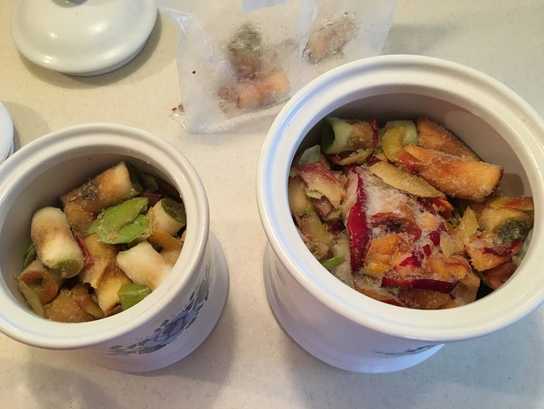 After your apples are in their containers, add the water to your measuring cup, followed by the sugar and mix until the sugar is dissolved. Pour this on the apples and keep repeating until you have covered all the scraps. Note: Sometimes I have a few apple scraps pop up or have tips showing, but that's ok. In the end of the process, you may have to just skim off the scum that may appear. 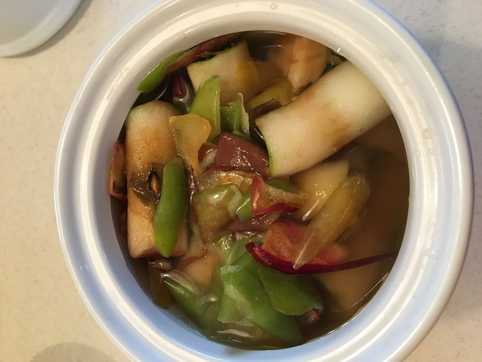 Next step is to mark your coffee filter/napkin with your marker, and date it for 2 weeks later so that you know when to check your vinegar. I also like to mark my calendar or make a reminder on my phone to check it in two weeks, as a back up. Then cover and tightly secure it with either a rubber band or tape. Store your vinegar in a cool dark place ( like a cabinet or closet ). Note: Make sure you have it secured nice and tight or you may have visitors like fruit flies show up unexpected...not fun...believe me! 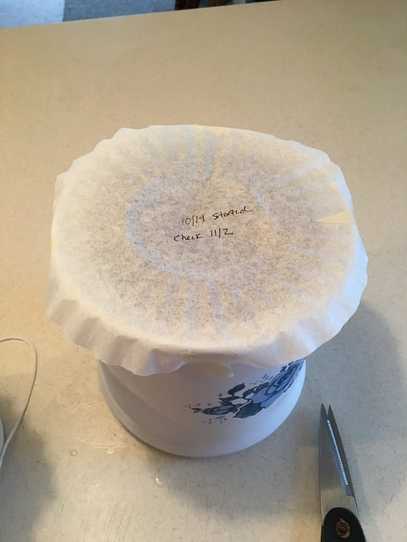 After the 2 weeks has passed, smell your HACV, if it has that smell of vinegar, it's ready. If not, just check in another week. But if it is ready, it's now time to strain it. You will need:
 Set up your station as pictured above, then begin to put the scraps in the strainer and push down the scraps to get all of the excess pulp and juice from the apples. Once it is strained, you can either compost your scraps or feed them to your chickens :). 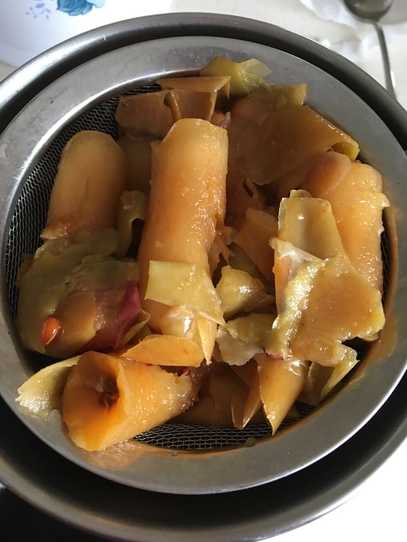 Next, take the vinegar and place it into your new, clean containers that they will be holding your vinegar in for now on. I use a funnel to do this to make it easier. 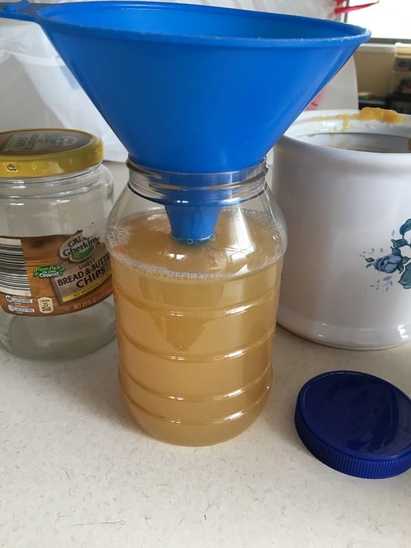 Finally, cover your container with the same or another coffee filter/napkin, secure with a rubber band or with tape, and date for 2-4 weeks later and store in a cool, dark place. 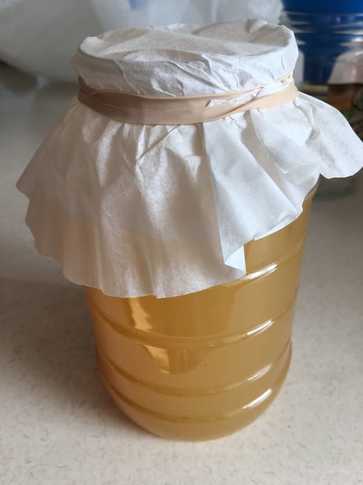 I stored mine in a lower cabinet :) 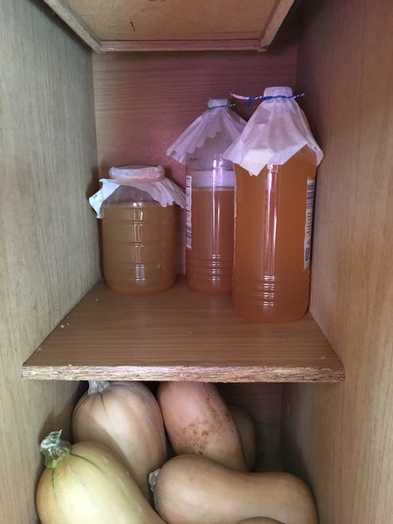 After the 2-4 weeks have gone by, you should have a cloudy, yummy smelling HACV! Give it a taste just to be sure, and if it still isn't up to par, just let it sit for another week and check it again. In the end, you just have to cap the containers. Now you're finished making a useful, from scratch product that you made yourself! Enjoy and happy frugal-ling!  Not sure what to do with your HACV? Check out this link to see the wonders of Apple Cider Vinegar :) This is where I learned about making HACV, She has some great facts about making it as well!
If you have a smart phone, they can come in handy with helping you spend less on purchases. Over the years, I have found a few apps that will help you with discounts and put more money in your pocket. Here are the apps that I have found that have saved me a lot of money:)
1) Walmart app. Everytime I get a receipt from Walmart, I save it, take it home, and scan the bottom barcode under the Savings Catcher. If there is a lower price somewhere else, Walmart will reimburse you in the form of a gift card and they will keep adding your savings on that gift card until you spend it. Then it starts all over. In the meantime, you get to use that free money to buy stuff online, or cash it in at their customer service center! Awesome app. 2) Coupons.com app Easiest way to get coupons quickly, sent directly to your printer so that you can bring them with you when you go shopping! I love checking this app once a week for new coupons. Whenever I need to go shopping at Walmart or target or wherever that accepts coupons, I check out their app first to make sure I'm saving some money ahead of time. 3) RetailMeNot app A great app to have because when you're out and about, they will alert you if there is a deal going on around you! I have saved so much money and gotten so many great deals because of this app. Also, if you have a store you're in that you think you might buy an item in, like bed bath and beyond, you can check their app first before you make a purchase to see if there are any scannable coupons/deals going on. Another way that I have saved money is by signing up for Wegmans, Christmas Tree Shop, Kohls, and other major stores online or in store for coupons and offers and that helps a great deal too:) Anyone who has any other great apps for saving money, please be sure to add in the comment section to further help other frugalers;-) Happy Frugal-ling!  Looking for a "from scratch" Alfredo sauce? Then try this Chicken Alfredo Recipe :) So creamy and delicious, you'll want seconds! Prep Time: 30mins
Cook Time: 30 mins Makes 8 Servings. Ingredients:
Directions:
Another Note: If you'd like to freeze this meal, freeze only the sauce (not the noodles) in a freezer safe tupperware. I love making freshly squeezed lemonade and using fresh lemons for lemon maraigne pie and of course cooking! But I had a hard time keeping my lemons fresh for a long time without them getting yucky. So! This is the easiest, cost effective way to store your lemons! What you'll need: * jar or clear container that has a lid * lemons * enough water to fill your jar to cover lemons All you need to do is pop your lemons into the container, fill with water to cover and stick into your fridge! The lemons will last for weeks and not get mushy or rotten:) Try this simple hack for a chance to save yourself some money :)  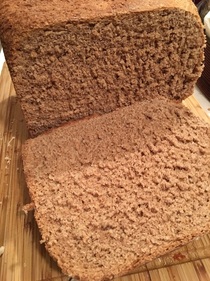 This is a very good bread that is made in the bread machine, start to finish! Super easy to make and tastes just like the bread they serve at Outback!
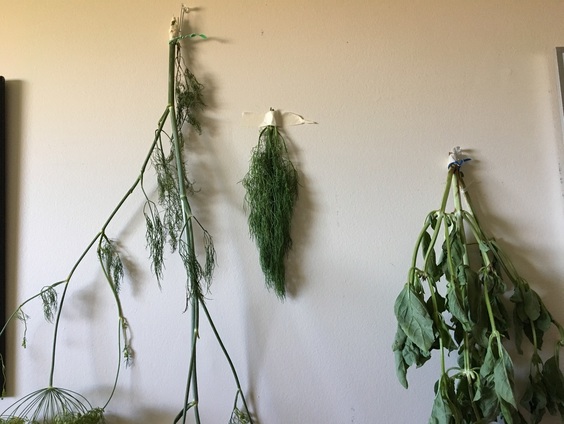
When I first started gardening, I had an indoor herb garden. I loved growing Basil, Oregano and Thyme. It was awesome having fresh herbs for recipes and they made my house smell so good too...and they look good! The easiest way to dry herbs is by hang drying or drying on paper towels and letting time do the rest! Here is a simple step by step guide for doing that and saving yourself some money by not having to buy herbs at the store! Drying by Hanging:What you need:
Instructions on Hanging:
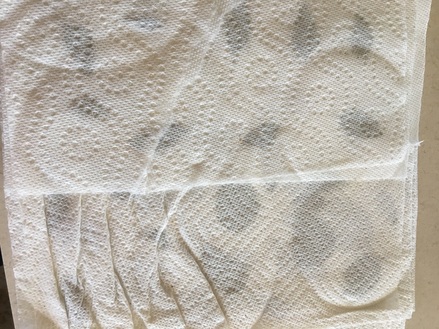
 Drying by Using Paper Towels:What you need:
 What to Do With Your Dried Herbs: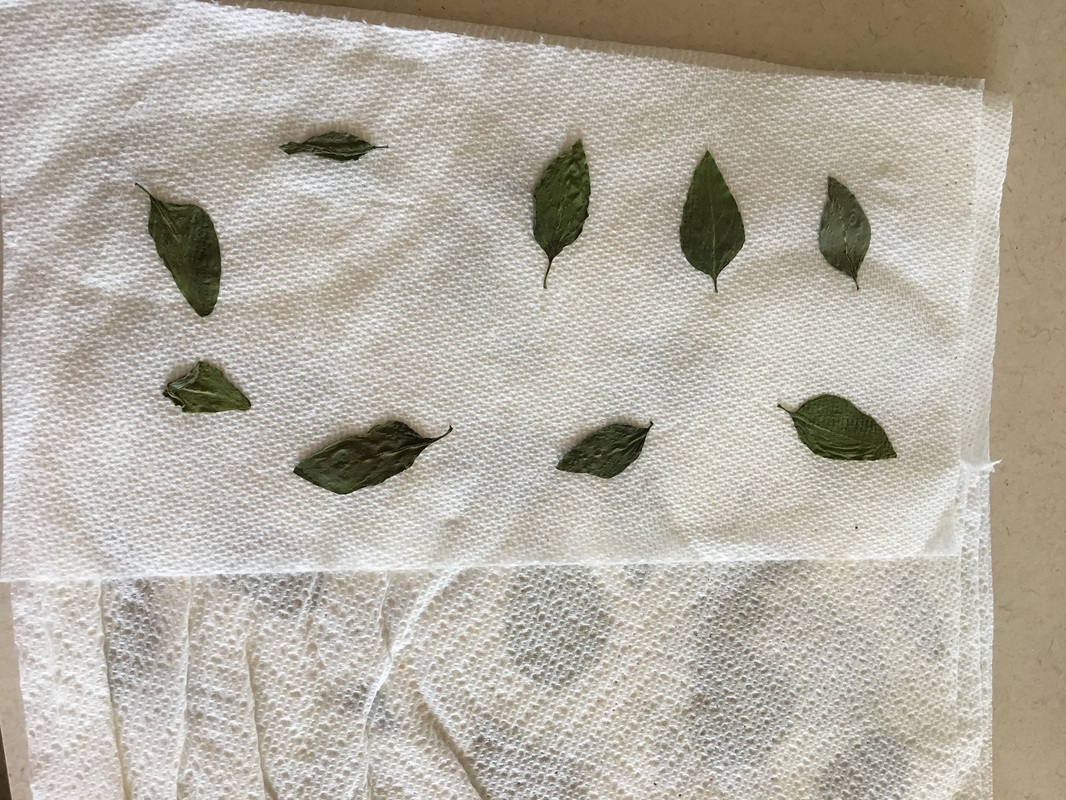 This picture above is of dried Basil. Once your herbs have dried, you can put them away to be used for recipes! Here are two ways of doing just that. Method 1-Placing Herbs in an Airtight Container:I like to save empty herb containers that I buy at the store to put my home garden herbs into once the herbs have dried, but you can use a simple zip lock bag too! In this description, I'm using Dried Basil used from the paper towel method. You'd do the same with your hung herbs, just take the herbs off the stem and place in your airtight container. Step 1: Tear your dried herbs with your fingers into little bits. ( If they are leafy herbs you tear them up, if they are stem type herbs like Rosemary, just run your fingers along the stem the opposite direction of how they grow on the plant, and the herbs should just trickle off the stem and onto the counter.) 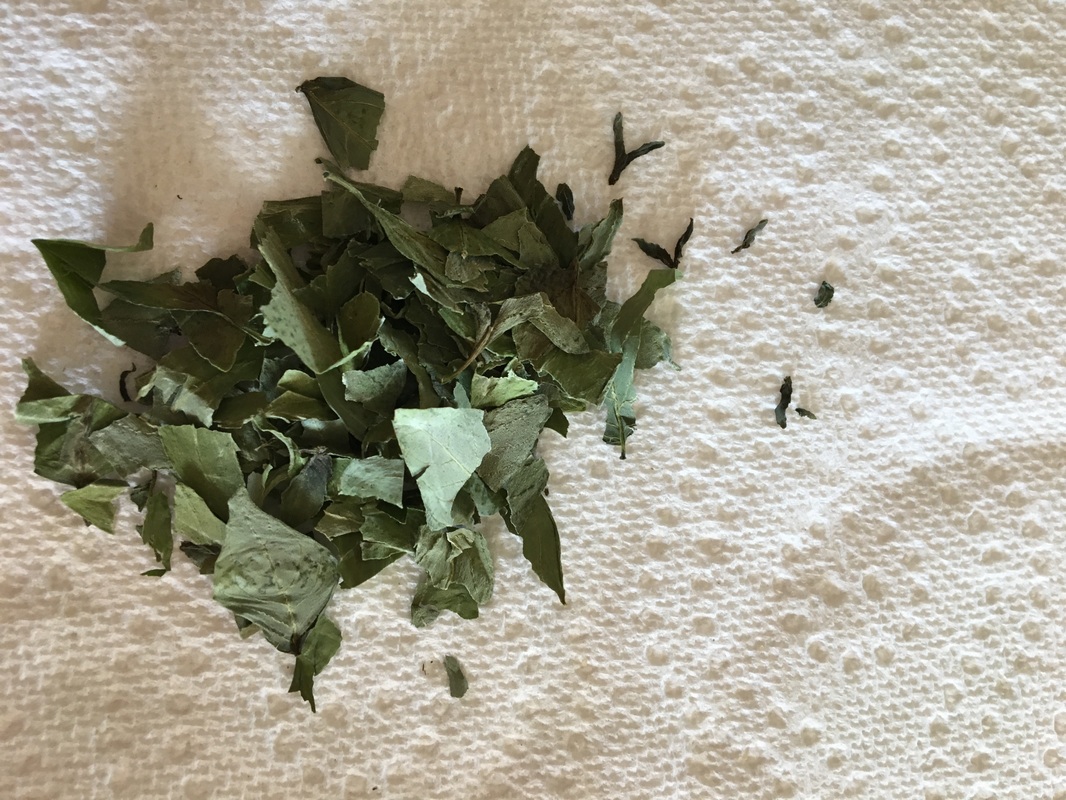 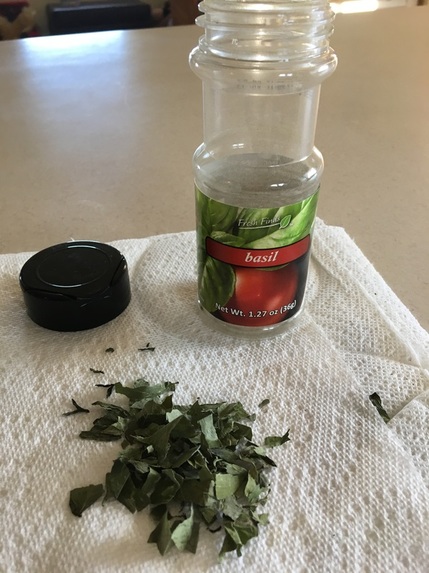 Step 2: Place your herbs into your container and store in a dry, dark place! 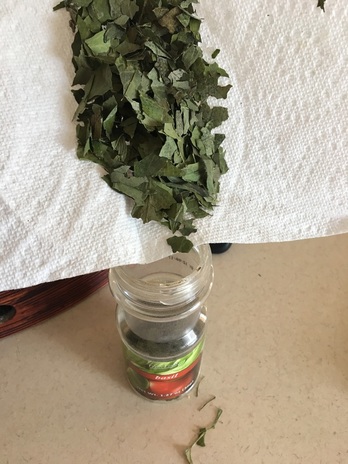 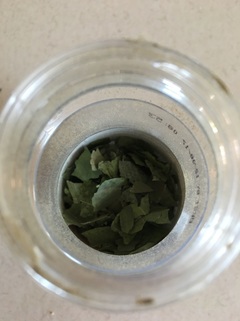 Method 2 - Placing Herbs in Your Freezer:Placing your dried herbs in the freezer is super easy. No pics necessary! Just take your dried herbs, (removed from their stems ) and place in a zip lock bag, labeled and popped into your freezer! I like to keep mine on the door in my freezer to make them easier to find :). This is the cheapest way to preserve your herbs but you can also use a dehydrator to dry your herbs faster as well as a coffee grinder to shred your herbs :) I prefer to do this by hand but to each his own!
I hope you enjoyed these frugal tips, keep on frugal-ling!! There are a lot of recipes that I use that require Veggie broth. This is the most cost effective and easiest way to make your own veggie broth in the crock pot! To make your broth, you first need a gallon or 2 bags of veggie scraps from your freezer. To start this bag of goodies, begin saving all of your washed veggie scraps! From onion tops and bottoms, to garlic wrappers, to skinned carrots, any veggie scrap you normally throw out that isn't rotten (those go in the compost) can go in your veggie scrap bag! You then start adding and adding and every time you add a scrap, you just simply pop back into the freezer! So easy, and so green! This bag of scraps will get frost bite but that's ok! There are still plenty of nutrients in those scraps that will add such complexity to your broth :) Once you have filled your veggie bag, you can start your broth. In this recipe, I only used one bag of frozen veggie scraps, and still the broth came out perfect :) 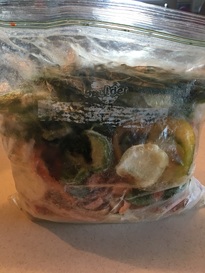 The next step is to dump your scraps into your crockpot, add a few bay leaves and fill with water to cover. Turn in on high for 5 hours and let it cook! 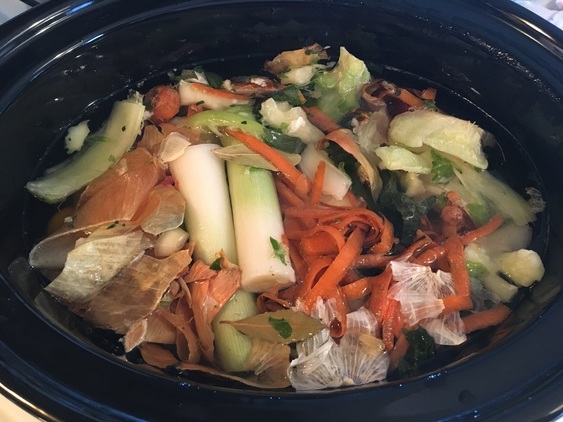 After 5 hours, begin to strain your broth into a bowl to separate the veggies from the broth. To stretch my scraps even further, I toss them in the compost ;) Store your broth overnight, covered in plastic wrap so that it will cool. 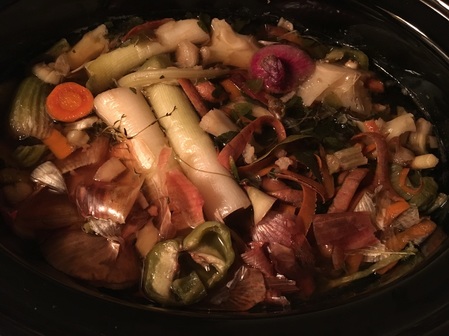 Your broth should have a reddish brown color and smell oh so yummy! 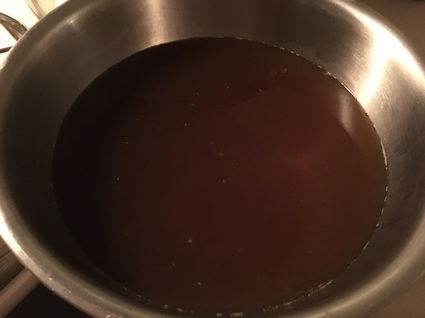 Once the broth has cooled, start ladling it into small zip lock bags and just pop in the freezer, propped up in your freezer shelf. Each small zip lock bag measures approximately 2 cups, leave about an inch or 2 of head space when filling because the liquid will expand as it freezes :) 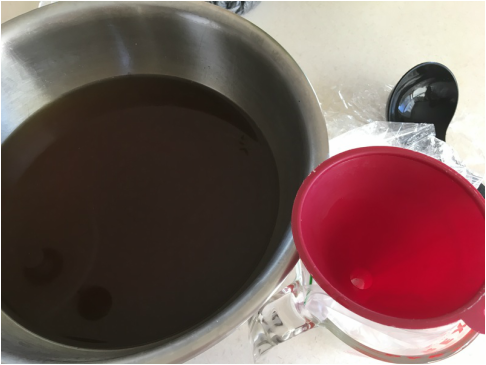 I put the broth into bags by using a large measuring cup and placing the opened bag into it, followed by the funnel. Then just ladle the broth into the bags! 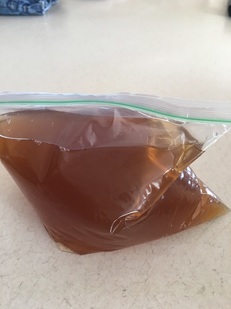 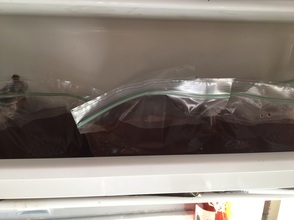 So that's it! Now you can start saving your scraps to make this frugal broth, enjoy!!
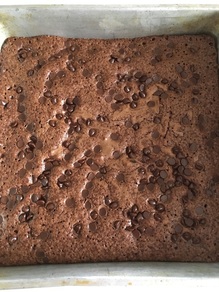 A super easy brownie recipe that makes the most moist and delicious brownies! So good you won't be buying the box kind ever again...you're welcome :) Ingredients:
Directions:
|
MarianI'm a lover of nature, food, and creating. Archives
January 2021
Categories |
 RSS Feed
