|
I love to make this stock, it uses up a single leftover chicken carcass and turns it into stock for another meal! You can also start saving your used up chicken bones and throwing them into a freezer bag until it's full and throwing that into the crock pot too. I made a chicken roast the night before, cleaned off the bones as best as I could, and saved the meat for another meal, then tossed the carcass in a baggy and popped in the fridge. Here is what you do with that leftover carcass, and you can do the same for a turkey carcass, just add more water to cover, add more veggies and chicken seasoning. It makes a ton of stock! Recipe for this without pictures is here. Ingredients: 2 1/2 lbs bone in chicken-pieces 6 cups water 2 stalks celery, chopped 2 carrots, chopped 1 onion, quartered 1 Tablespoon dried basil dash thyme dash bay leaves Step 1) Clean your veggies, take the carrot skins and veggie scraps and place in your freezer veggie stock bag to make veggie stock once it's full. 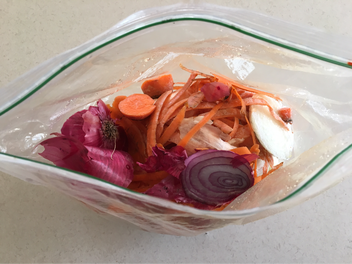 Then cut the veggies and place in slow cooker ( as you can see I have some frost bitten celery from my freezer that I added ;) ) 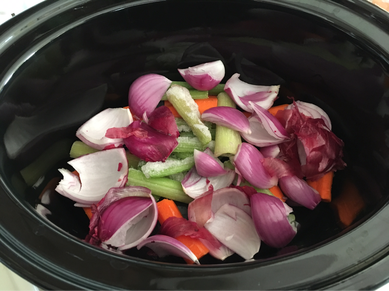 Step 2: Add your herbs and chicken carcass or bones, then pour in your water. 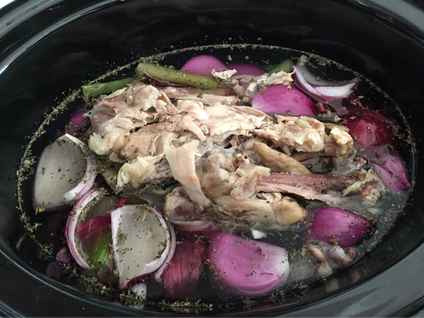 Step 3: Turn on your crock pot to low and cook 8-10 hours....the longer the better! If you're short on time, you can turn it on high for 4-6 hours but believe me, time is your friend here. You want the broth to get a nice rich deep flavor and the more geletin in it, the better body this stock has for meals. Step 4: After the time has passed and the stock has a nice dark, rich color, you will want to turn off your crock pot and let it cool for an hour at least so that you can handle it. Step 5: Strain your stock. To do this, separate the veggies and bones from the stock using a colander. I use 3 bowls. One for the bones and veggies, one for the stock, and one for the meat that I remove from the bones. This pic shows the strainer in the stock bowl. I use a ladle to remove the bones and veggies and press the back of the ladle down to squeeze out all the excess juice. 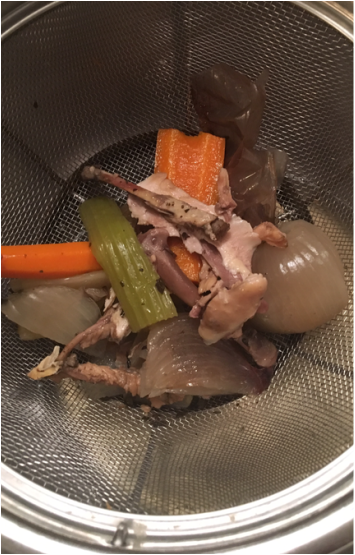 This bowl below depicts the strained veggies and bones. 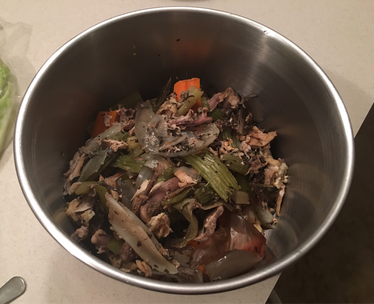 Below is the meat stripped from the bones that can be made into sandwhiches or put in the freezer for another meal. I like to do this with every batch Of stock I make so that when I have enough, I can use it to make chicken pot pie! 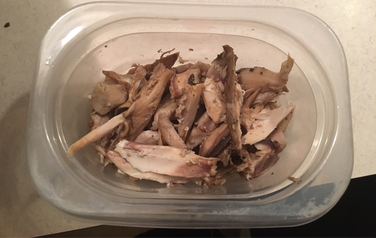 Step 6: Once your stock is strained, you can cover the top of the bowl in plastic wrap and place in the fridge overnight for the fat to raise to the top. Step 7: The next day, your stock should look like this... 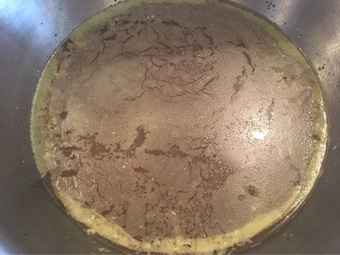 Pretty right? No...not at all. That's the fat on top. You can either scoop off the fat and throw it out OR save it. I scrap the fat off and put in ice cube trays and stick that in the freezer to use for chicken based recipes in place of using oil! It adds such a complexity to your chicken dishes, try it out! It should look like this once placed in ice trays. 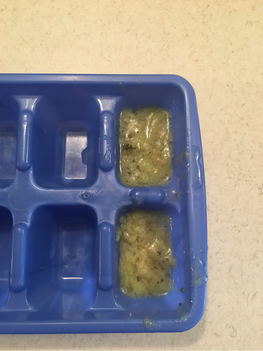 Step 8: Once you have gotten rid of the fat, you can start bagging it! I have found that the easiest way to do this is using a container like a tall measuring, baggies, a funnel, and a ladle. Like in this pic. 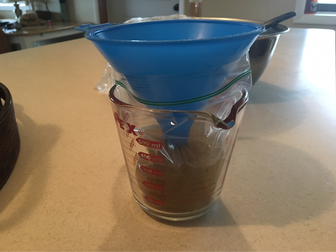 Fill your baggies leaving about 2 inches headspace ( since your stock will expand when it freezes) and place in your freezer door to keep from spilling. Or you can put the stock in Tupperware :) just remember to label. The stock lasts up to 6 months in the freezer. 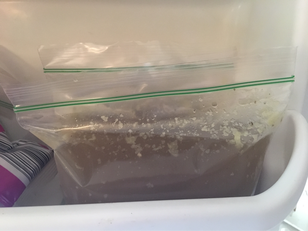 Well, that does it! Any questions just be sure to comment and happy cooking!
0 Comments
Leave a Reply. |
MarianI'm a lover of nature, food, and creating. Archives
January 2021
Categories |
 RSS Feed
