|
It’s been 4 months since we moved into our dream home and we’ve accomplished a lot! Here are some updates to our home that we’ve made! Lean to addition for work shopBuilt the frame after installing the posts, then he added the roof. Wood being delivered-board and batten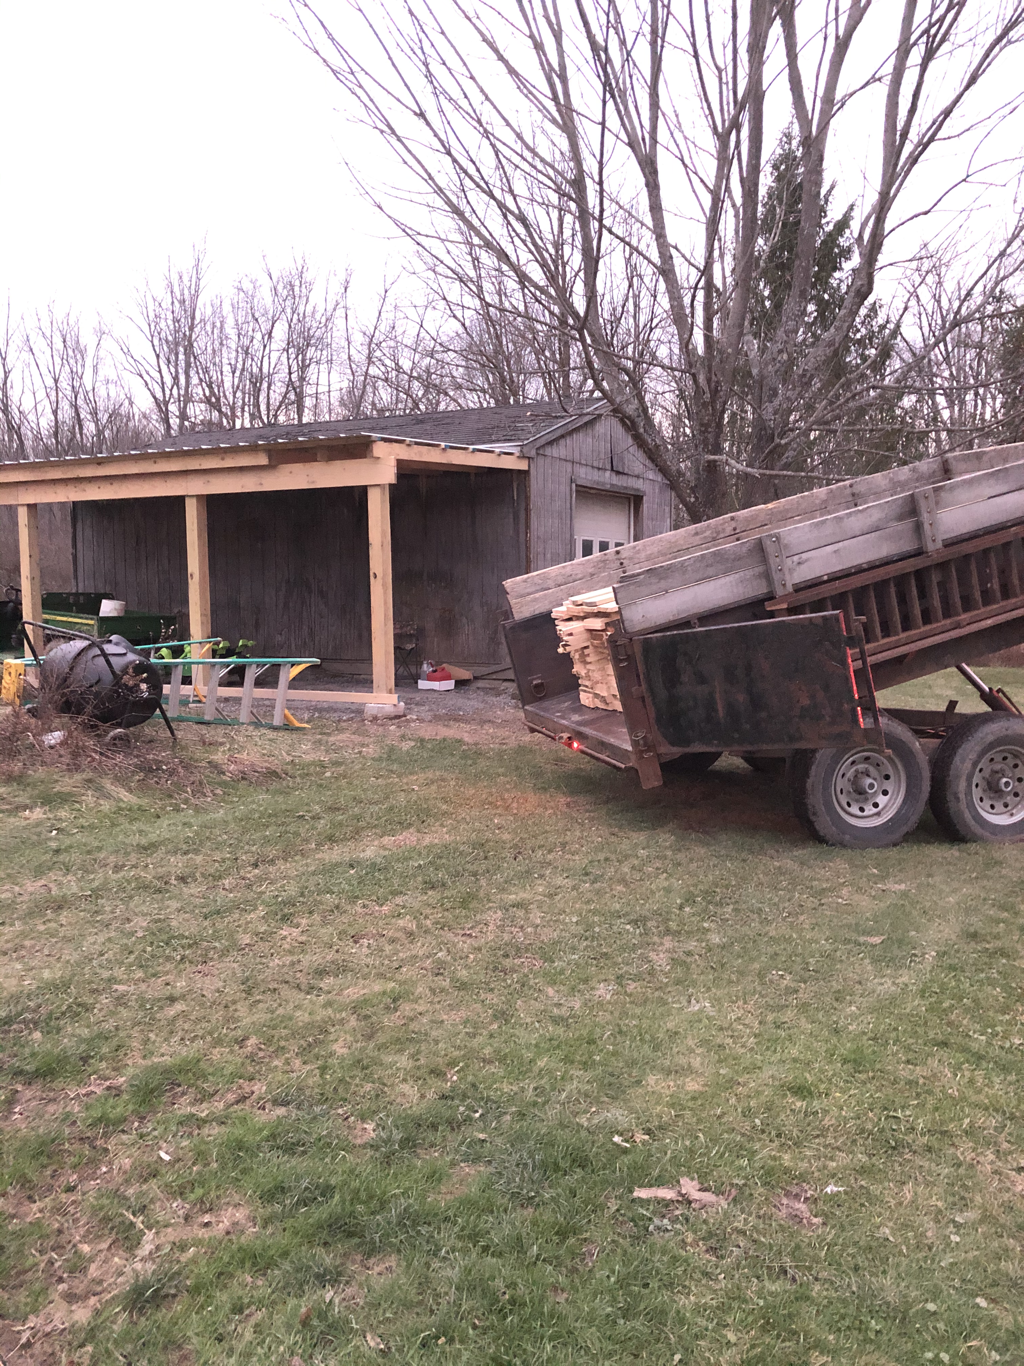 Siding started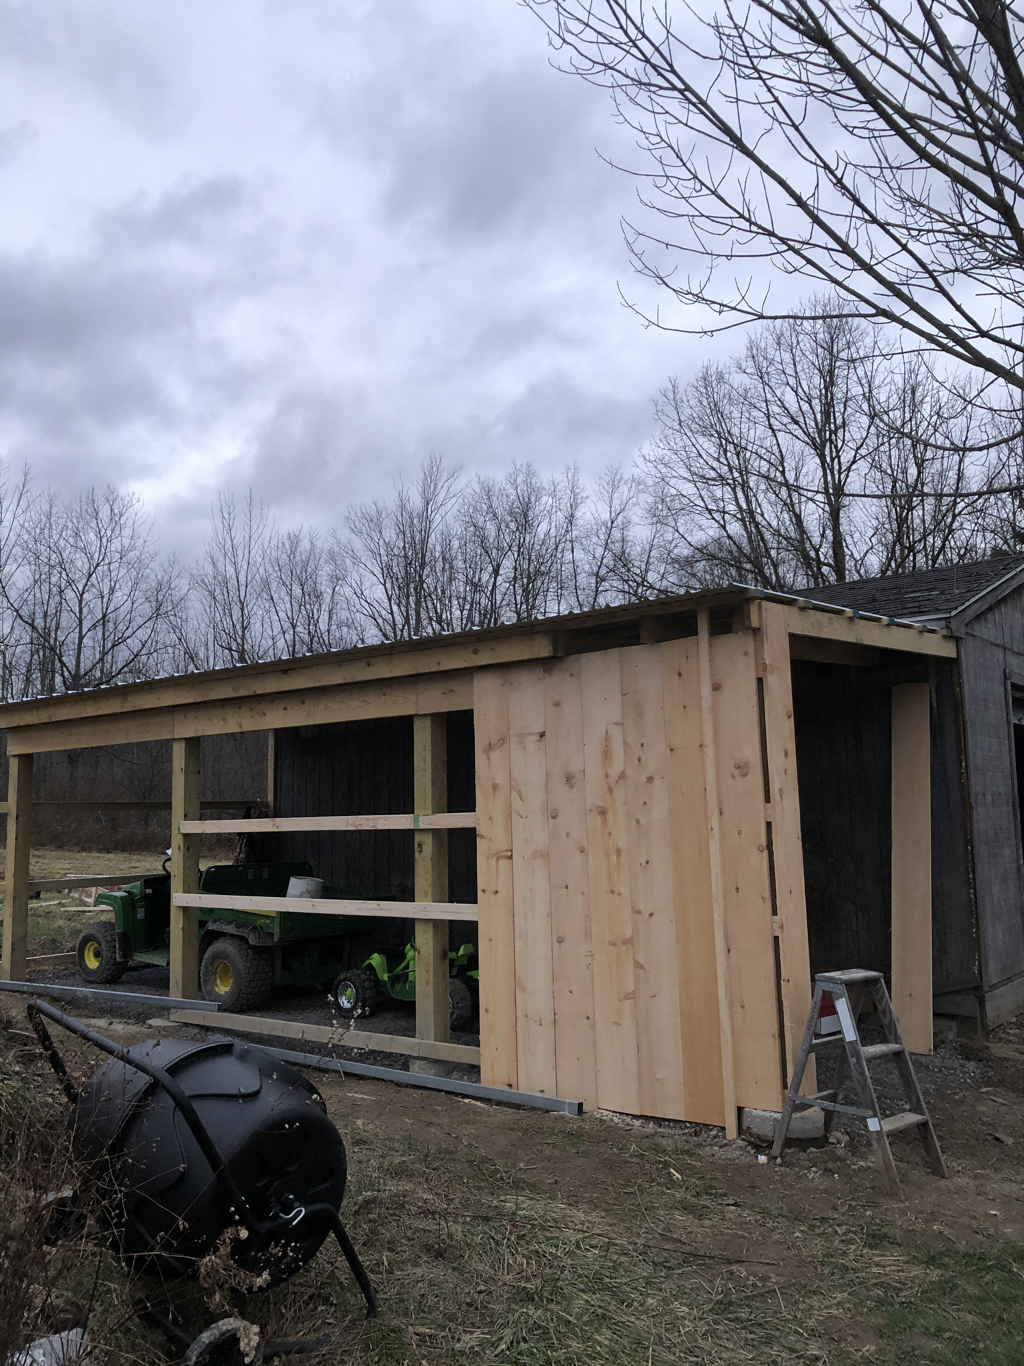 Front of the lean to opening for tractor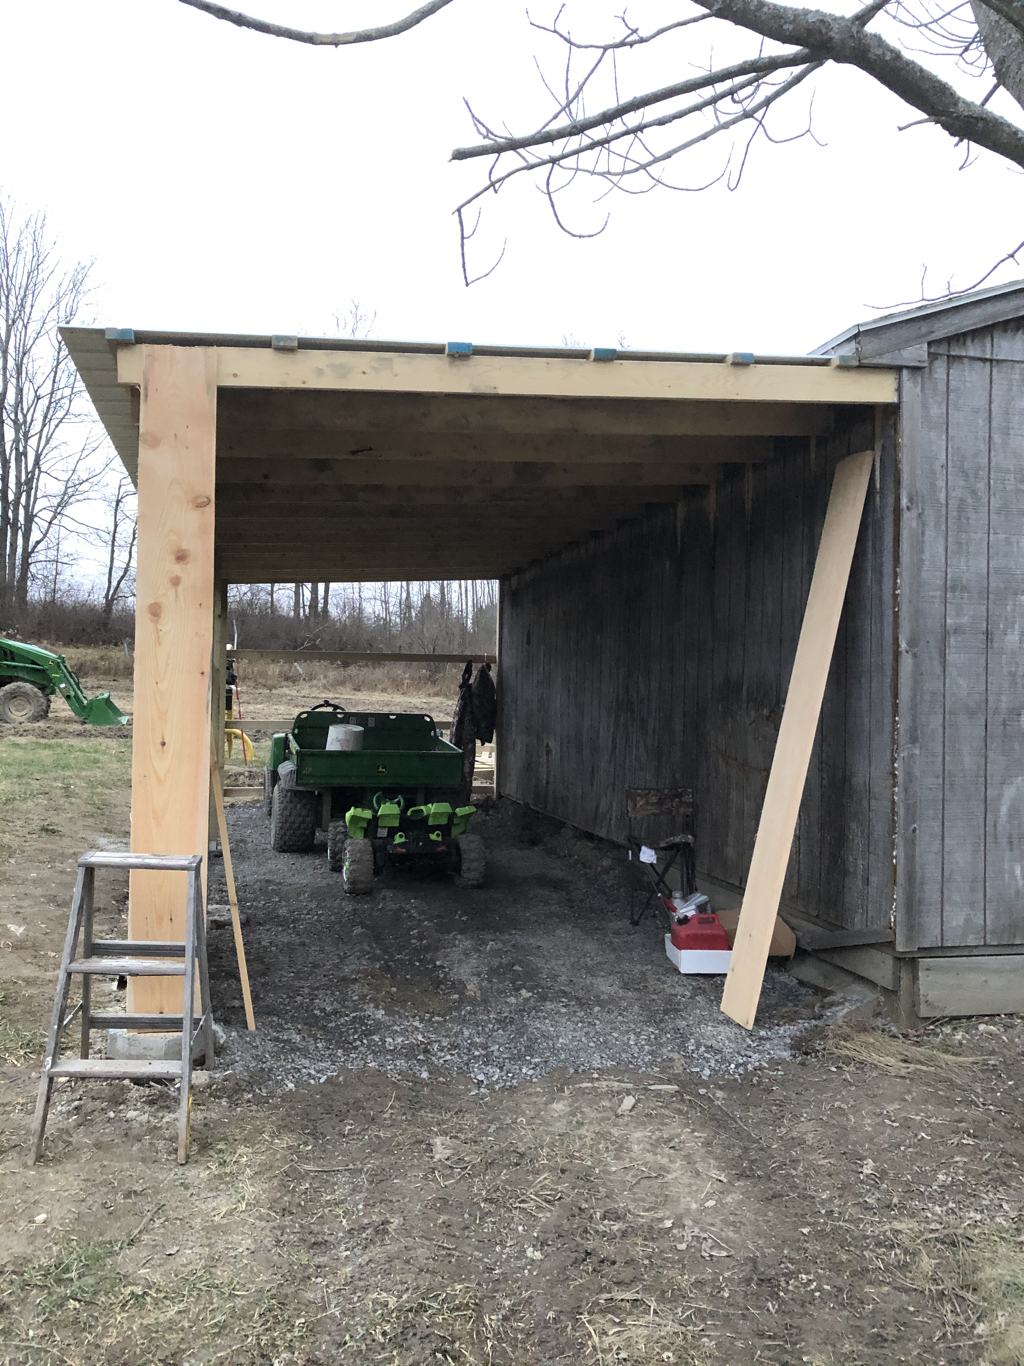 Sliding door being installed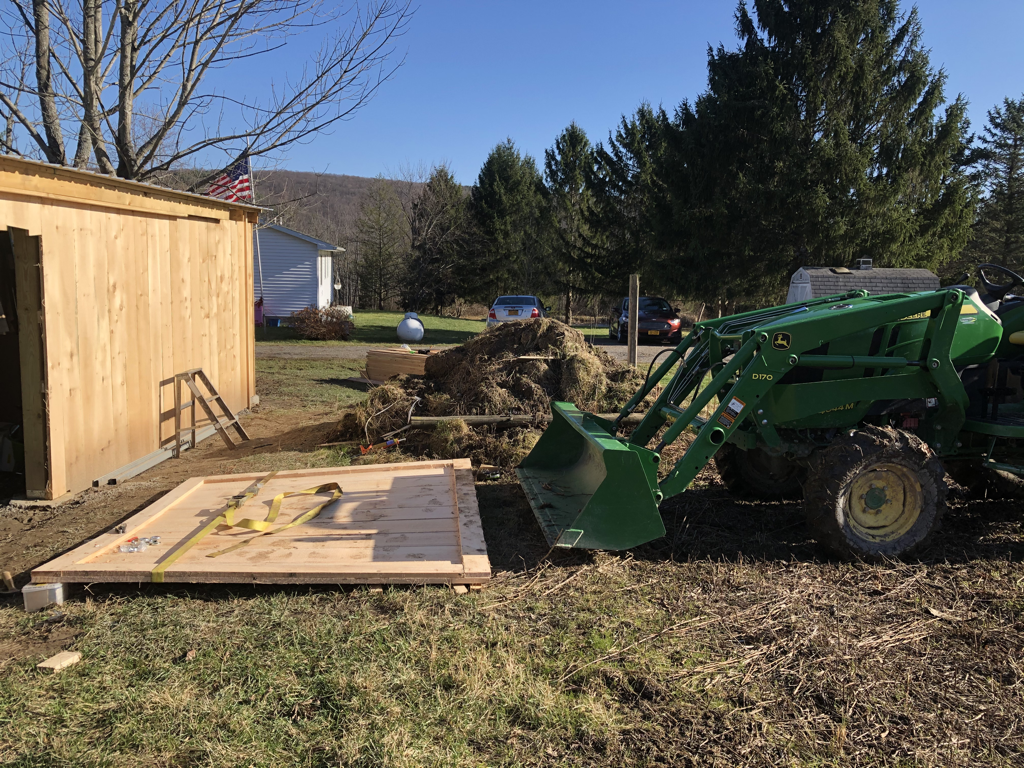 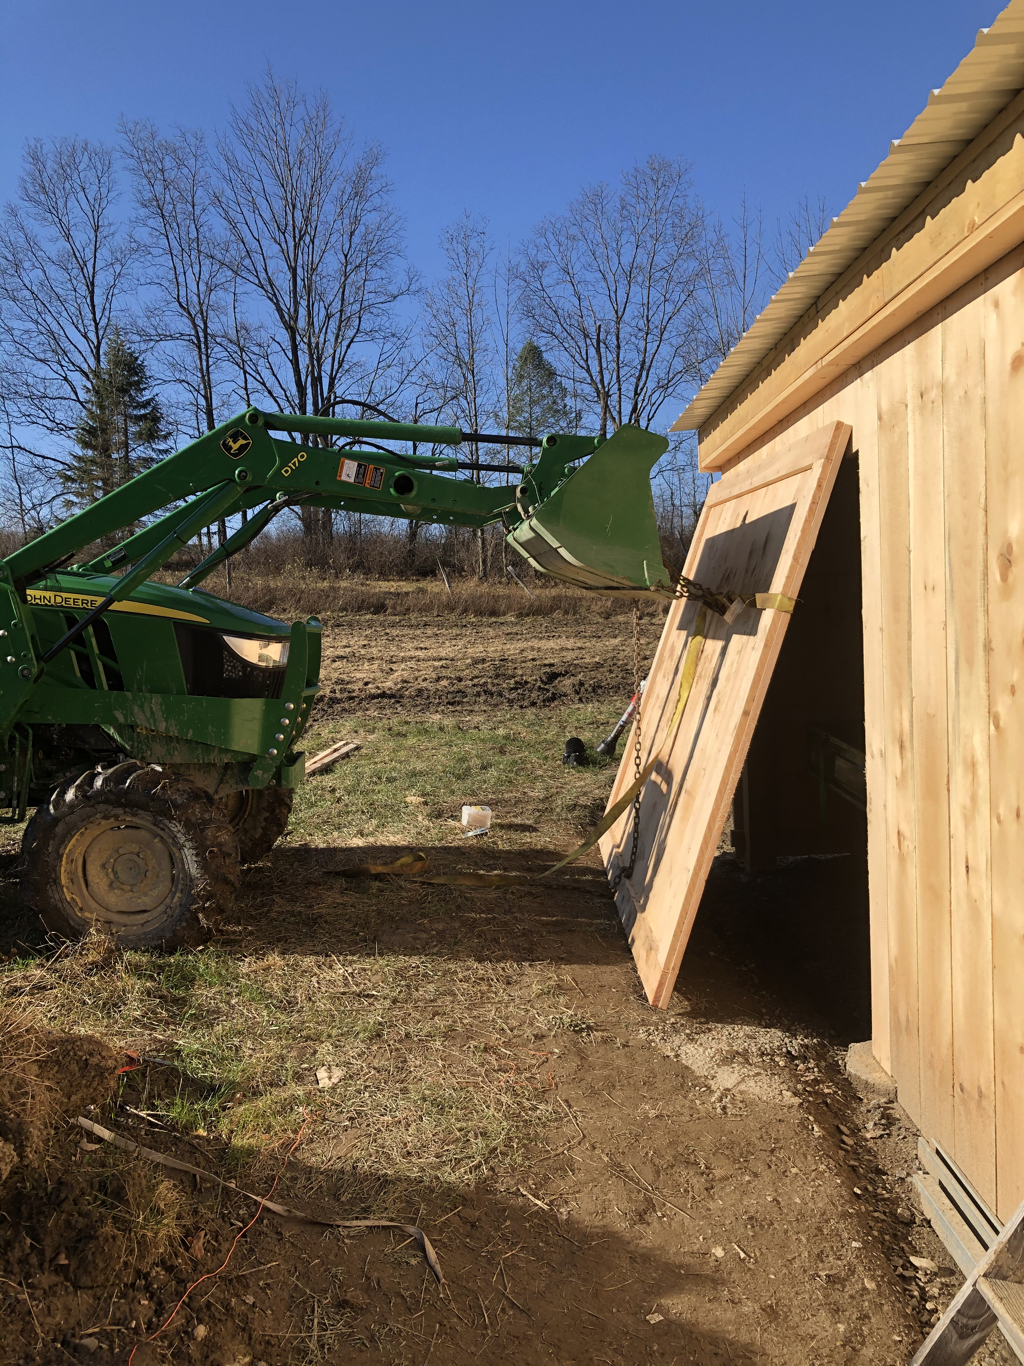 Inside complete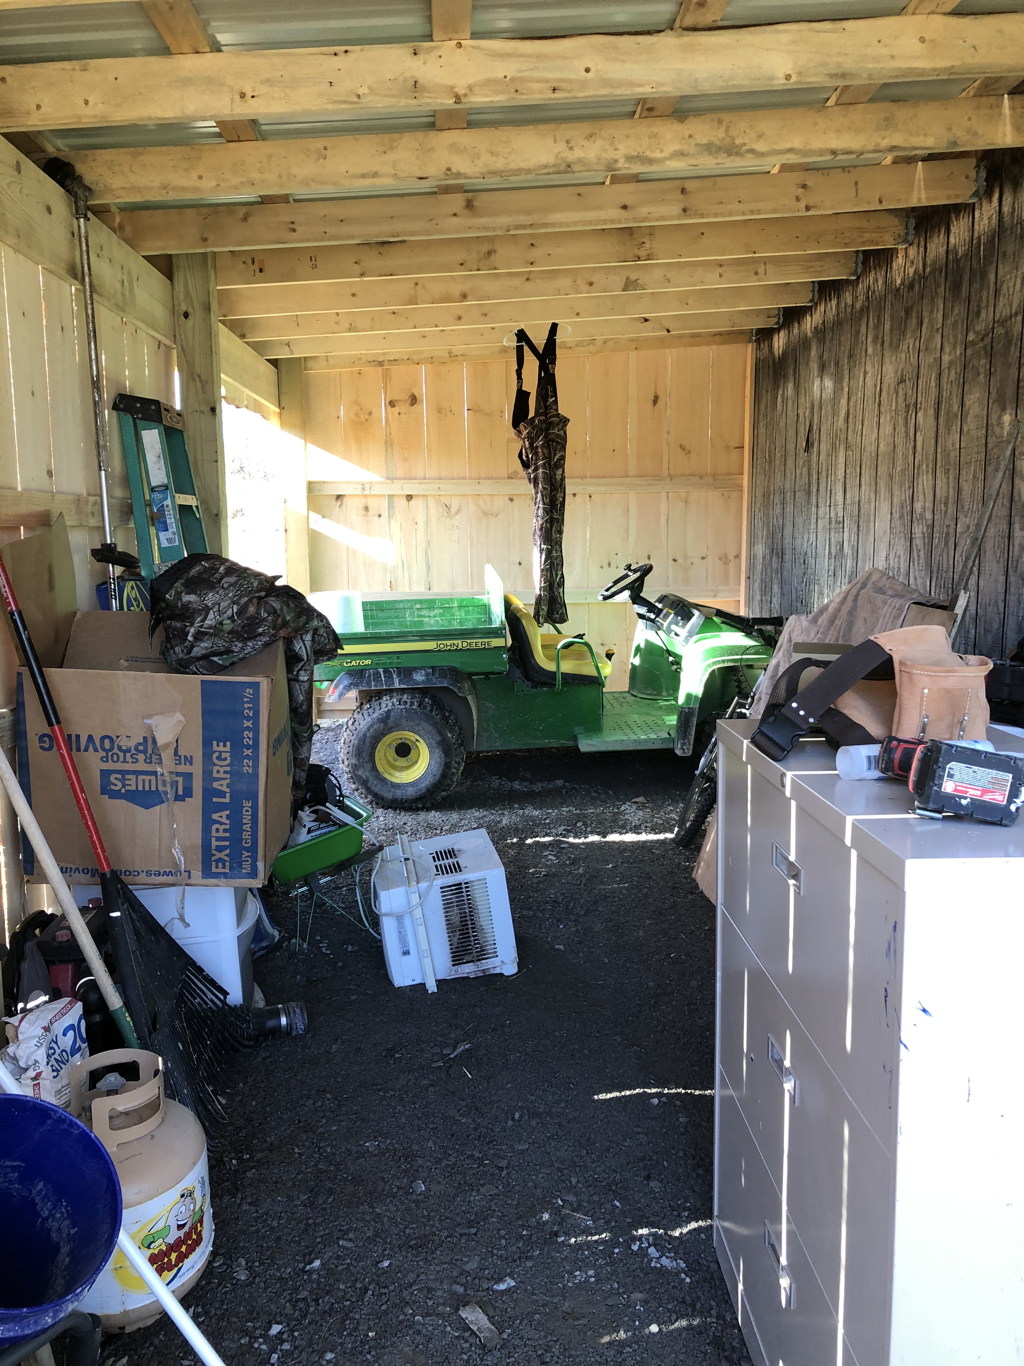 Installing the door track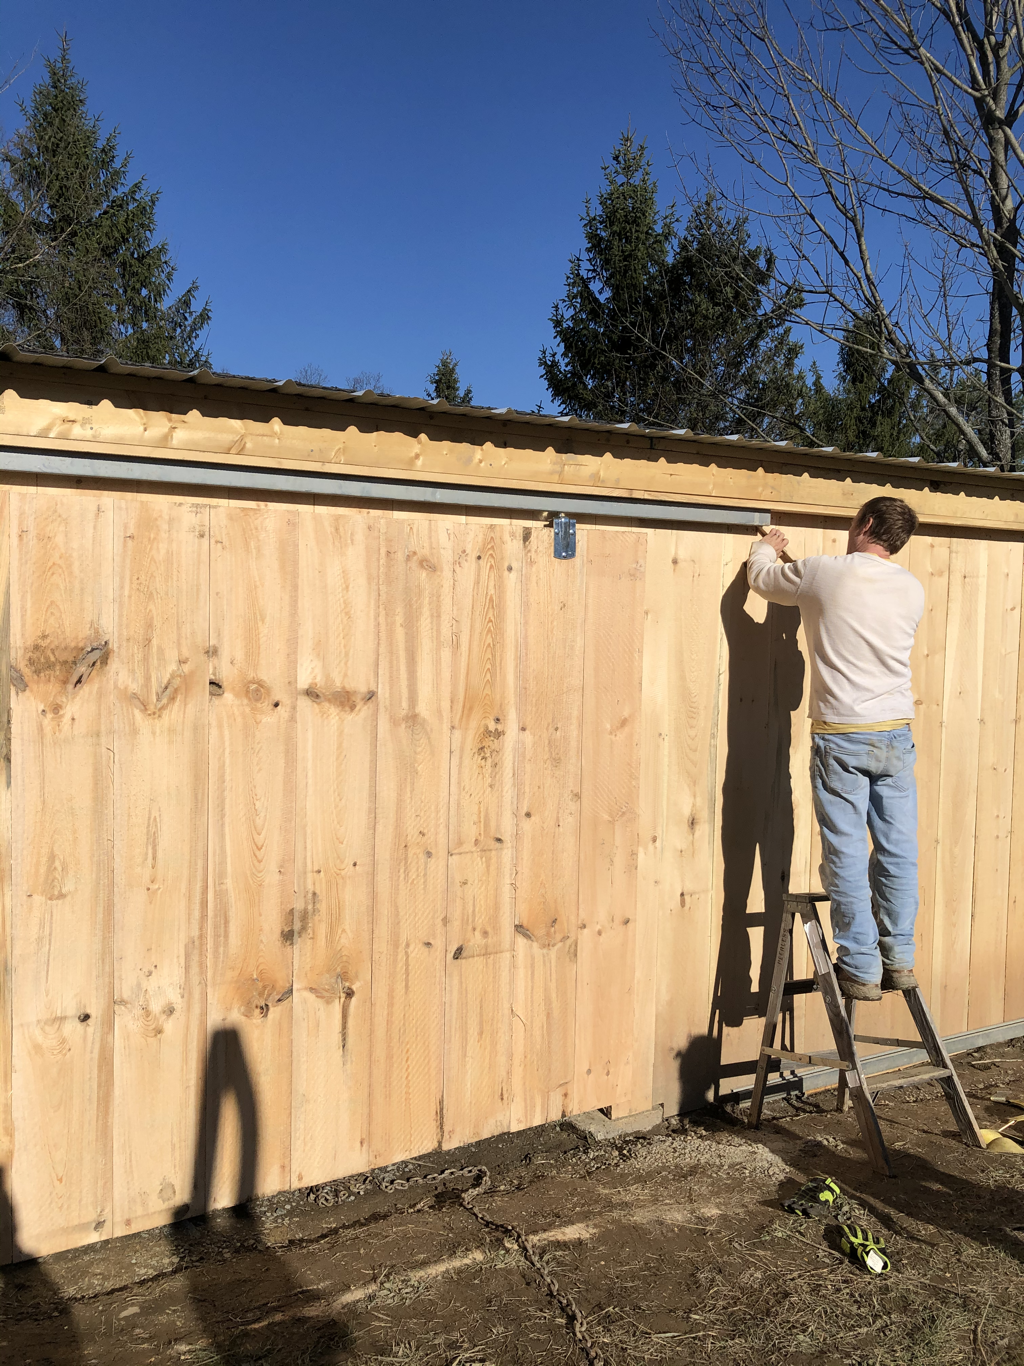 Door put on tracks and lean to complete!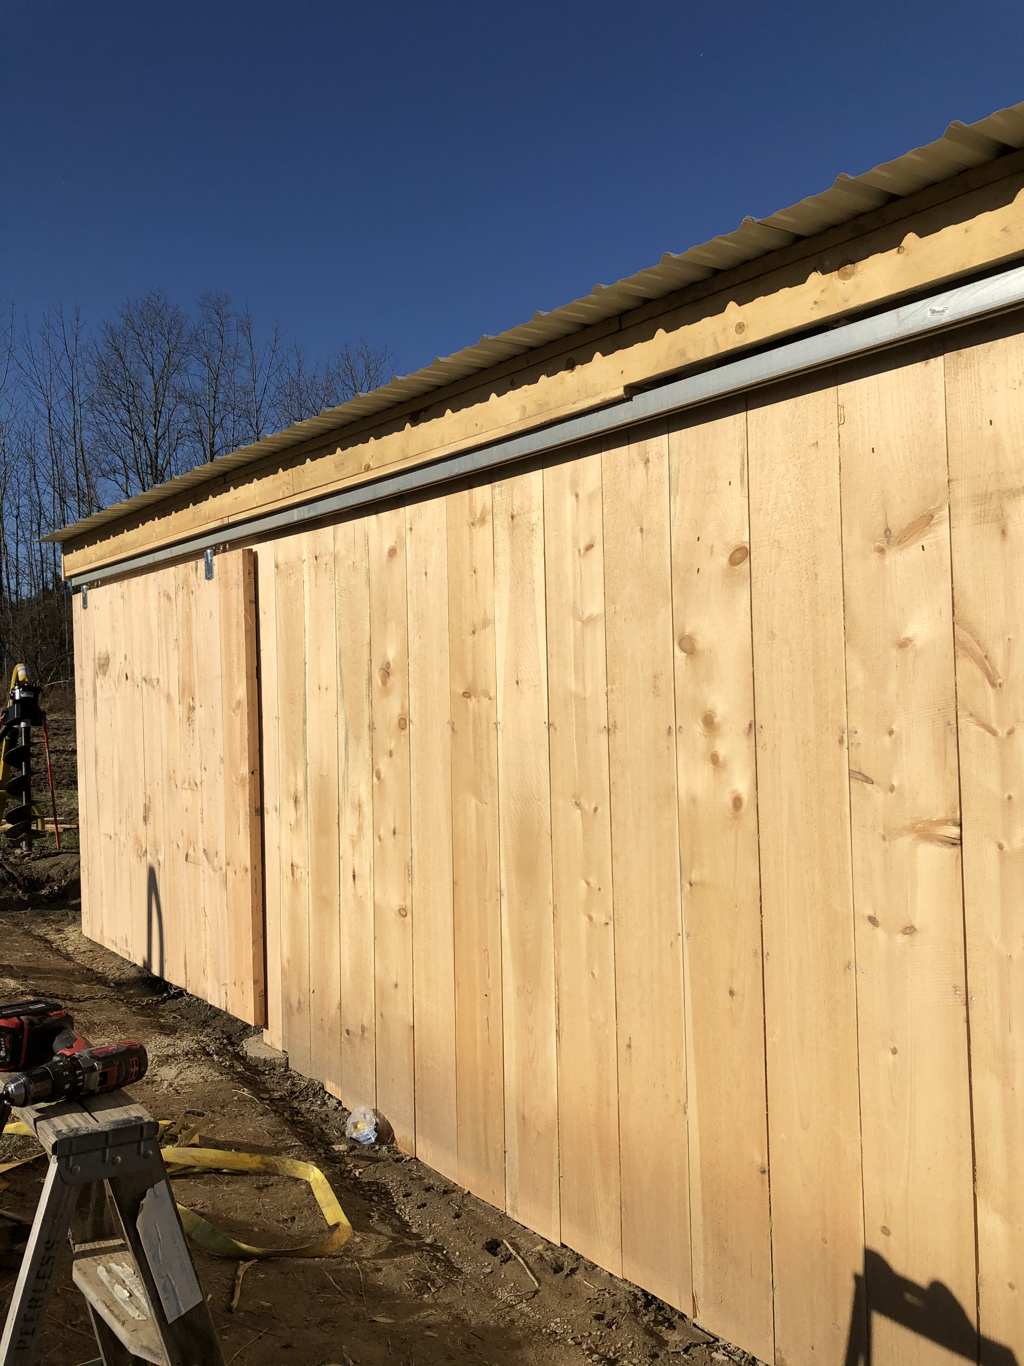 Workshop projectsAdded stone to shop so that we can pour concrete in the spring.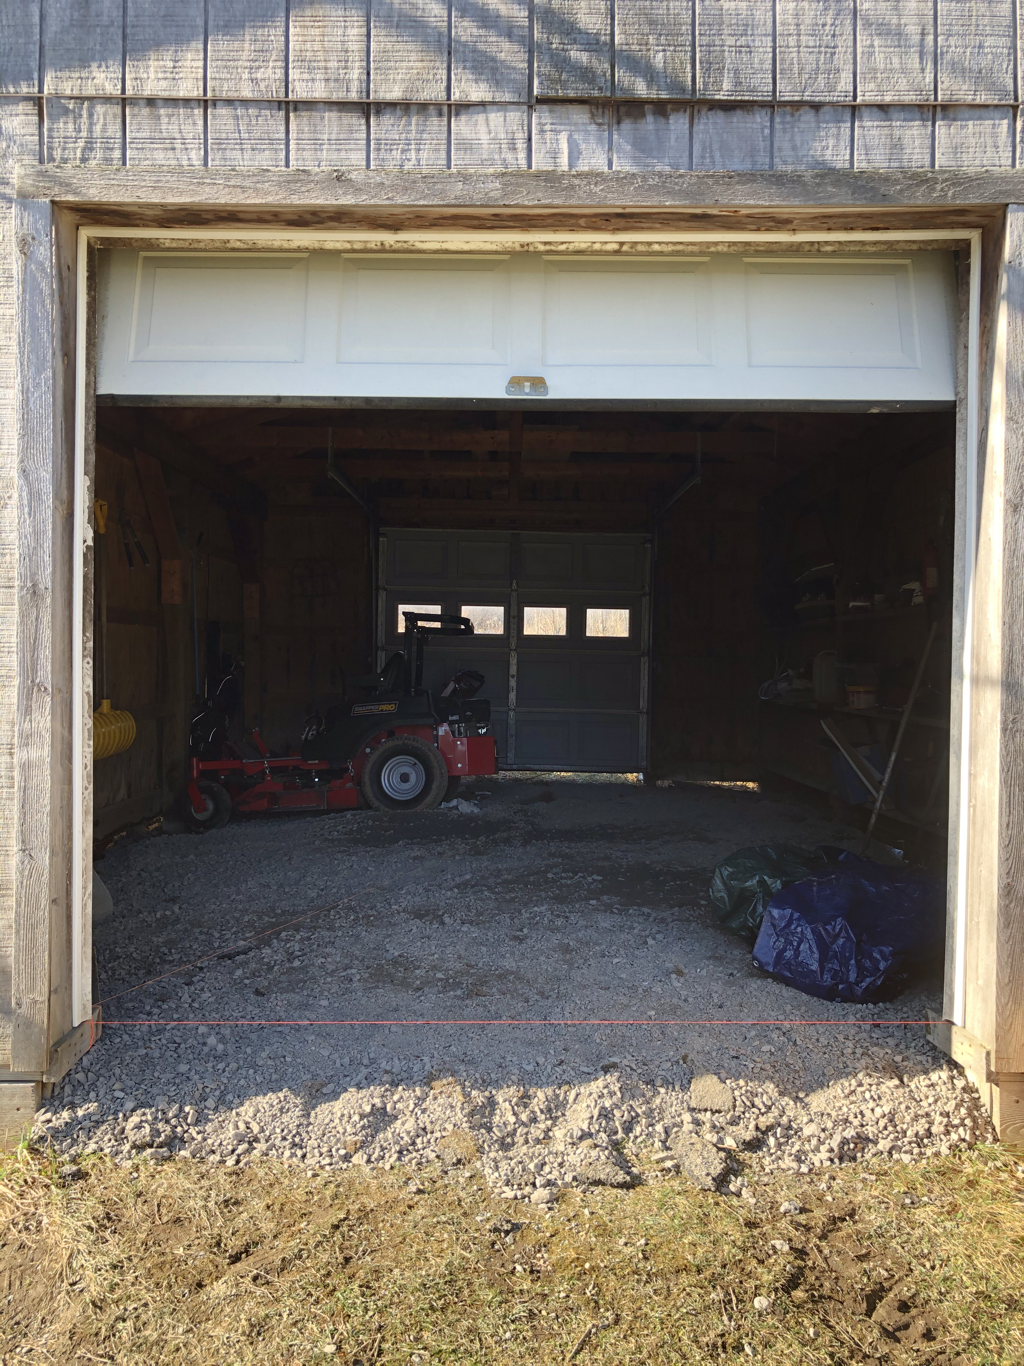 Installed wood stove Installed shop lights and air purifier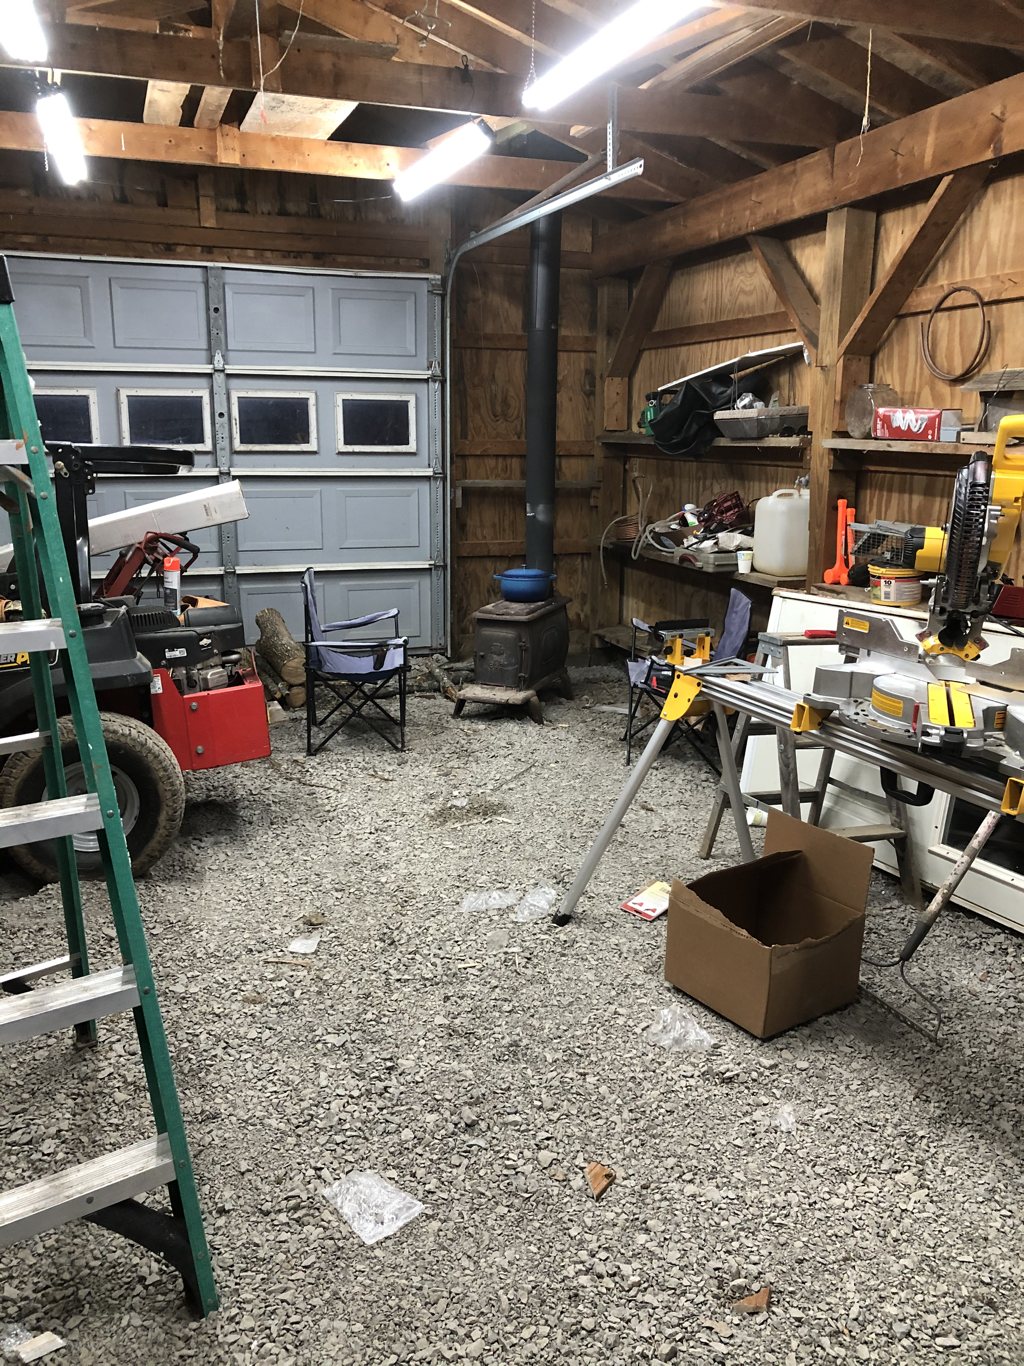 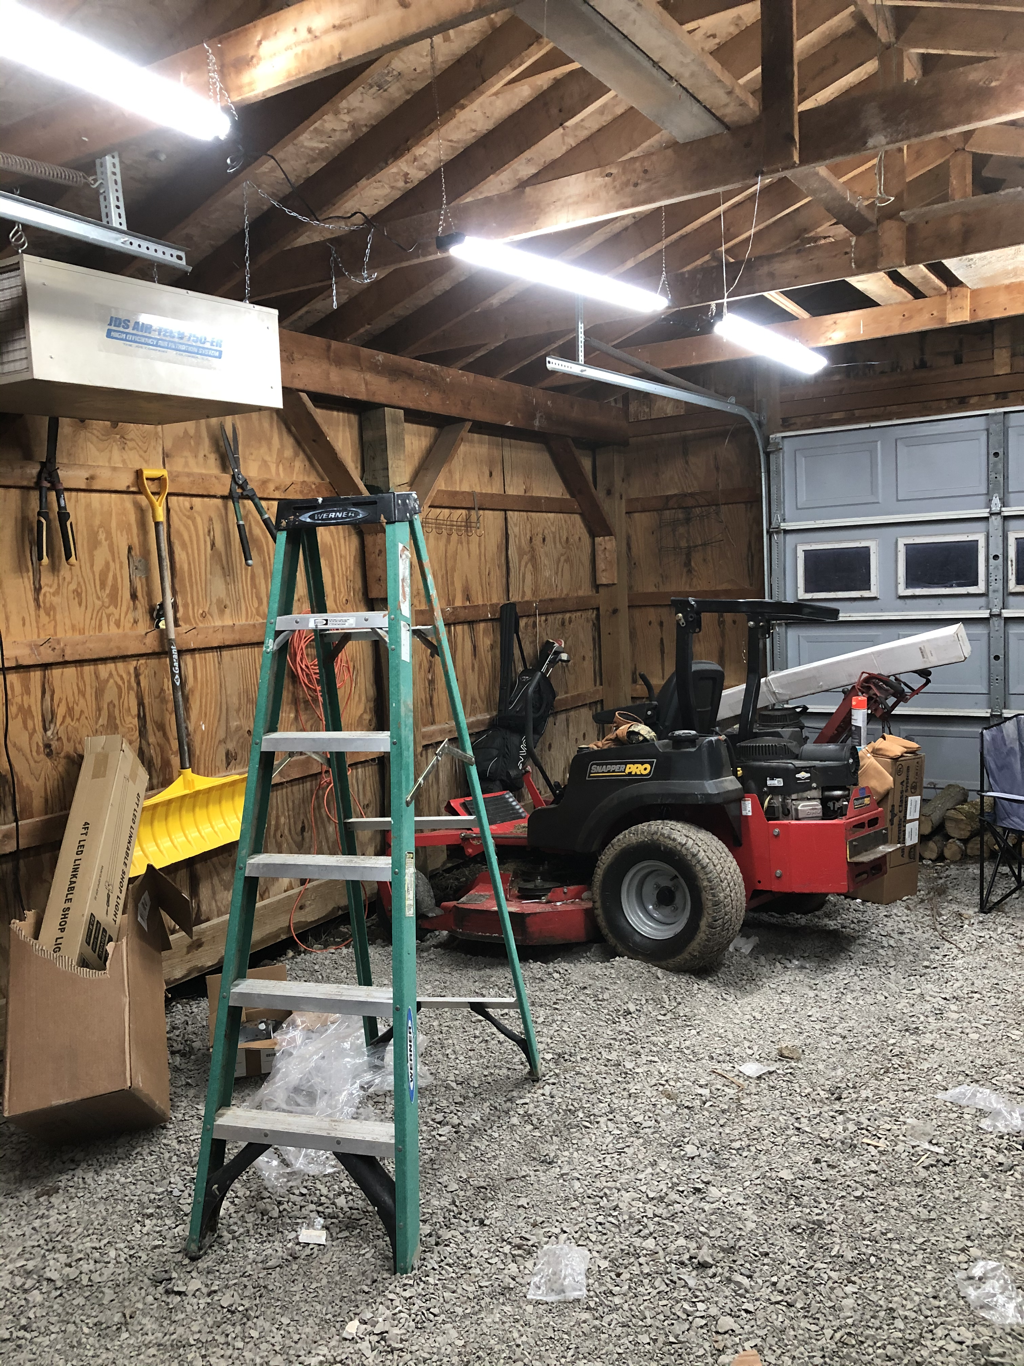 Entry door project-before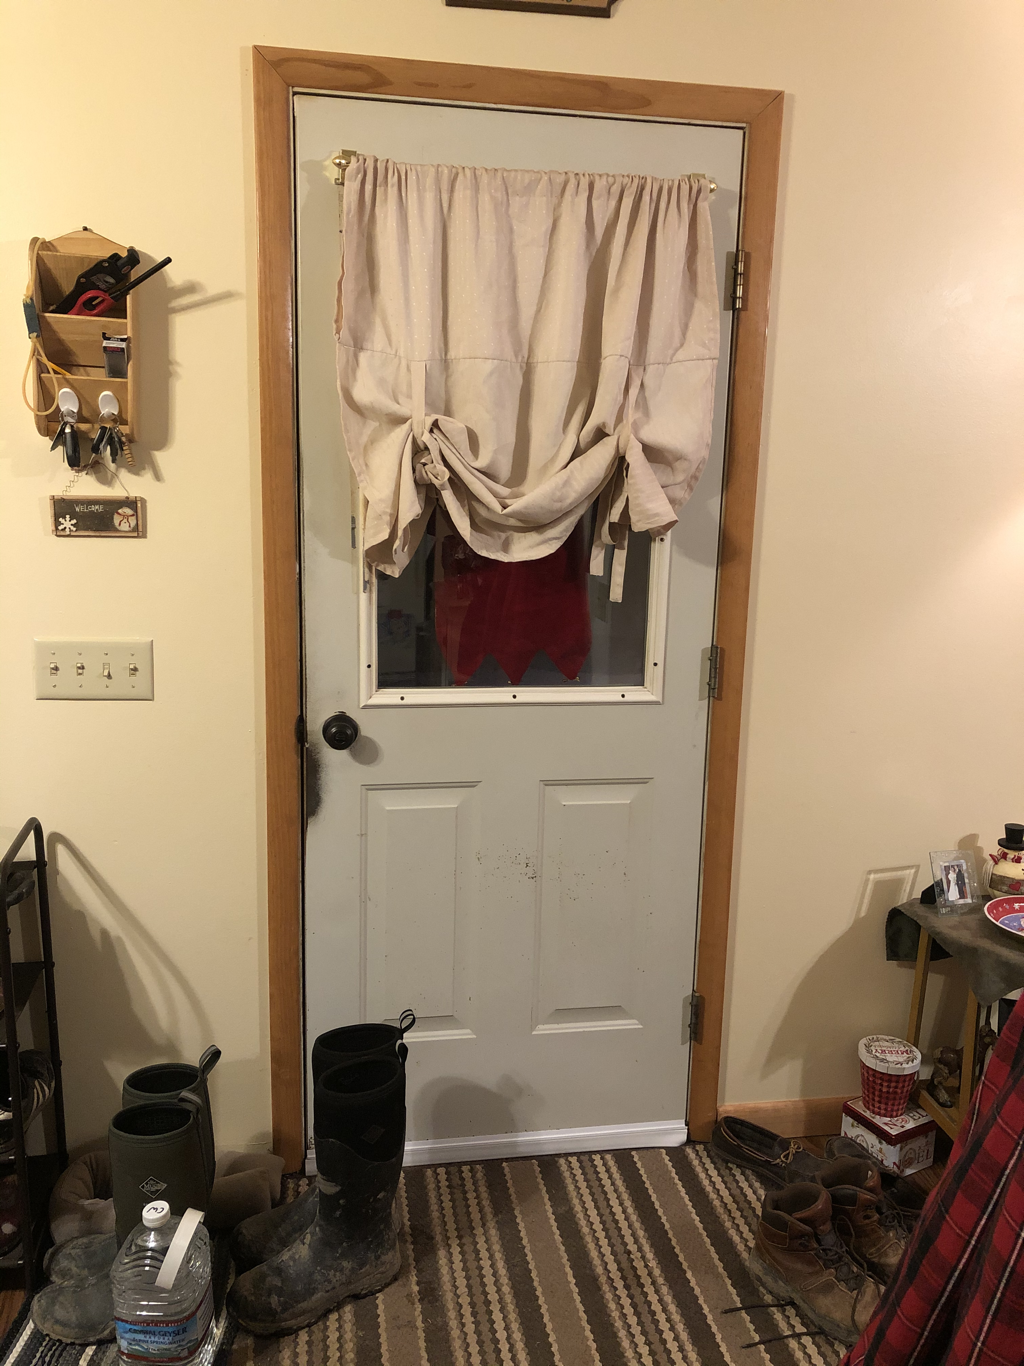 After! New door and storm door added!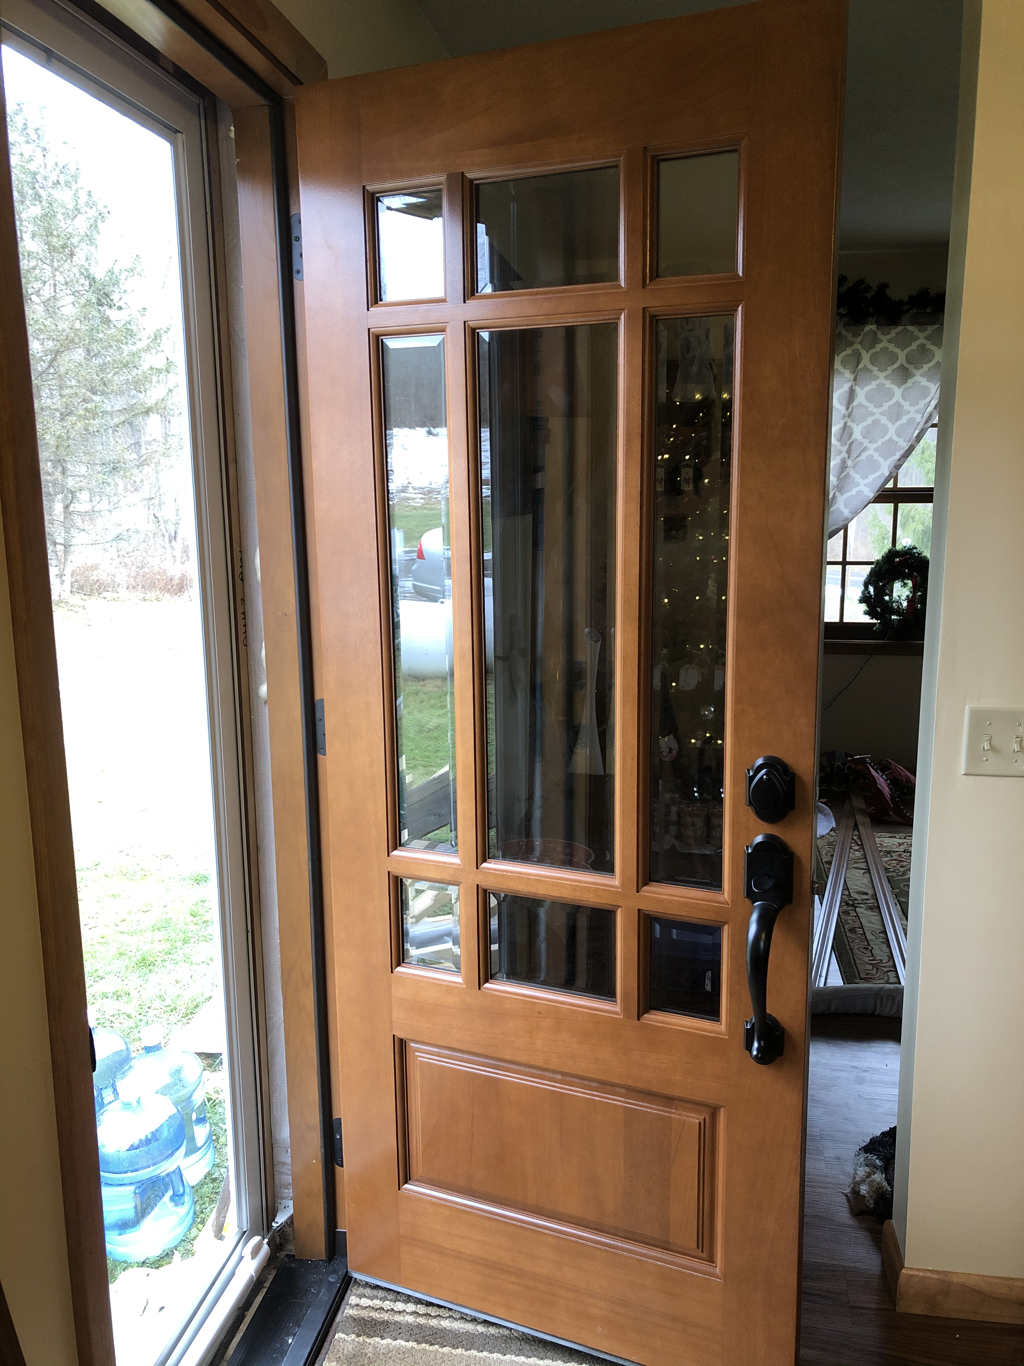 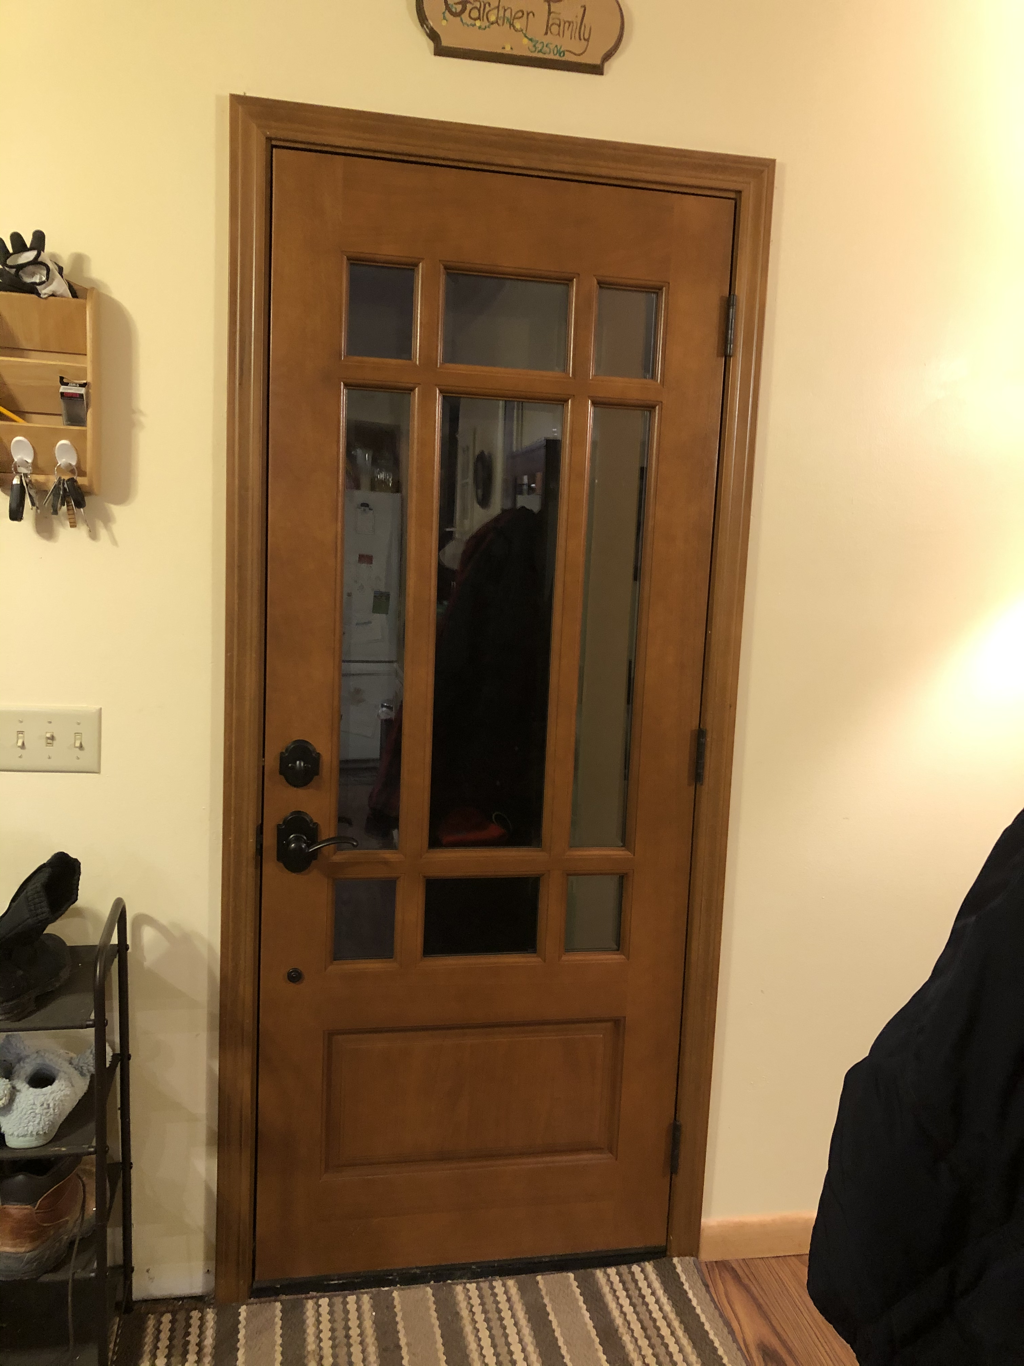 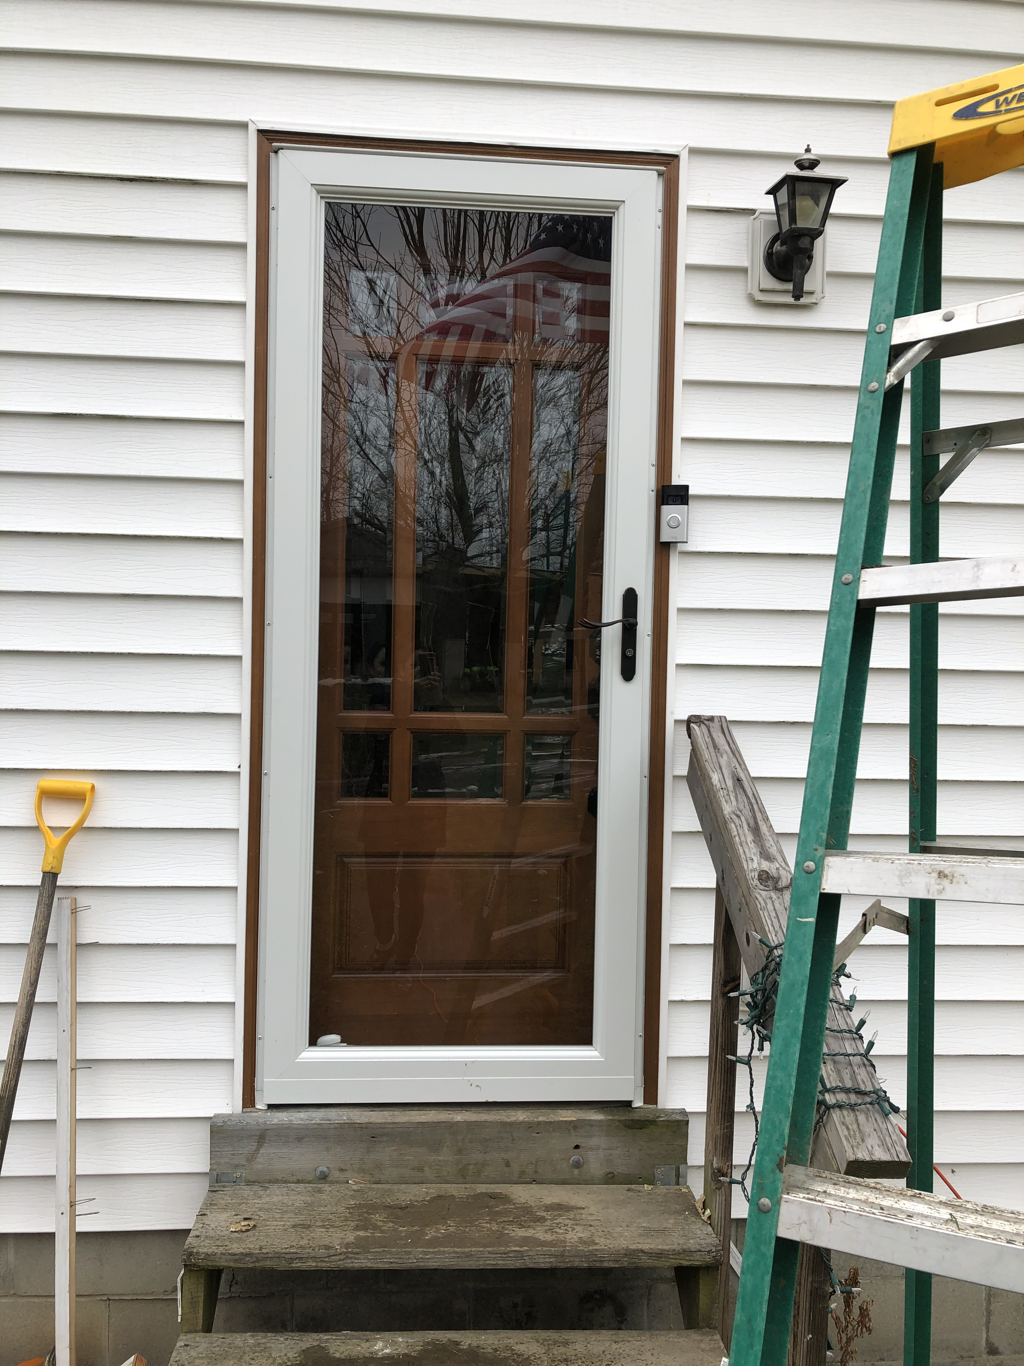 Archway started 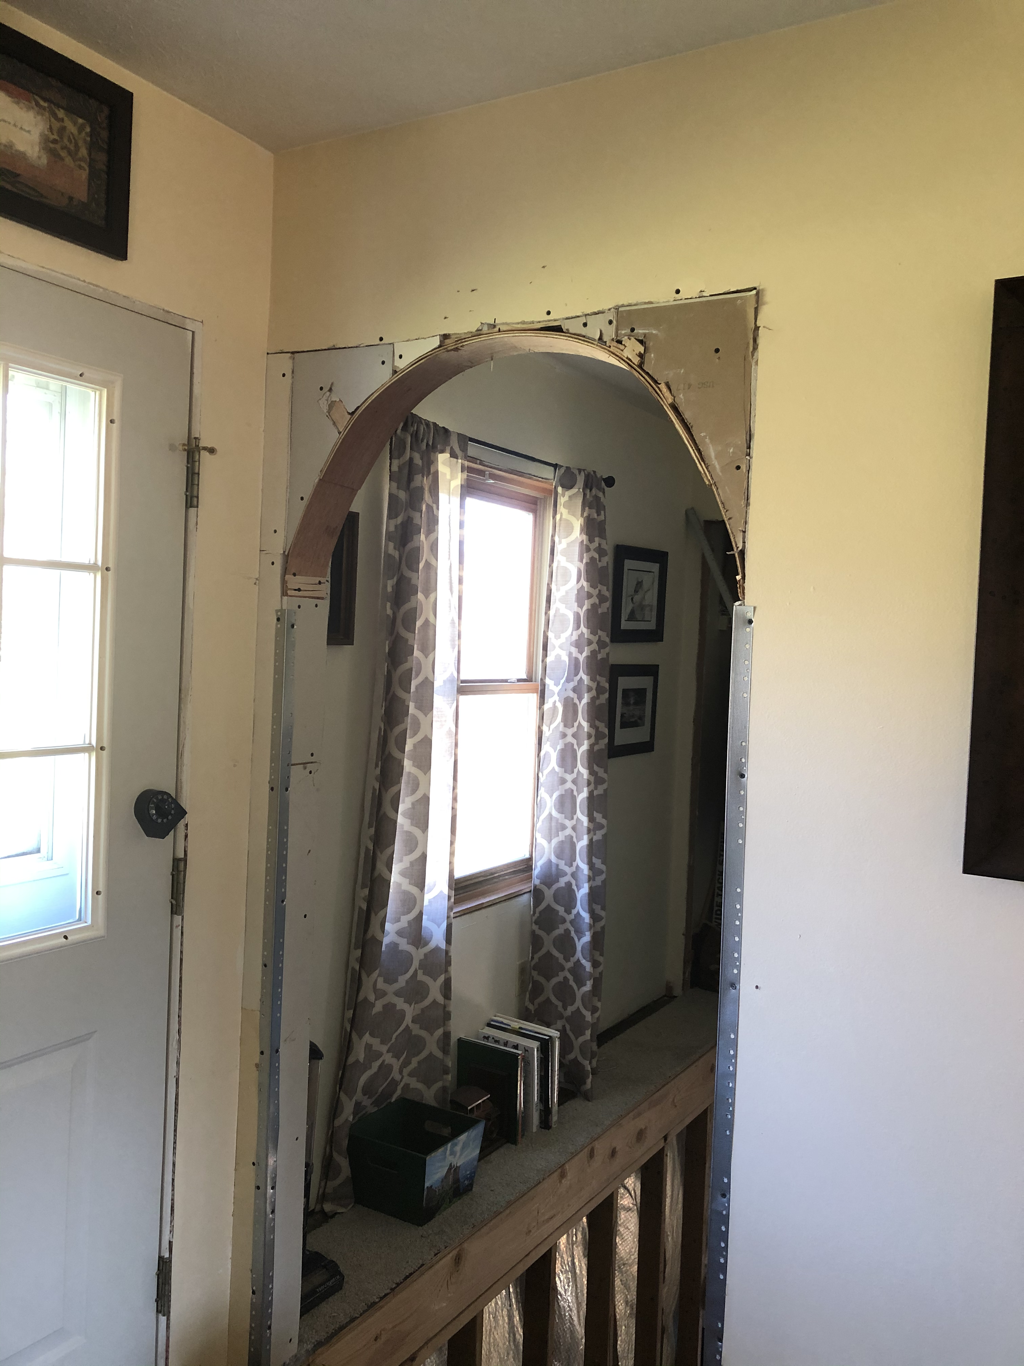 Archway to basement complete!  Dimmer Recess kitchen lights added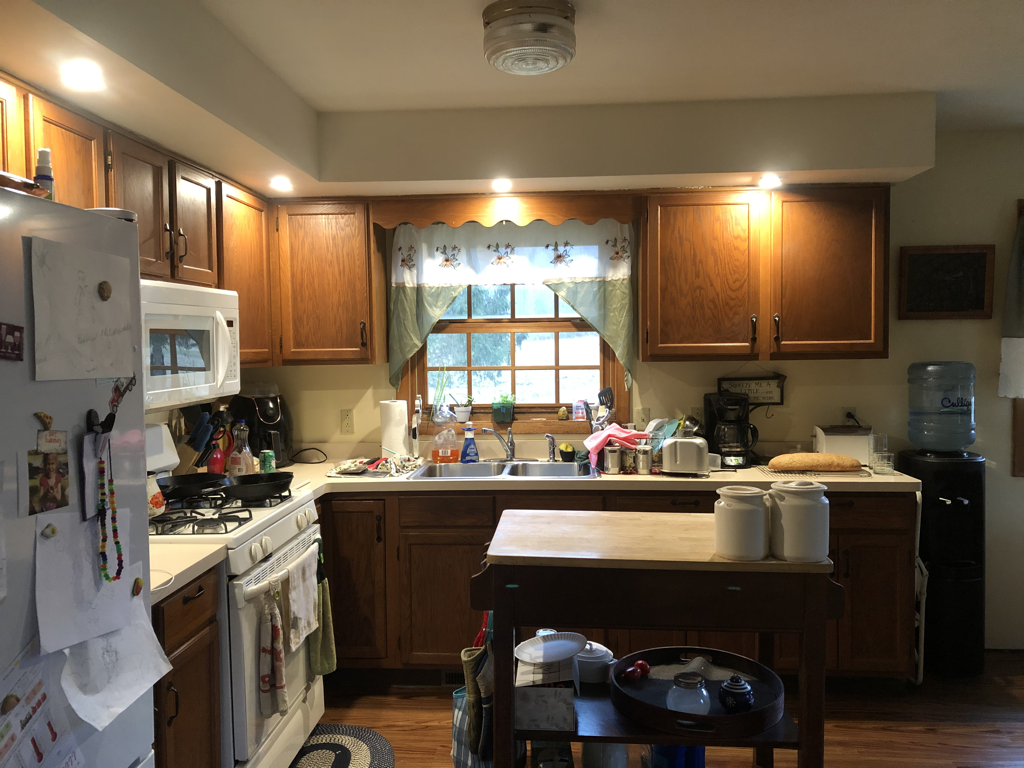 Basement projects continuedRemoval of insulation in basementWas a dirty job but had to be done. Put insulation in 15 contractor bags then vacuumed walls and floors while in space suit. 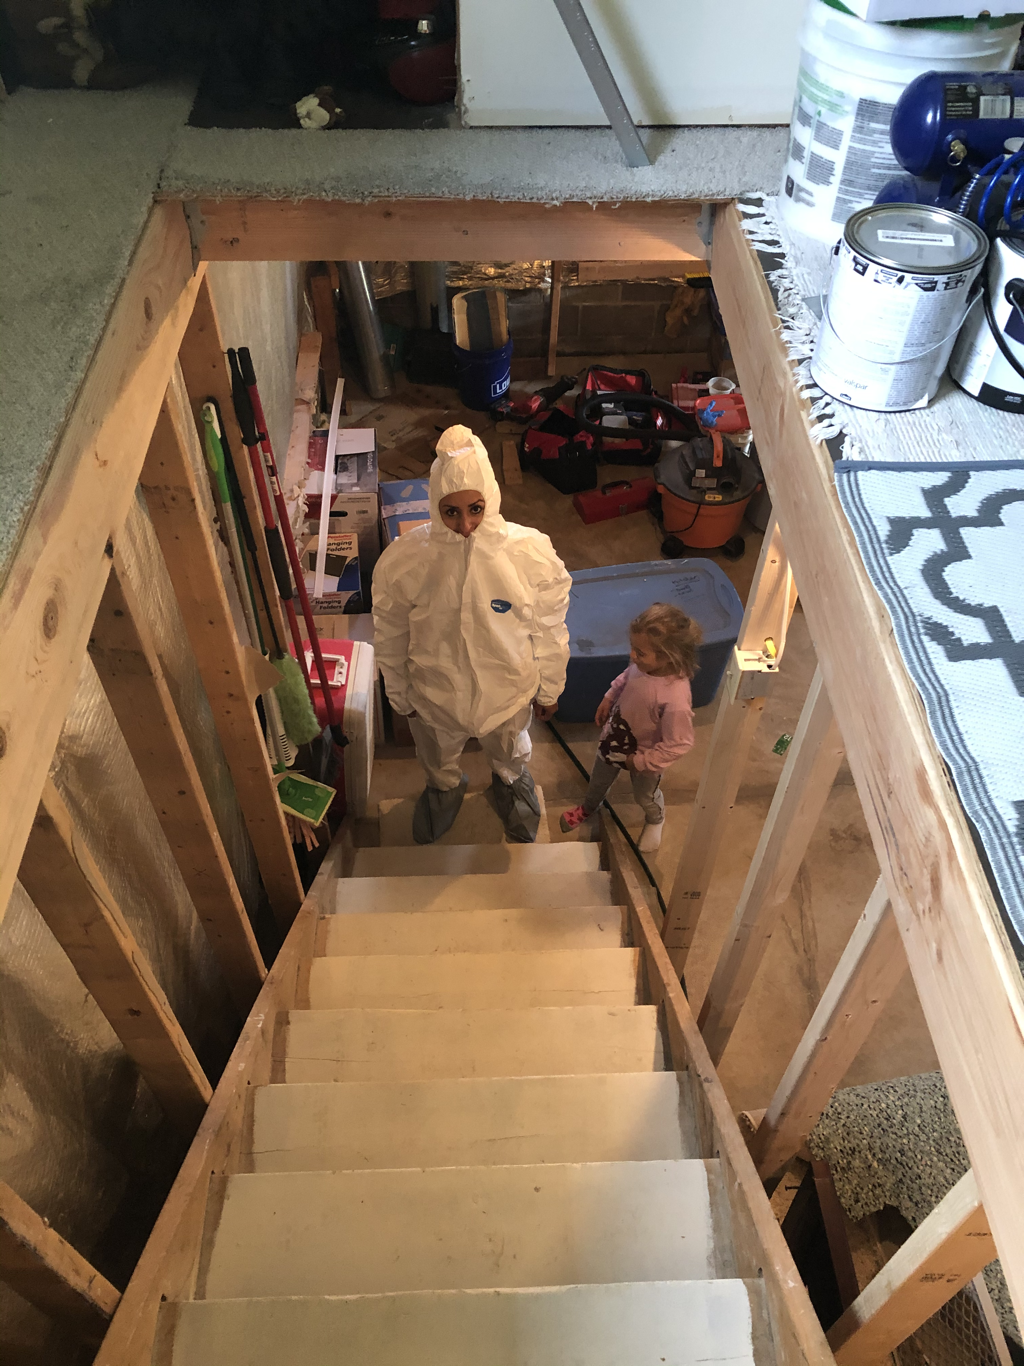 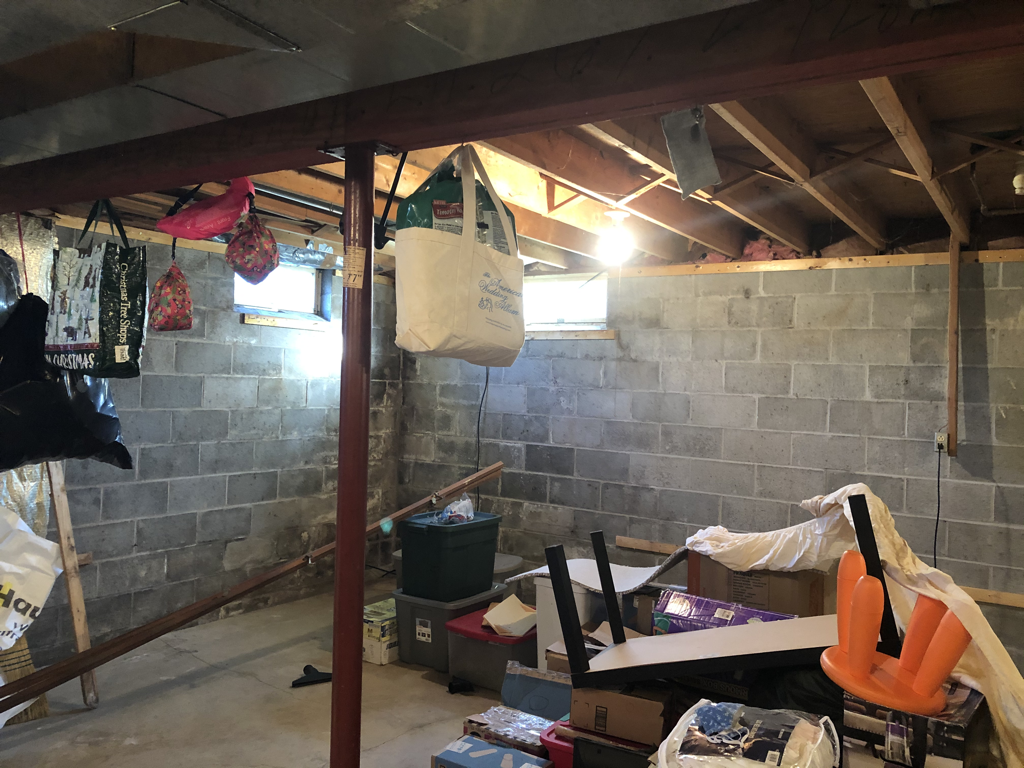 Painted entire basement with mold killing primer. Took 6 gallons and a month to complete start to finish. One person.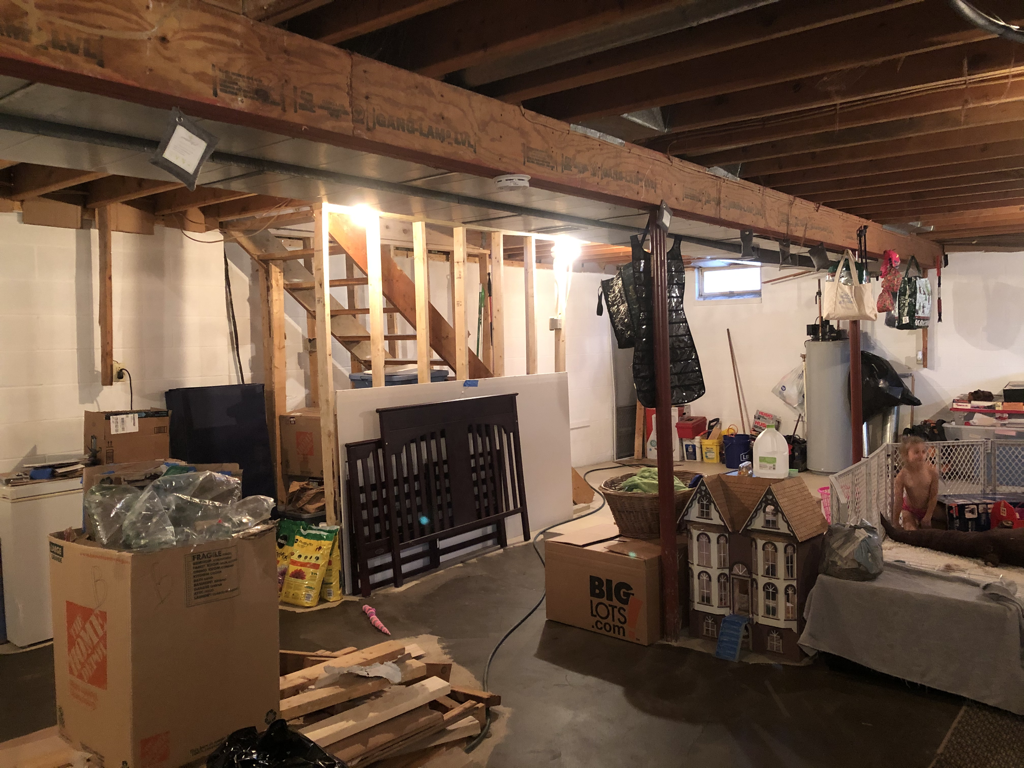 Also painted the floors-all temporary before we add drywall and carpeting. As well as an e grass window and walkout.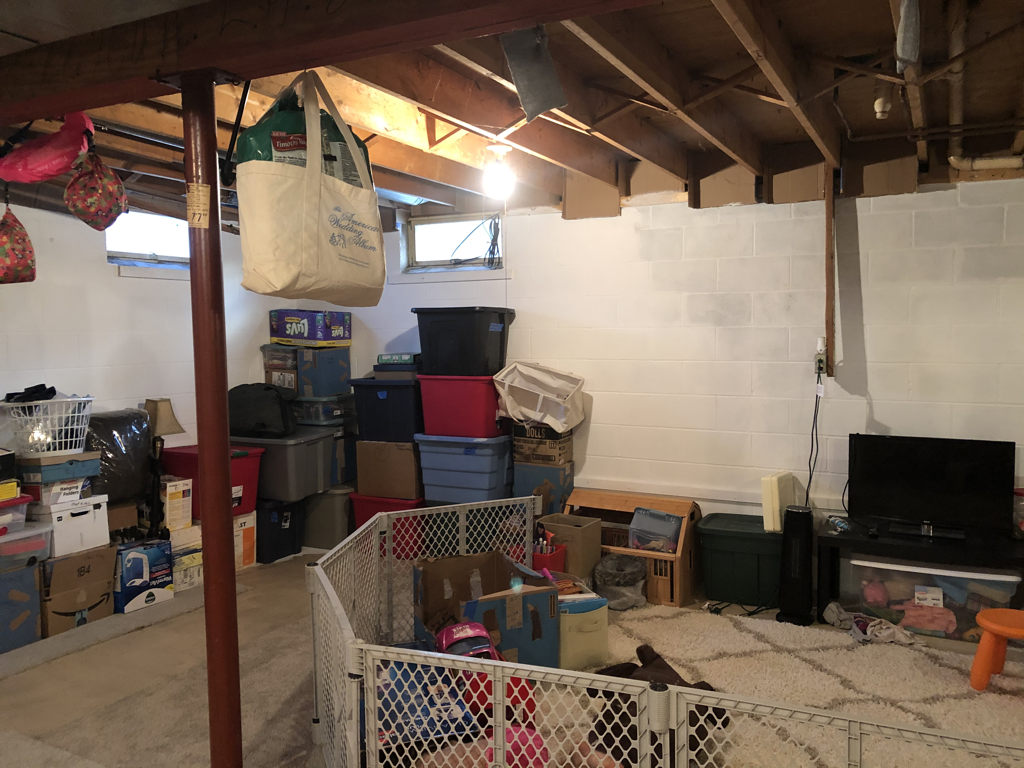
0 Comments
Back pasture all cleared out and mowed-ready for fencing!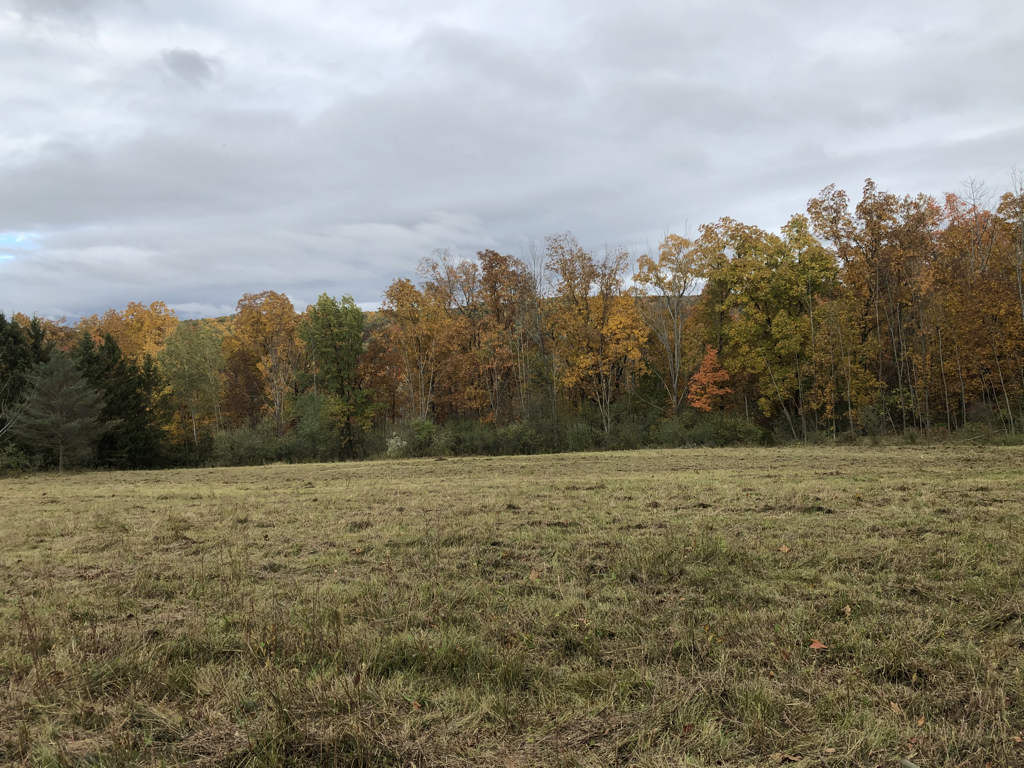 Garden so close to being ready for tilling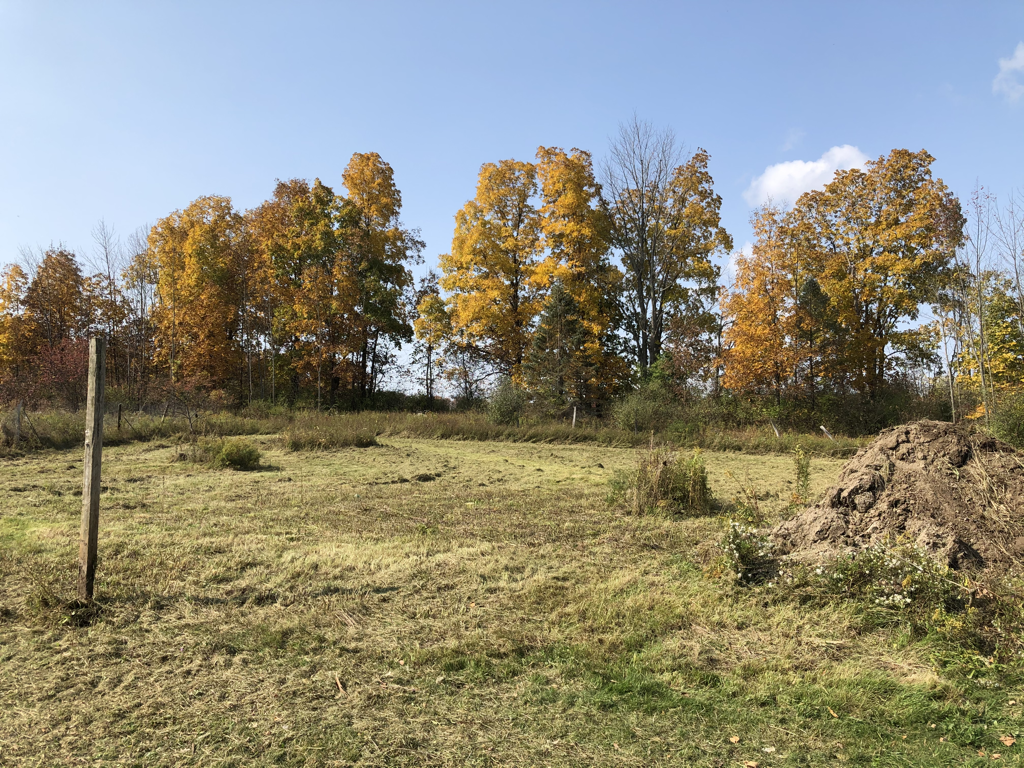 Using our post hole digger for installing the lean to addition for our tractors storage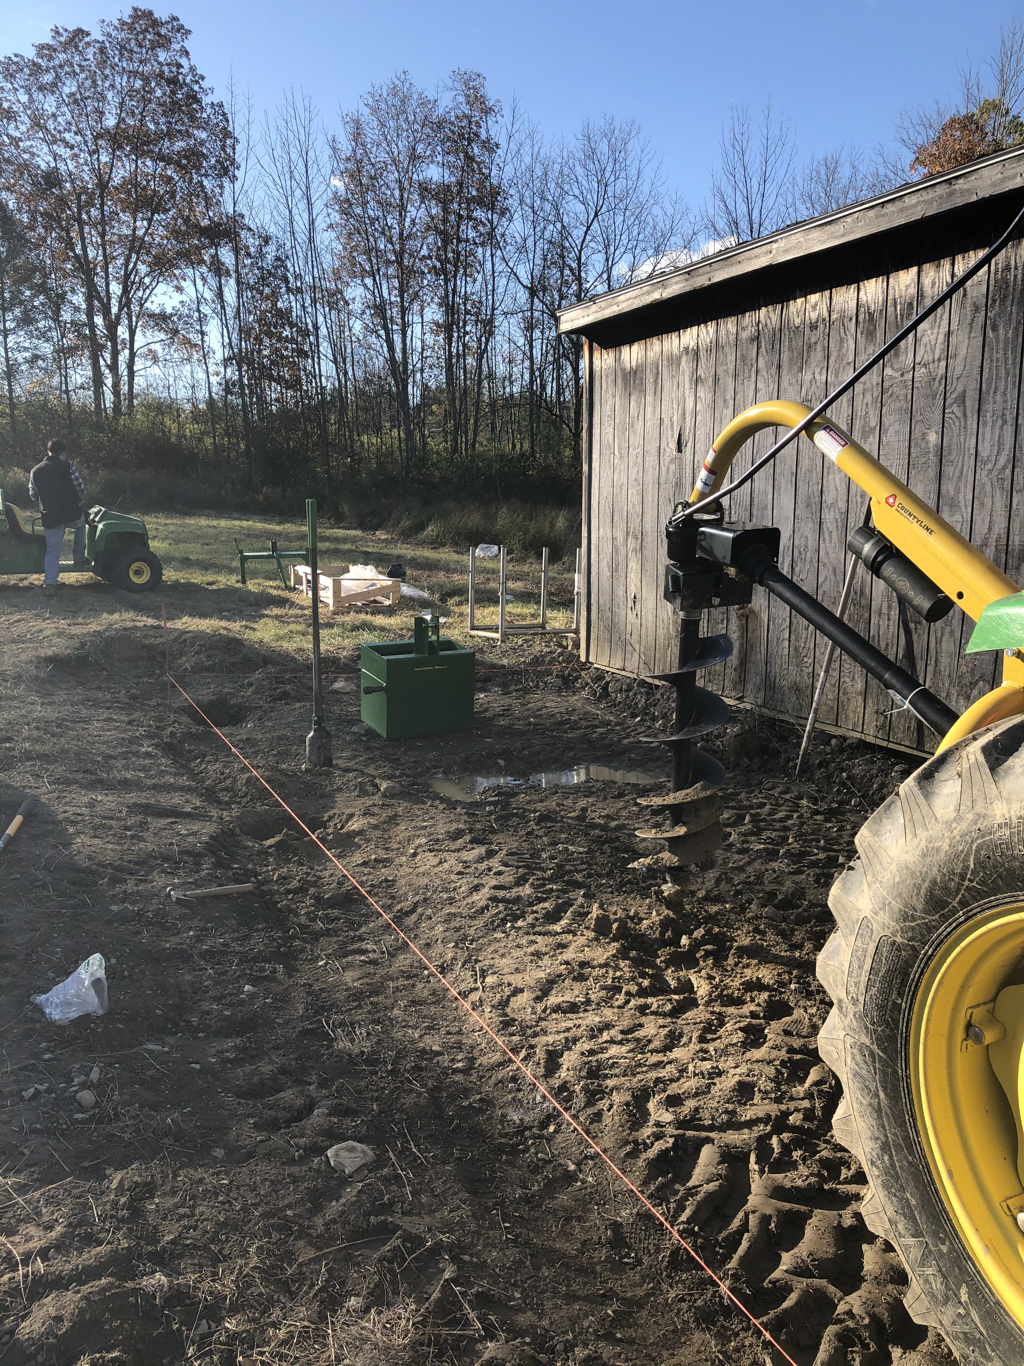 Office before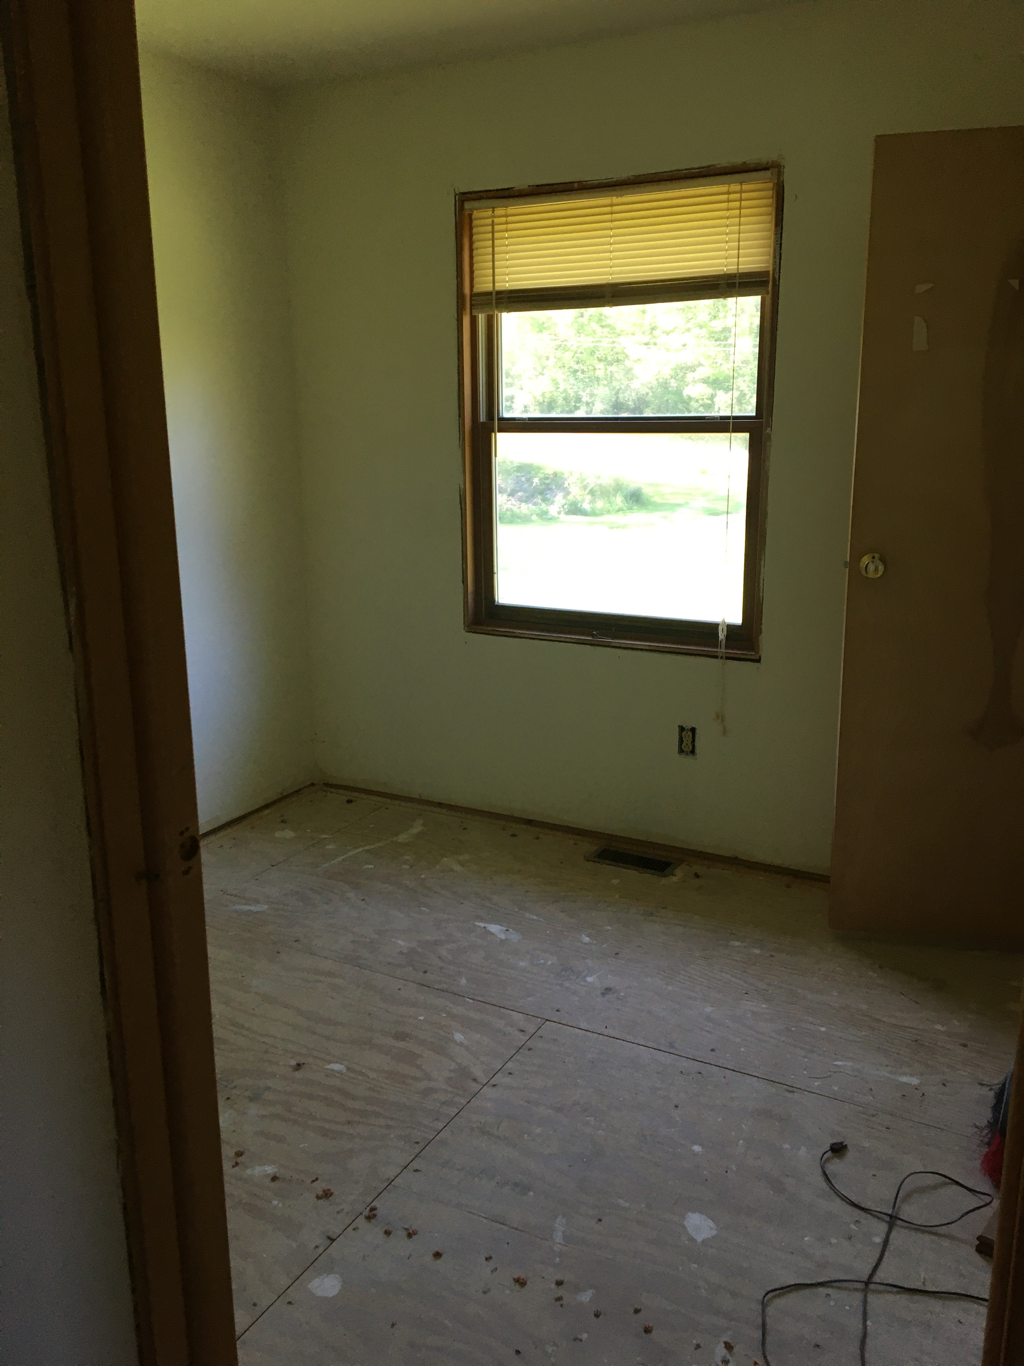 After!Right now this room is dangerous with the basement just below but we will be putting in a bannister here to keep light coming in and a door frame on the doorway. This room will be carpeted as well so that we have a cozy office nook:) 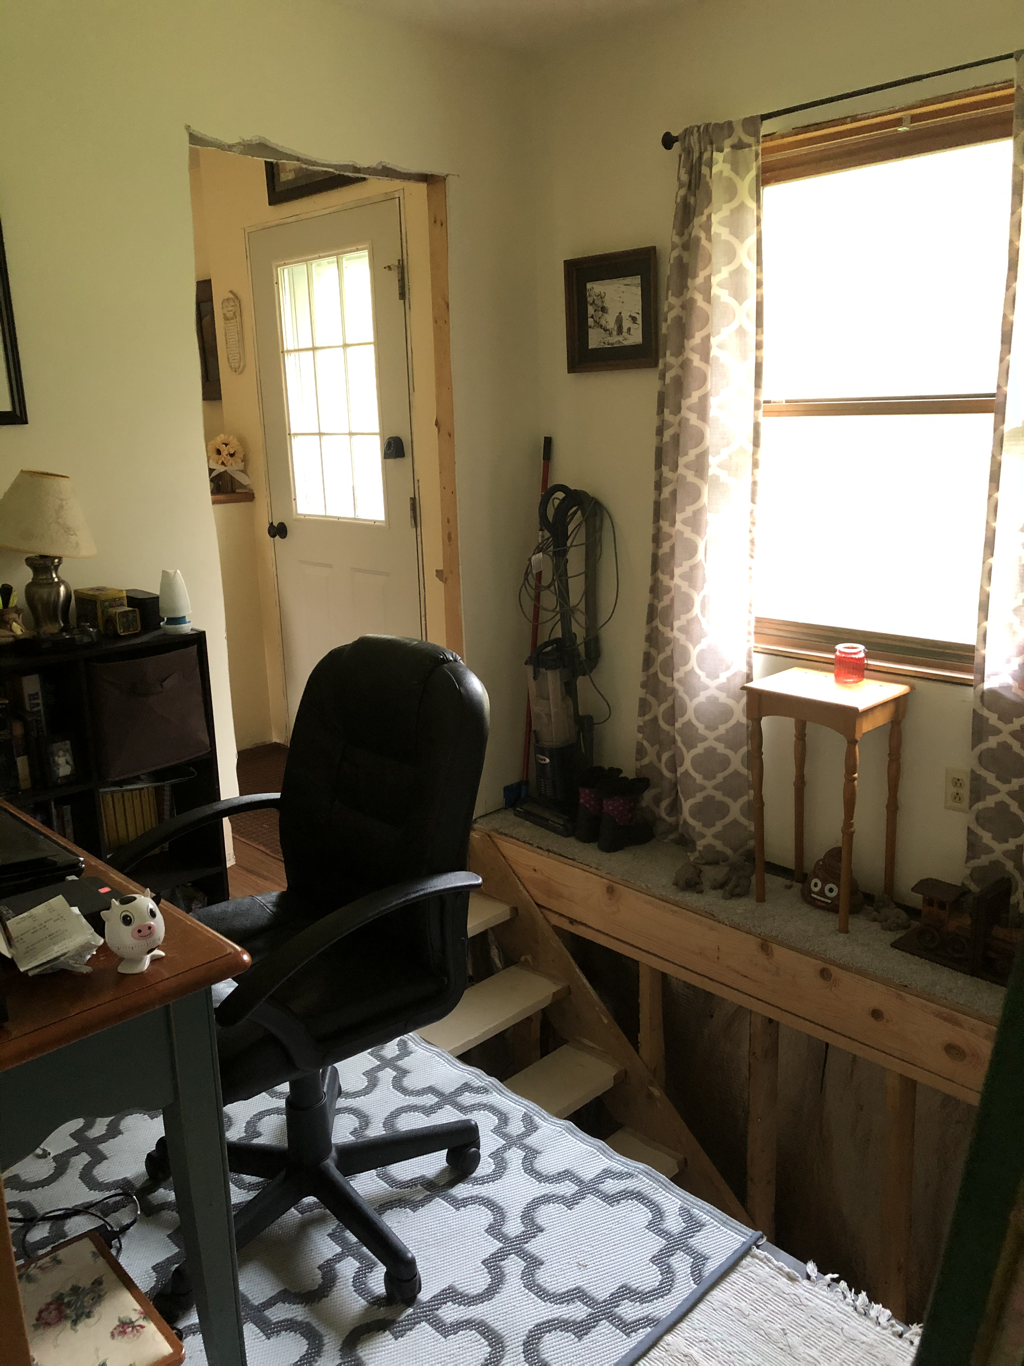 Our room before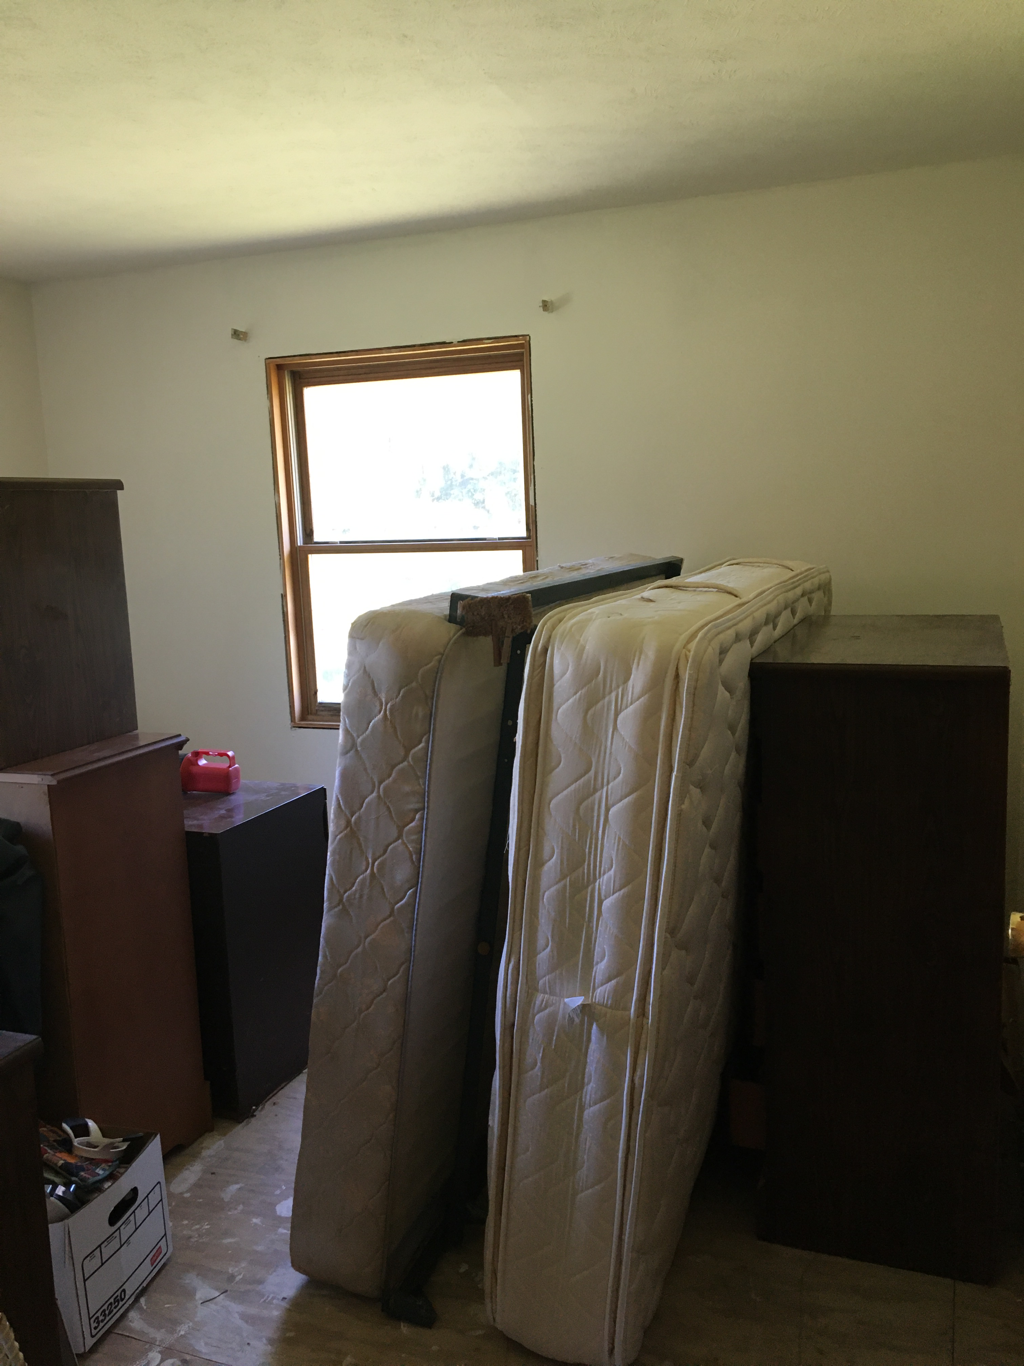 After!Fresh paint and new carpet 😀 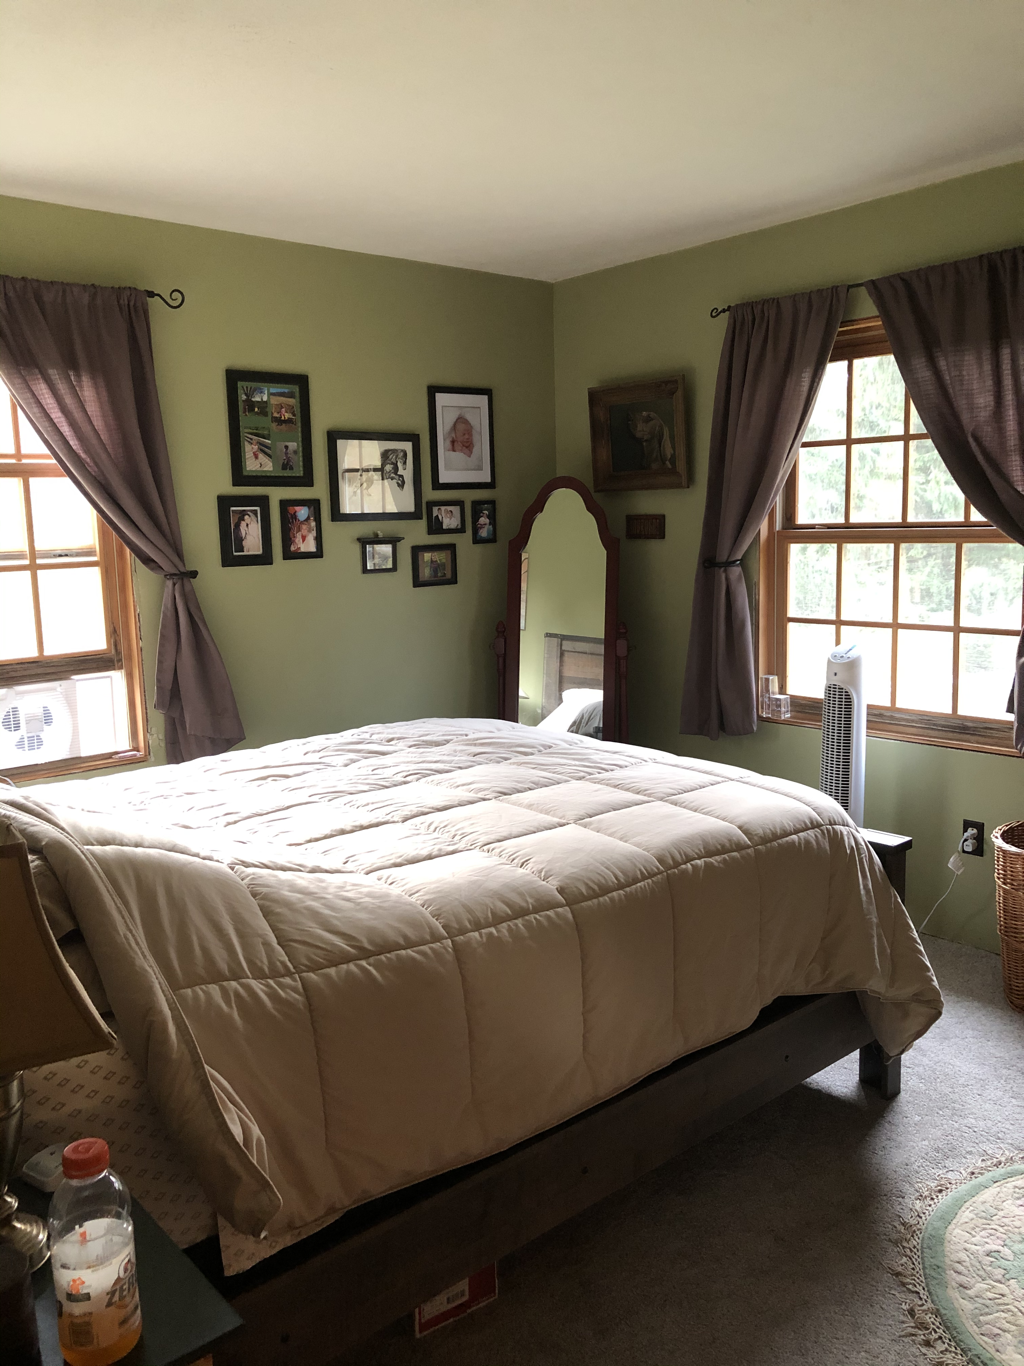 Before basement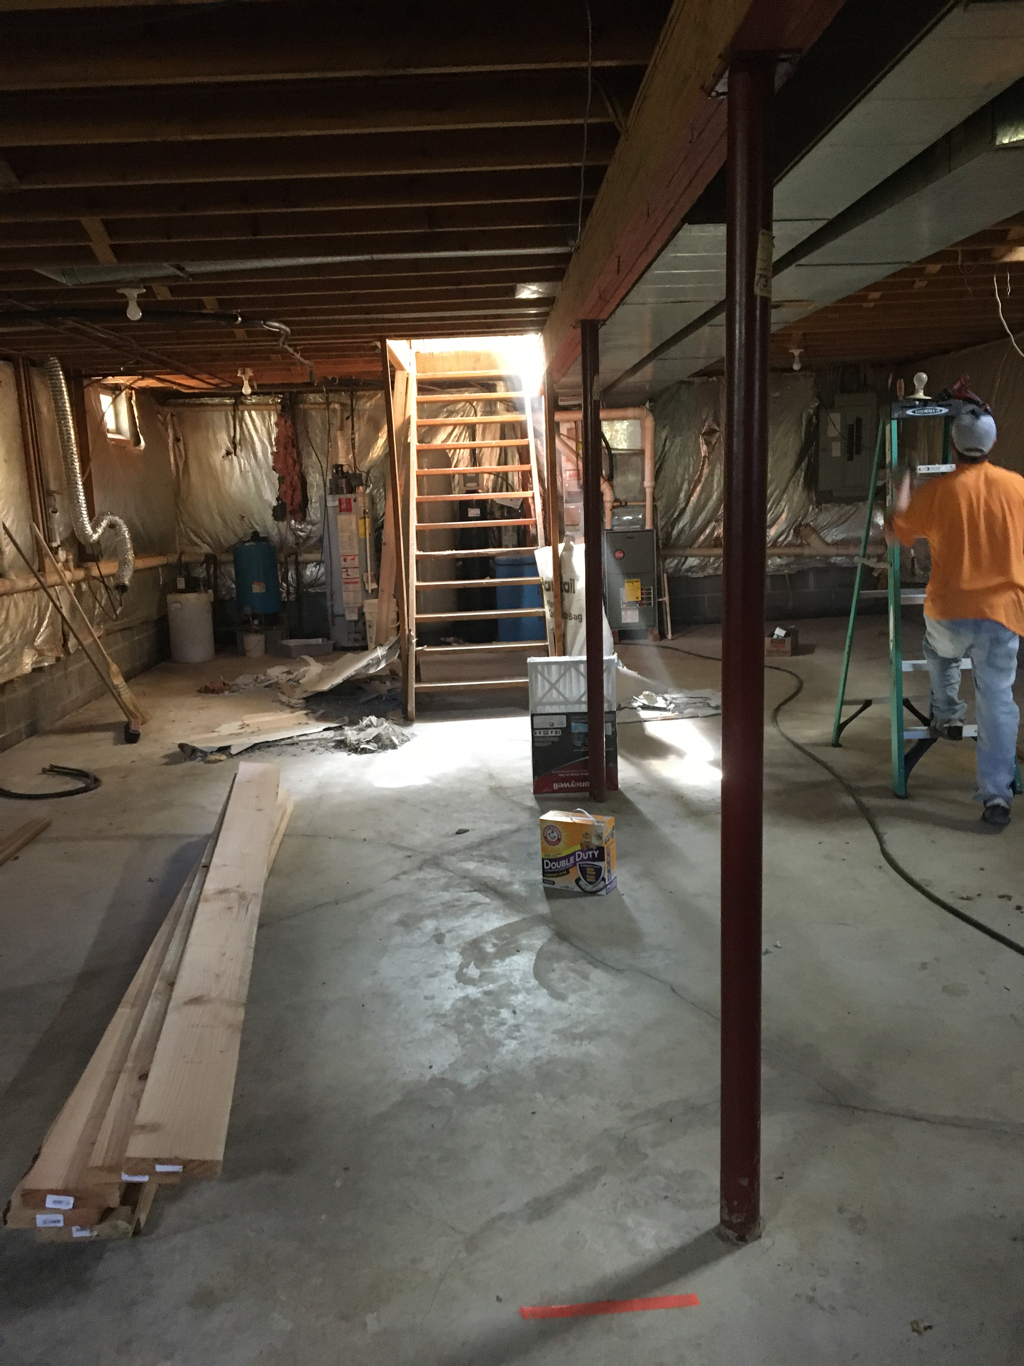 After!We want to finish this basement by ripping all of the insulation off the walls, painting the foundation with moisture blocker, then insulating and drywall it all. Insulate only the areas using such as the Rec room, spare bedroom and art studio. Laundry room and pantry can remain un insulated. Add a drop ceiling and carpet with our walkout door and it’s done! 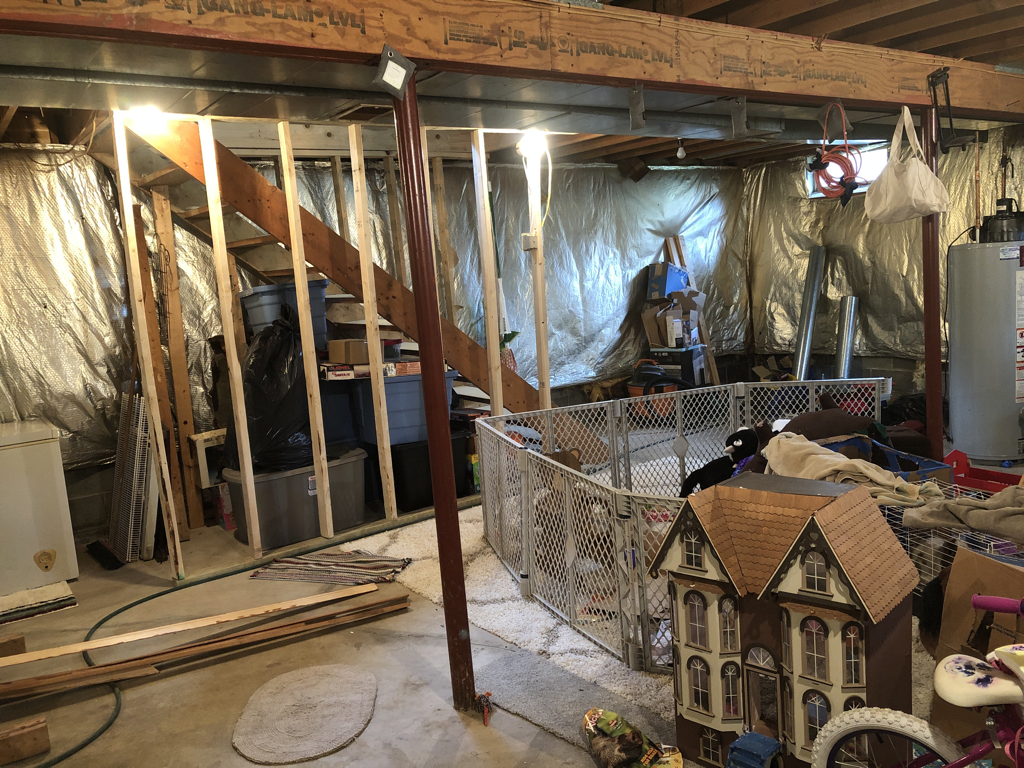 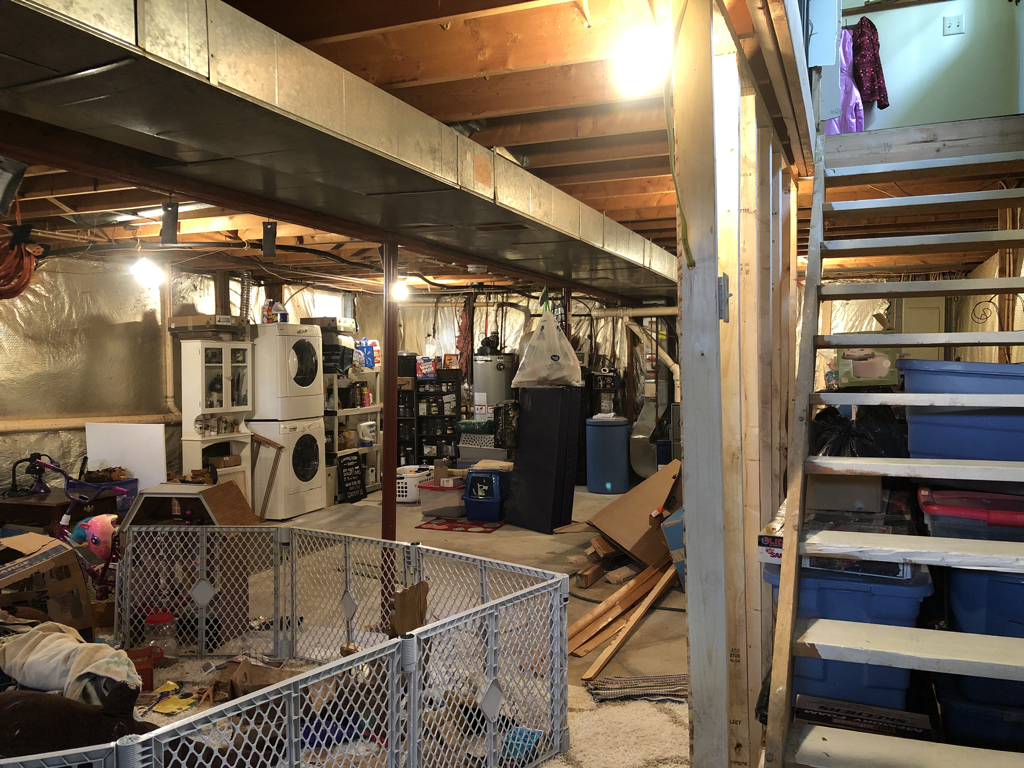 There it is! All of our hard work documented and we accomplished it all within a month! With hard work, perseverance and a lot of praying for strength 😅 we got it done :) Hoping this post motivates and encourages you today in following your dreams!
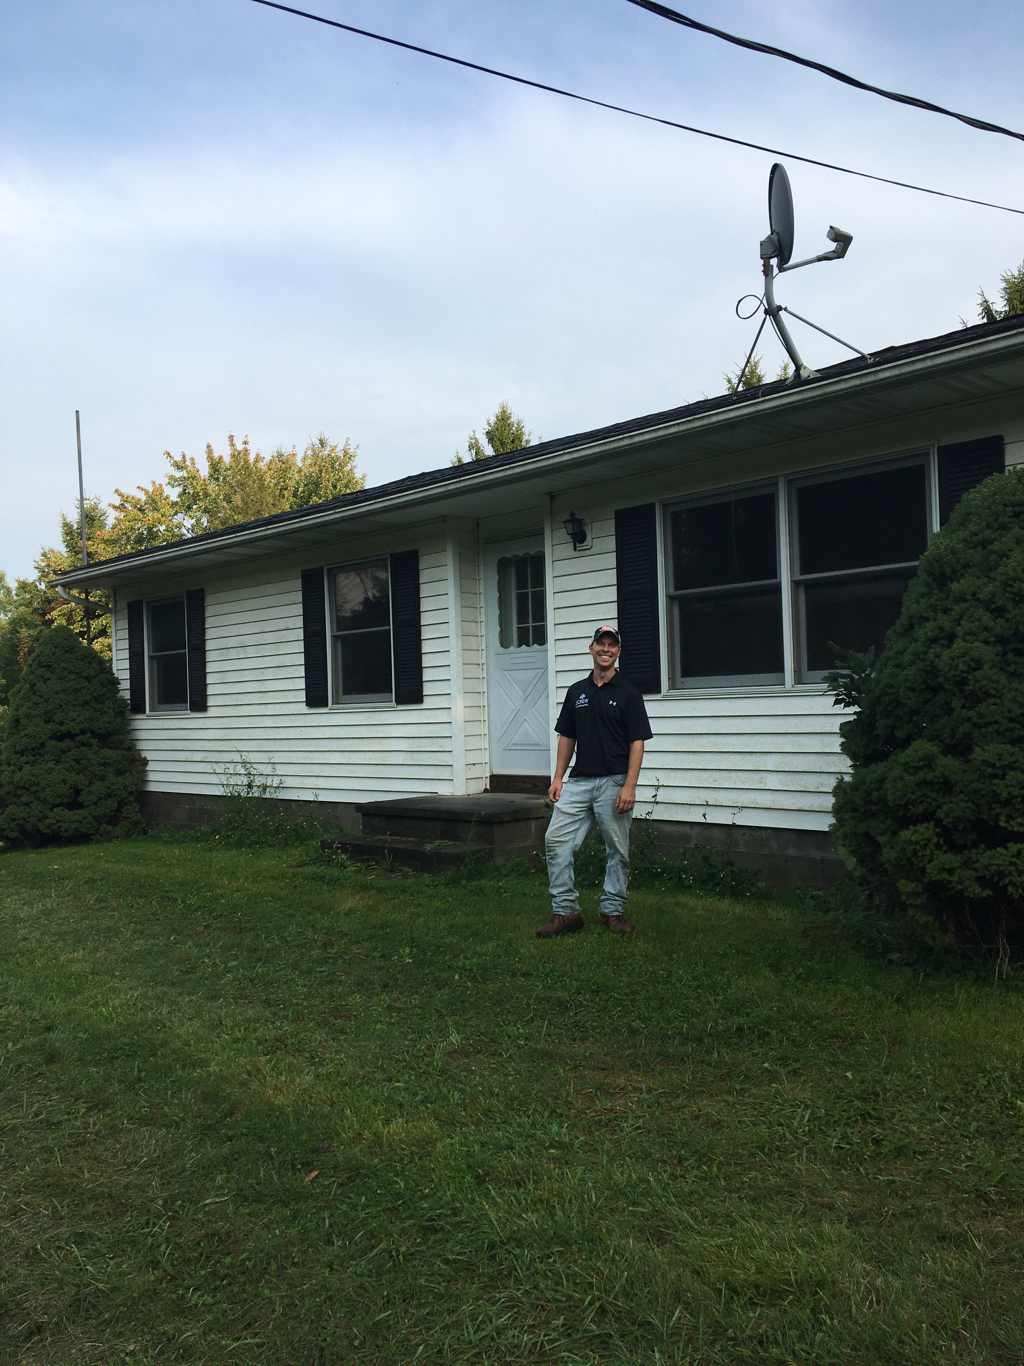 After 14 years of discussing owning a hobby farm and planning, making lists, research and a lot of dreaming, God blessed us with our farm! 21 acres of privacy, quiet and peace with plenty to do and play with and a cute ranch home to boot! why did it take so long you say? Well, starting and owning a business early on in our marriage set us back some since trying to buy a home while starting and growing a business from scratch takes a lot of time before a bank will even look at you. Once we sold the business, we were able to focus on growing my husband Michael’s career as a salesman. So with all of that history, now we were in a better place to buy and own 21 acres with a home that needed a lot of work. So no more drafty old houses or old home quirks to contend with. Maybe some people out there enjoy the quirks but we just found them super frustrating! We owned our other farm house for 2 years before finding this gem but it was a great flipper and starter home so I don’t hate old houses, just don’t want to live in them forever is all. This is our forever home! We will retire here and grow old here, owning our land and animals and raising our children here so we are tickled to be staying and not moving. EVER. AGAIN. We’ve moved 13 times in our 15 years of marriage so yeah. It got old. So here’s a little background info since the last time I wrote in this 3 years ago. We bought our flipper in 2018, flipped it and sold it in 2020. Took the money we made from that sale and put it into this home. I have since been raising chickens for eggs, gardening and learning everything I can about owning cows, ducks, goats, horses and growing and preserving food. Now I get to put that knowledge to the test:) throughout this post there are going to be before and after pics of the work that we have done since moving in a month ago. I hope it inspires and motivates you to follow and pursue your dreams because it is possible! Our story is proof of that. We had Jesus guiding us and providing for us our entire marriage and Having faith that the Lord would give us our hobby farm someday was what kept us going through all of our trials and life bumps. He loves you and wants what’s best for you, and His very best is better than anything than I could have ever imagined. I remember praying and wanting at least 3 acres and being excited about that. Then it went up to ten. But silently I wished for 20. Was too scared to pray for 20 but I’m sure at one point I discussed my desires with him. He knew my heart and what we could handle so instead He gave us 21! Believe in Him and just watch what He can do for you❤️ The Farm!This is an Ariel view of the farm. I have drawn lines to show where I’d like pastures, the garden behind the shop and where I want the lean tos for the pasture animals. We have 7 acres of lawn, 14 acres of forest😳. 2 ponds, one near the house and one way in the back. Not stocked, except with frogs and snappers...and a soon to be 3 season room off of the back of the house off the kitchen. We want to leave the forest layout alone so that we can hunt back there and make plenty of trails to enjoy and trail ride with our horses. Have an acre garden to live off of the land and more ducks and chickens. A miniature jersey cow is also in my plans and 3 horses. So there it is. Our outdoor plans. Now to show the Pics of what we’ve done so far.  The backyard-our favorite spot to take pics of the farm❤️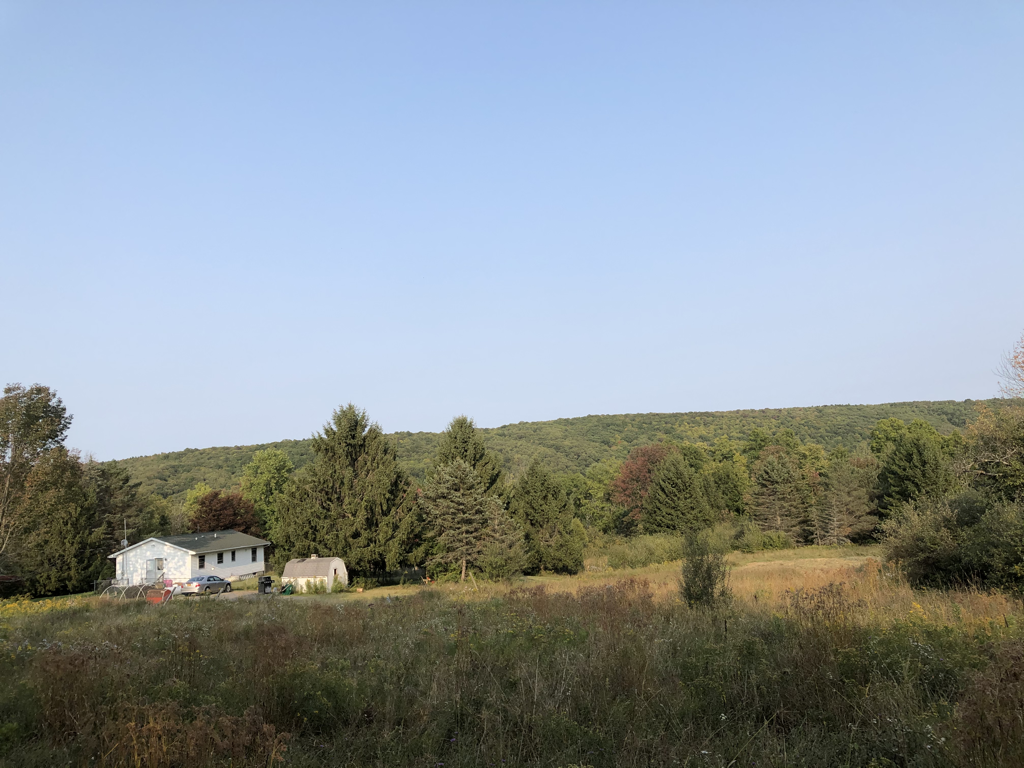 Yard behind our house-garden shed is behind that big pine on the left.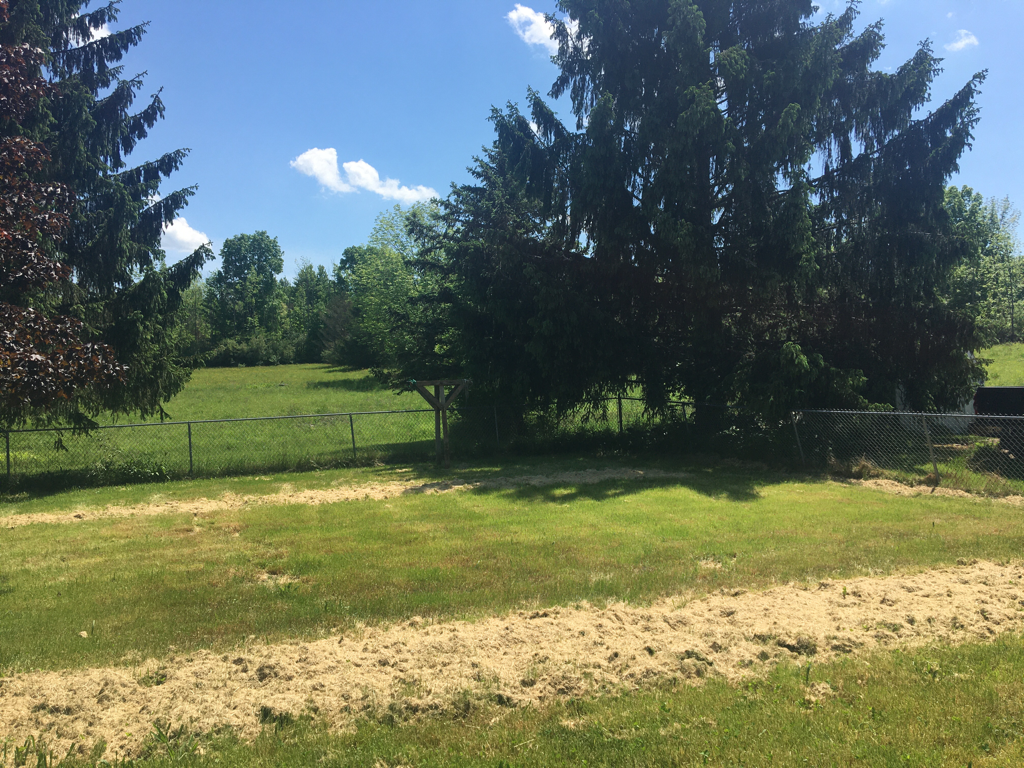 Fence removed!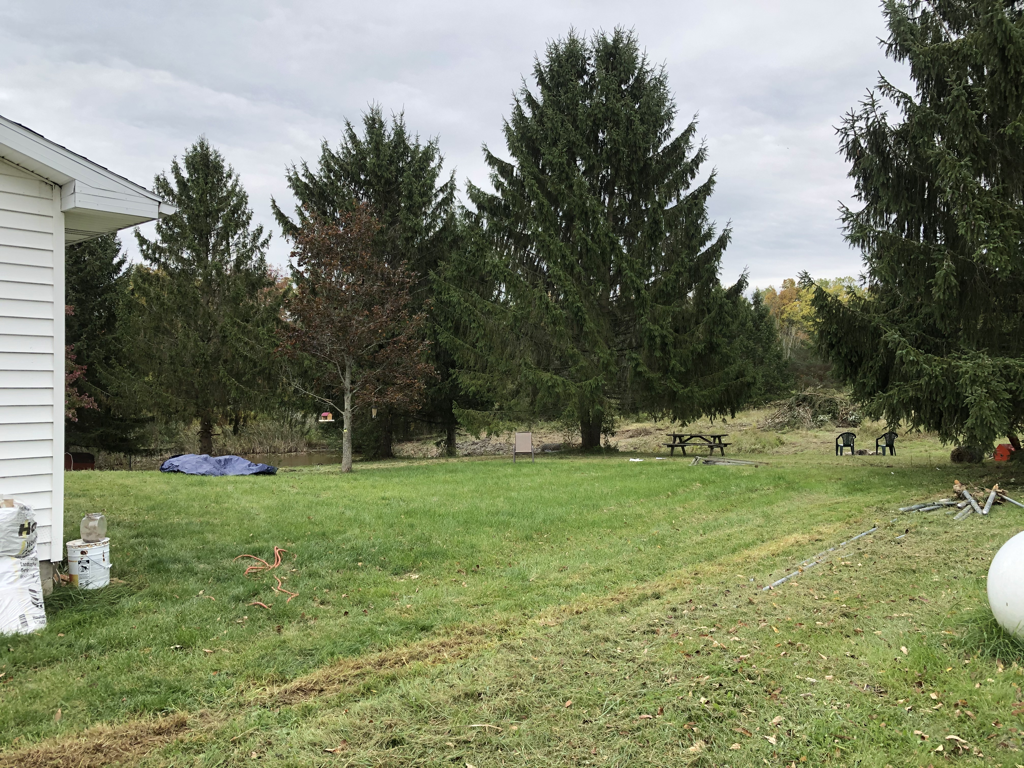 Front pond before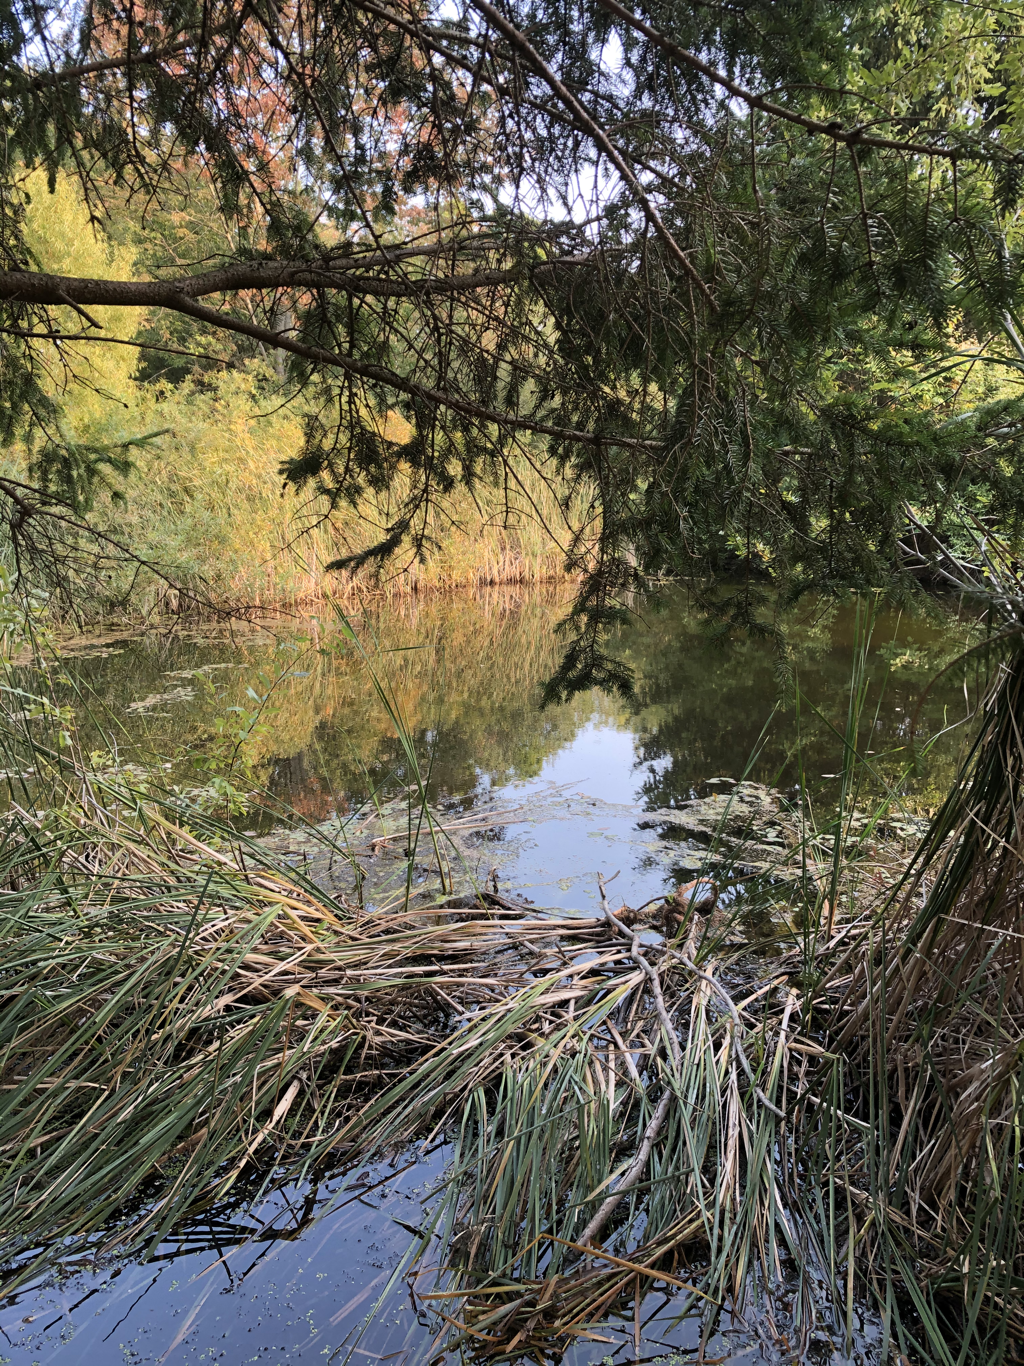 After of front pond, excavator took out lots of cat tails and brush that kept out the view of it. Duck house by the pond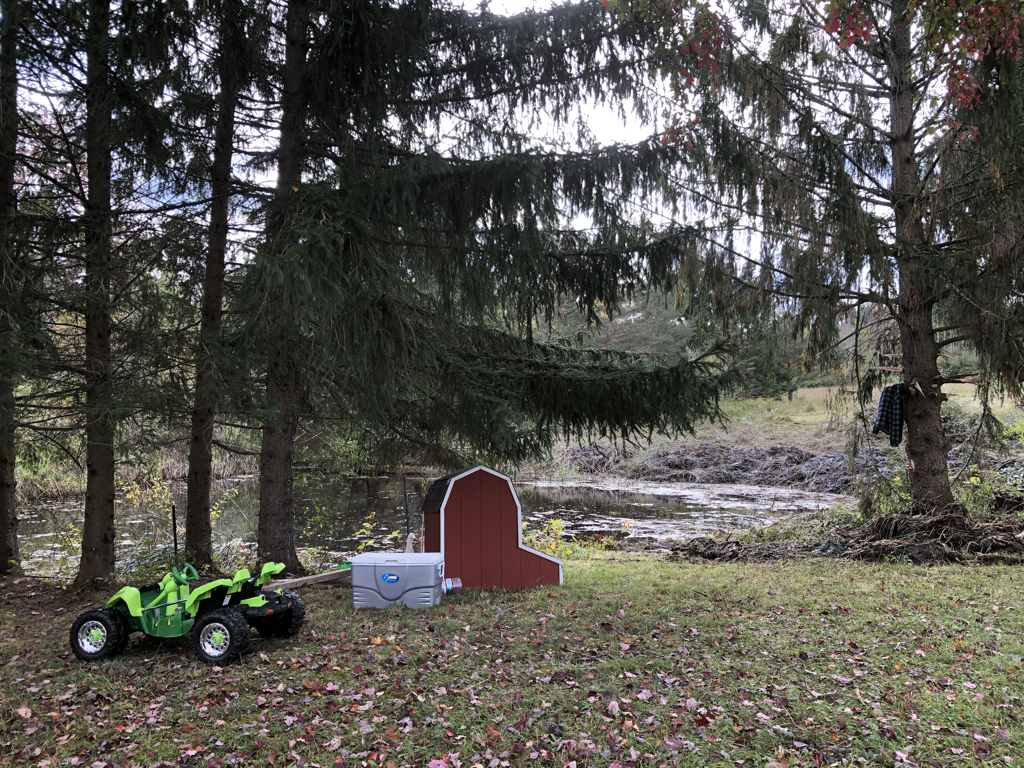 Where our future garden will be-plan is to have almost an acre garden with a tall fence to keep out deer. 3 compost heap piles in the back with fruit trees lining the garden. Apples, peaches, pear trees, 3 of each:)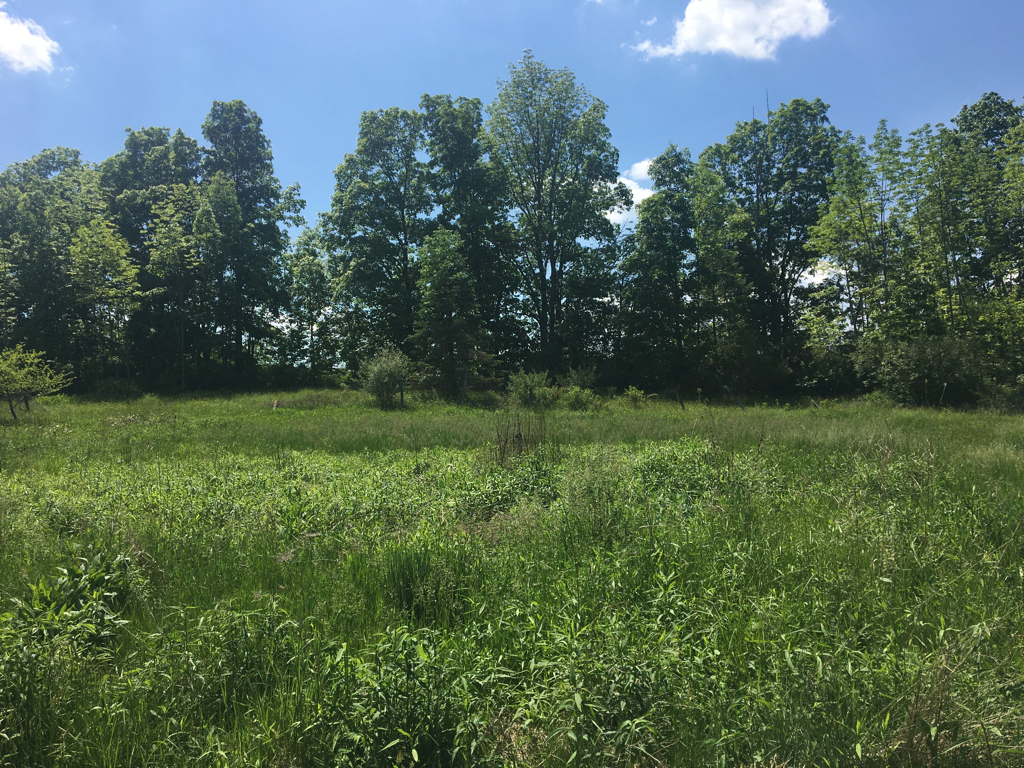 Garage will be turned into a work shop for Michael. Lean to will be built on the side shown to store our tractor.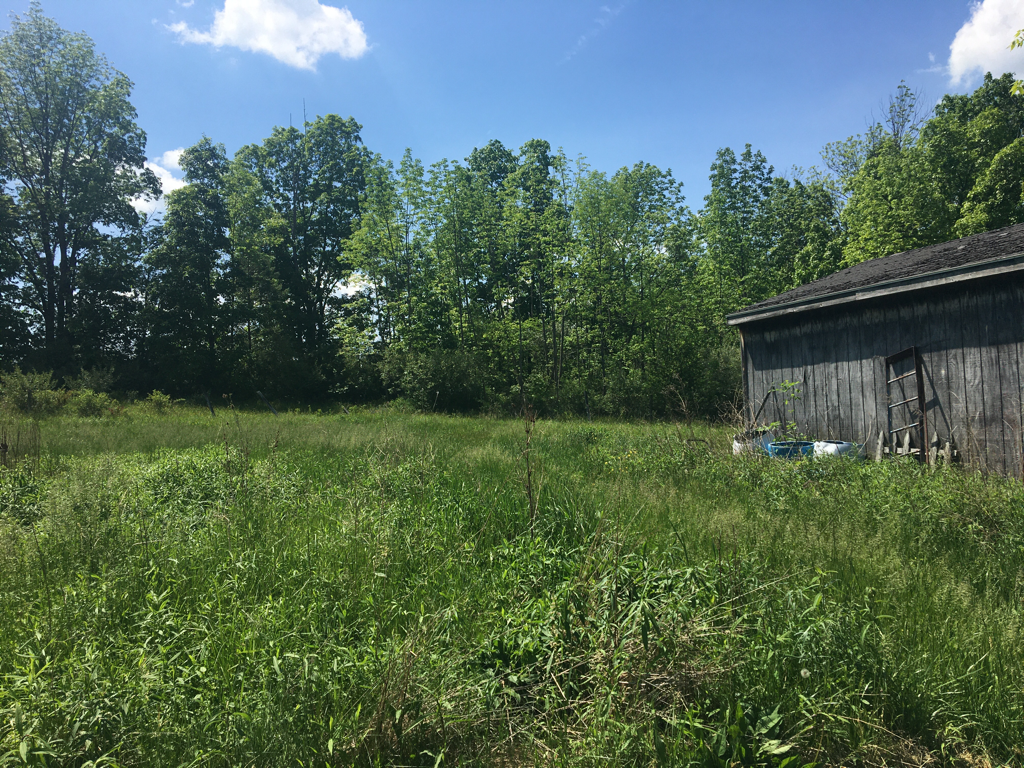 Back of the house-will add a 3 season room off the left side off the kitchen. 3 season room will have a deck and pool off of it.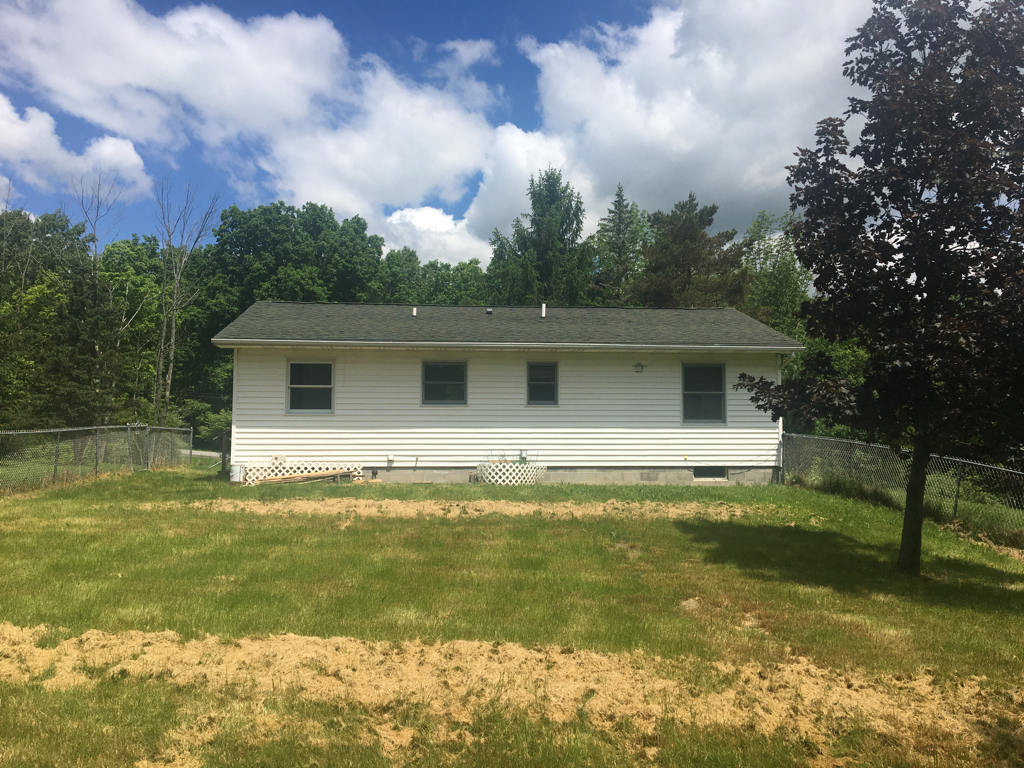 We will be adding a walkout basement off of this side.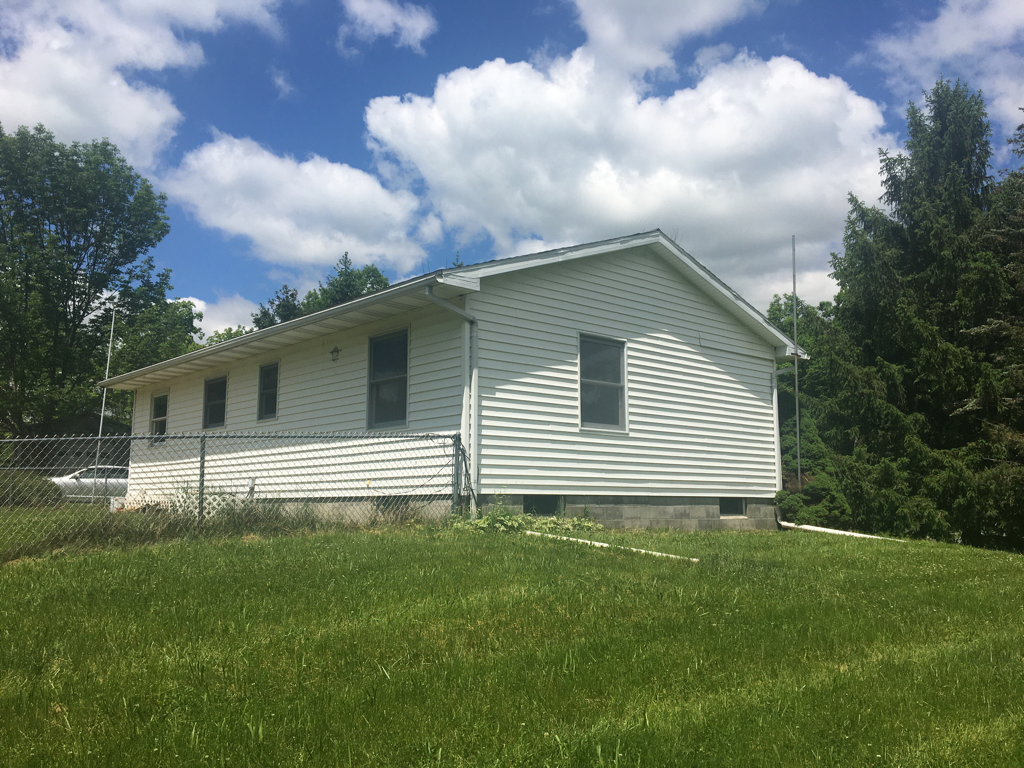 Back pond that’s in the back of our property. We will have a nice trail that leads up to it and have it cleaned up.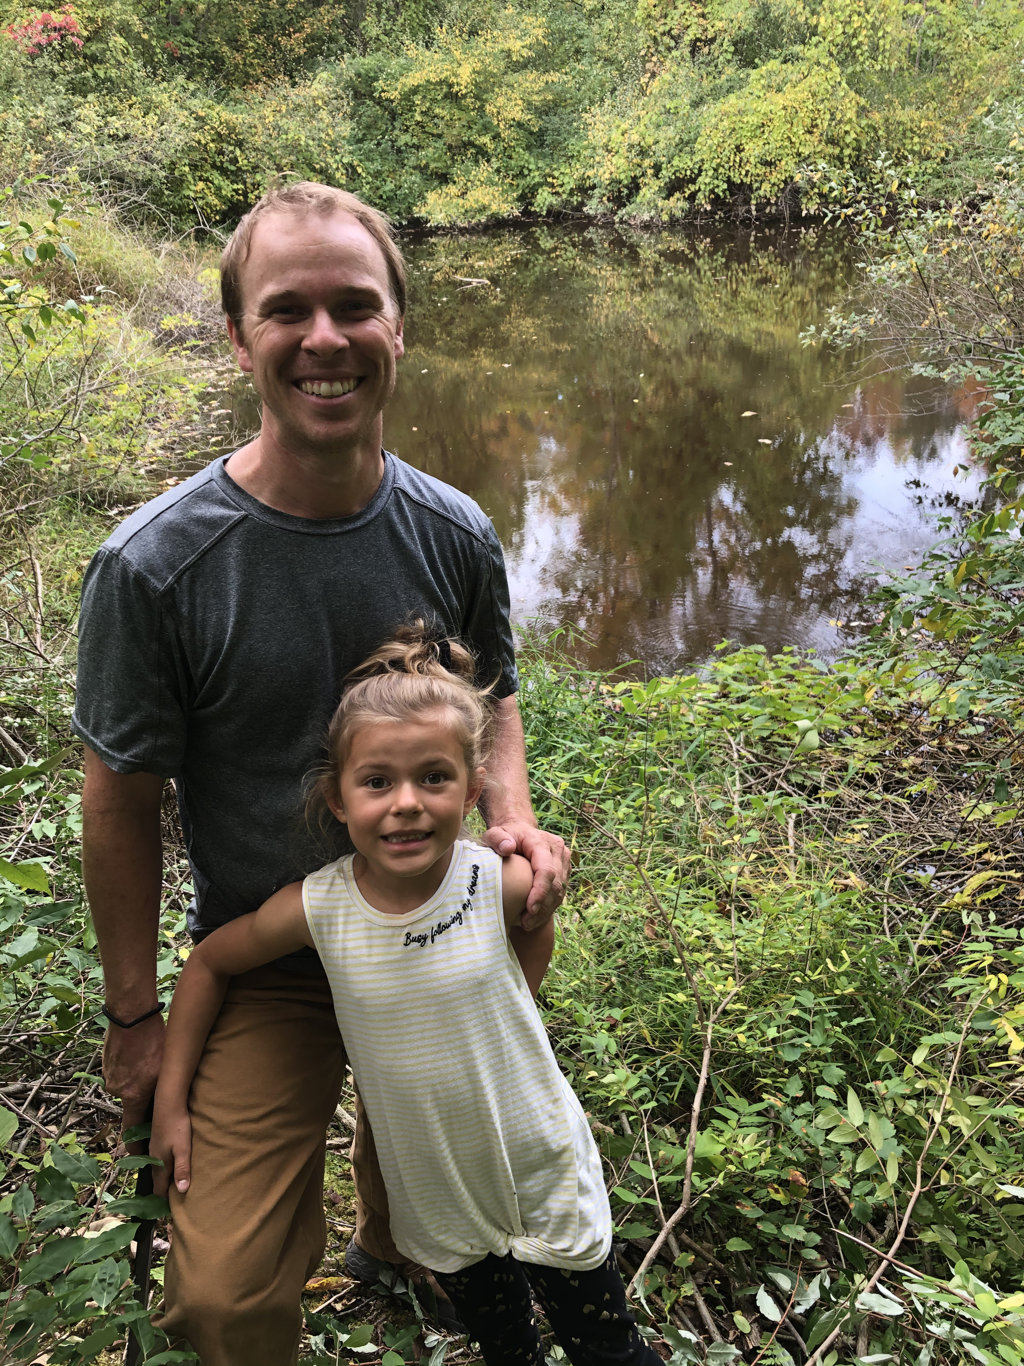 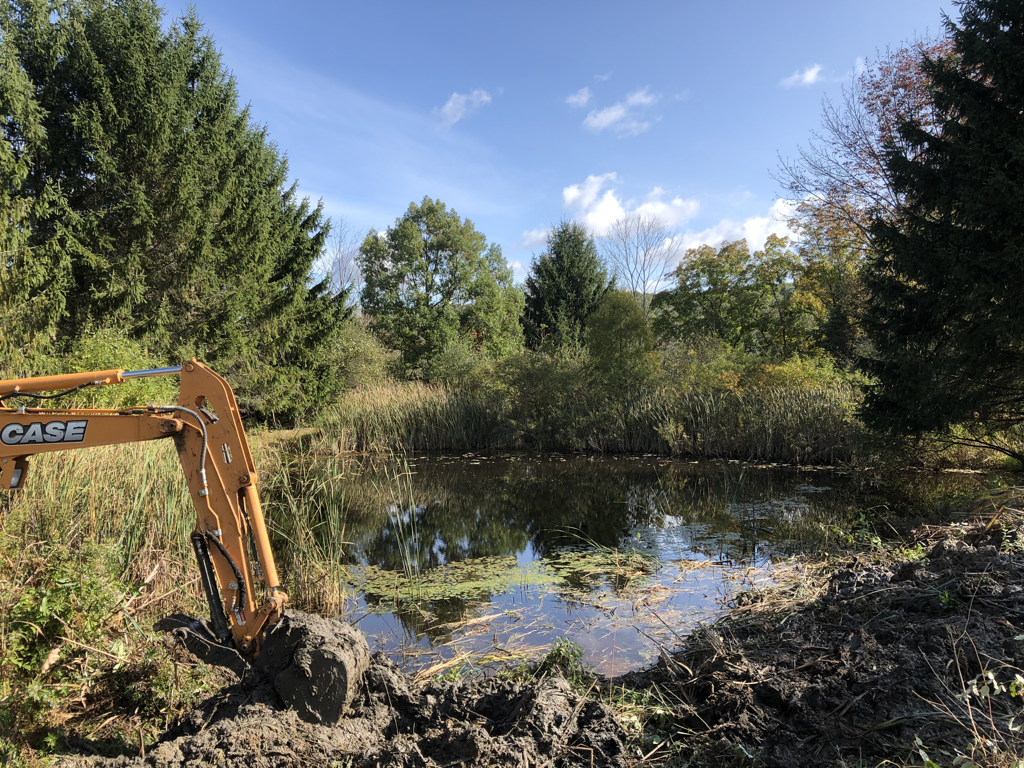 Excavator fun with daddy❤️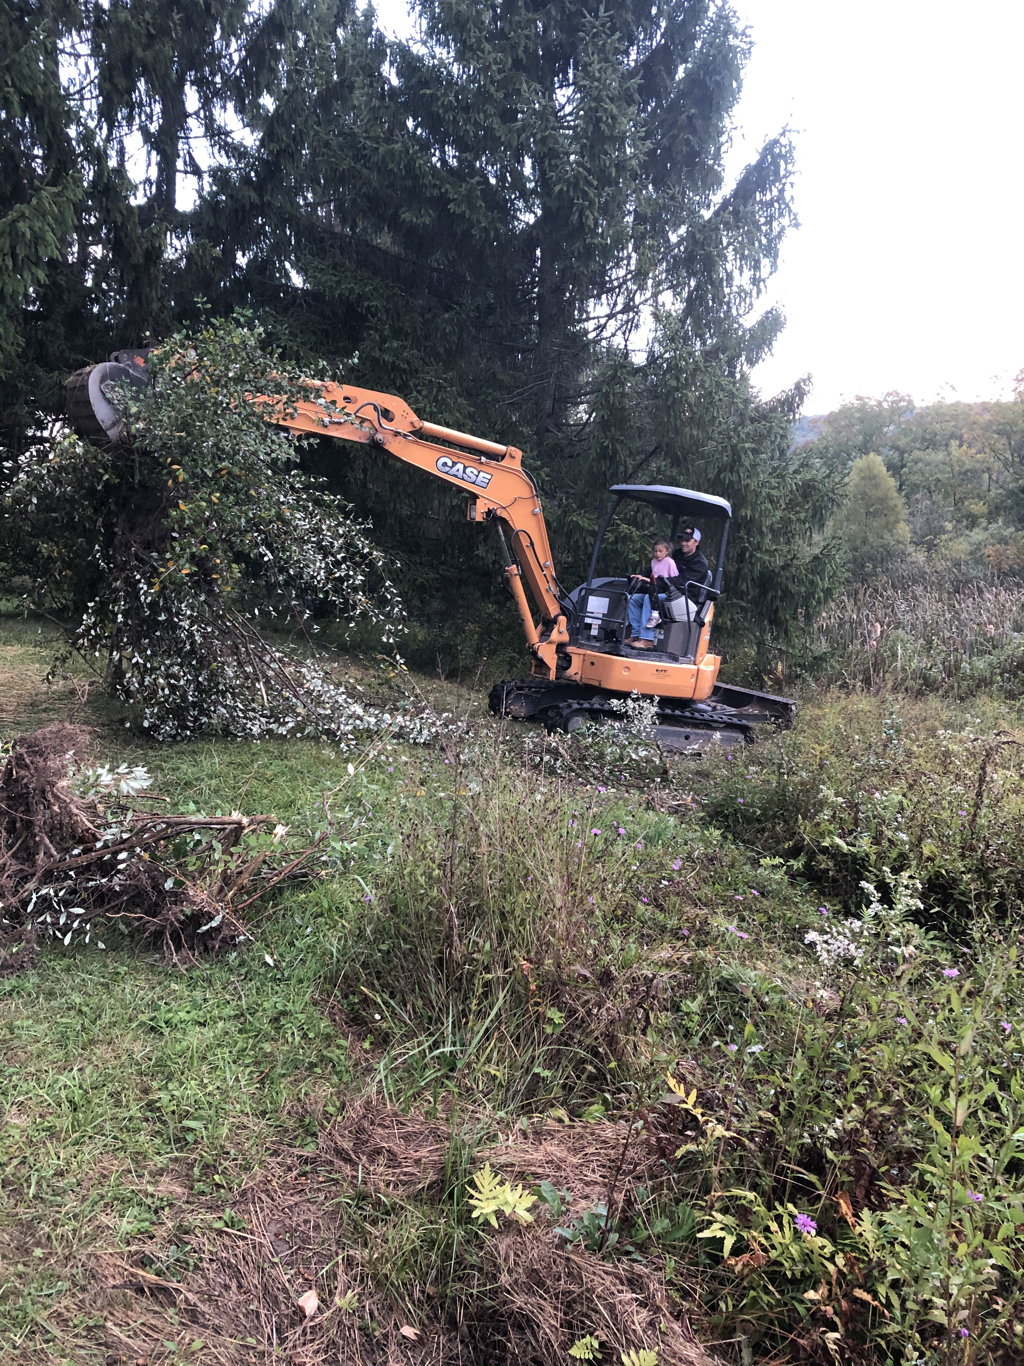 Before front of home After-took out 2 trees with our tractor We took my she shed and converted it into half of a chicken coop for our 6 chickens!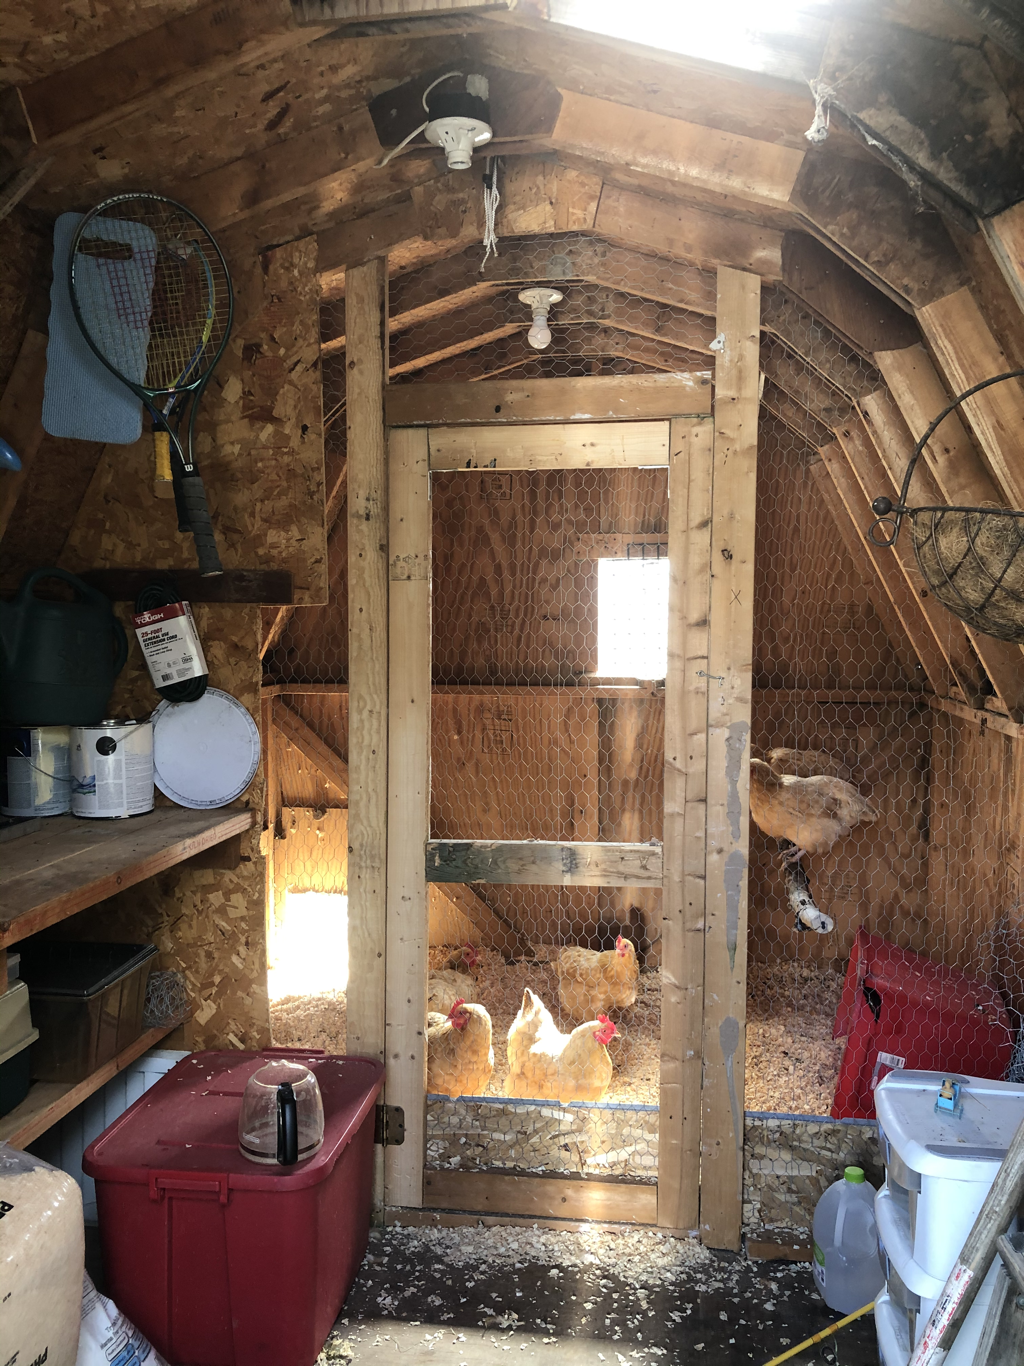 Inside renos before and afterKitchen Before  Demo begins! 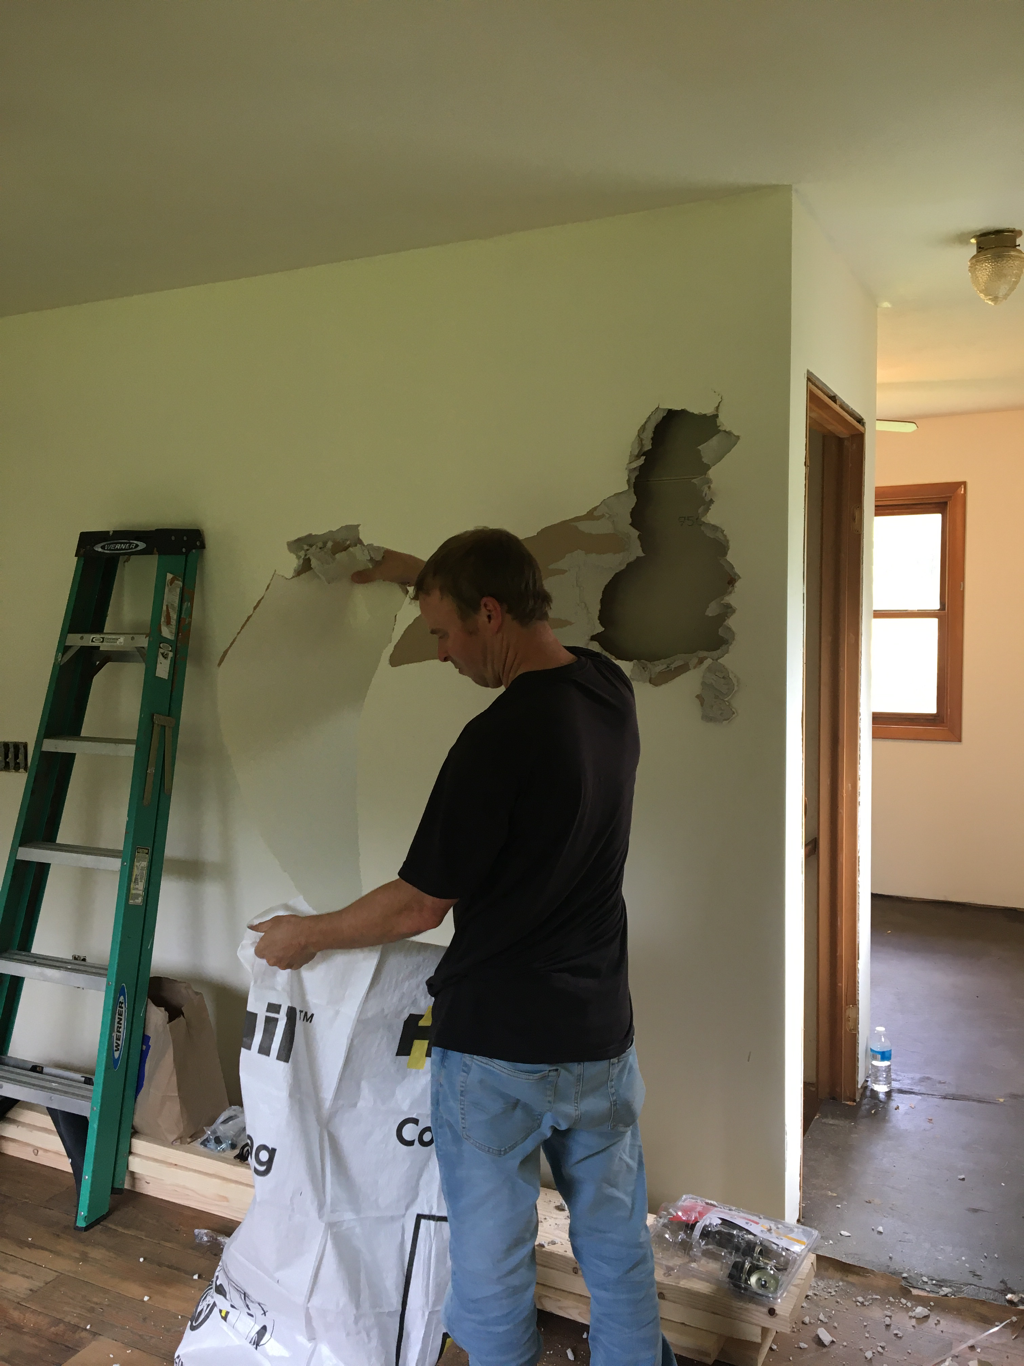 Walls down except one, basement stairs yet to be moved 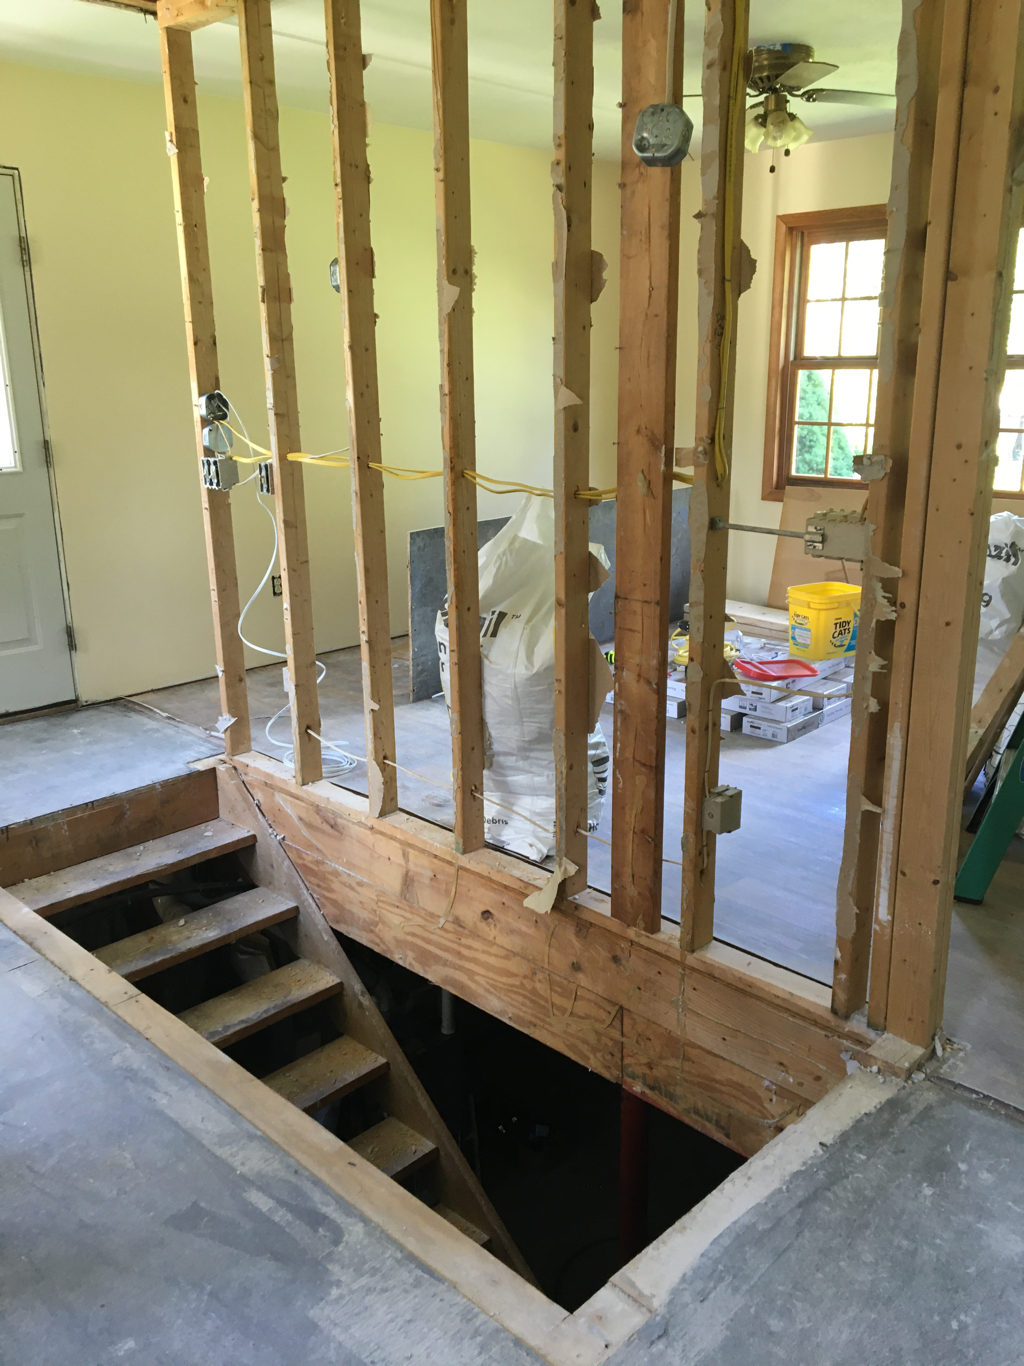 Putting in flooring bracers  Cut the drywall to fit door frame 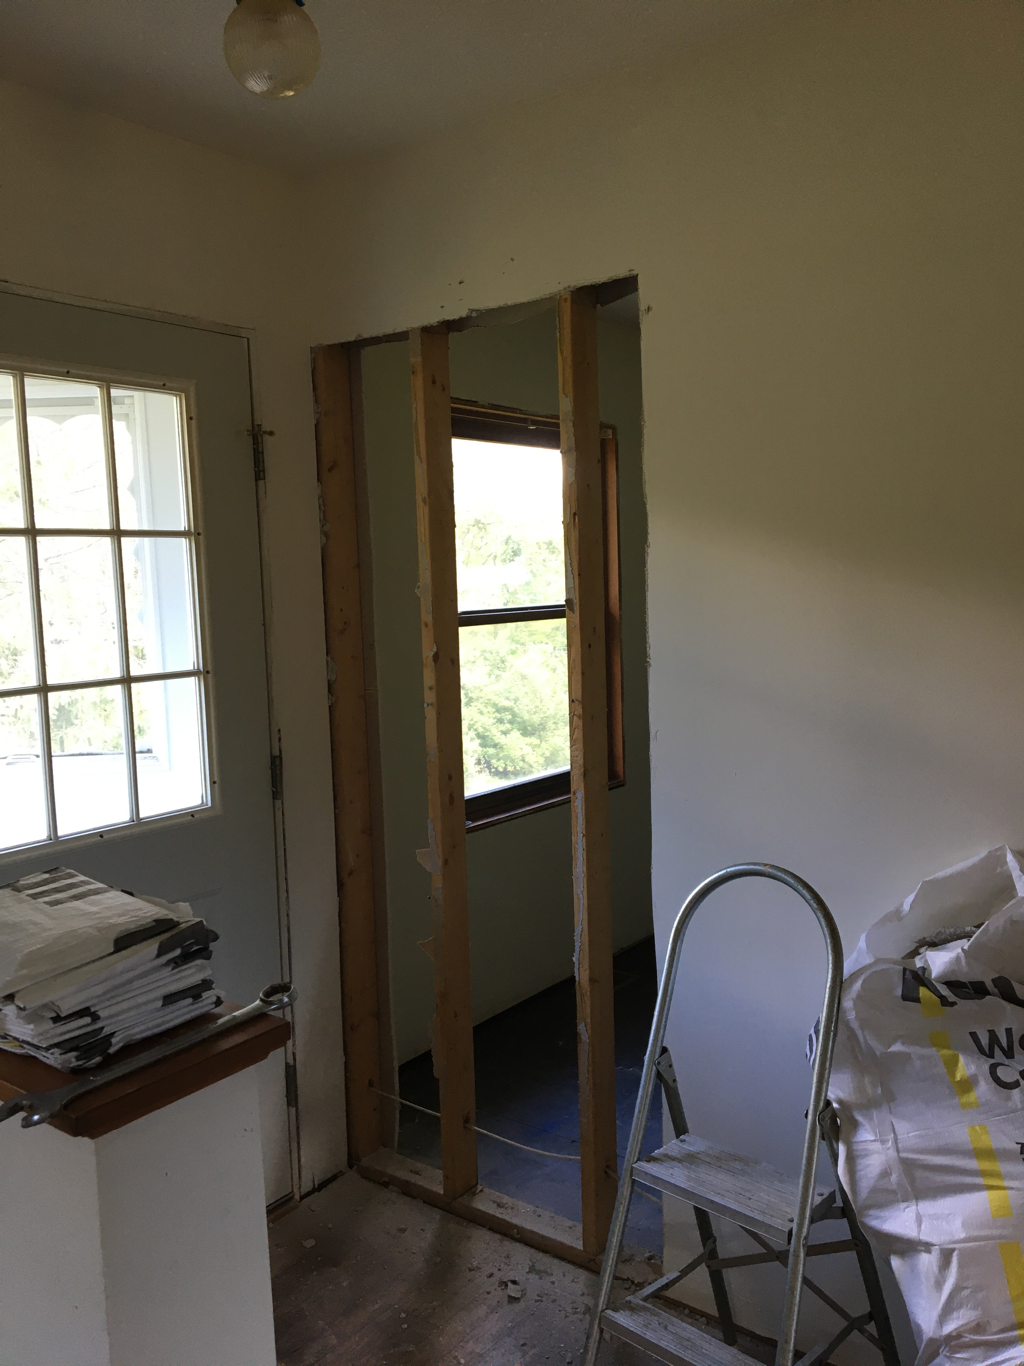 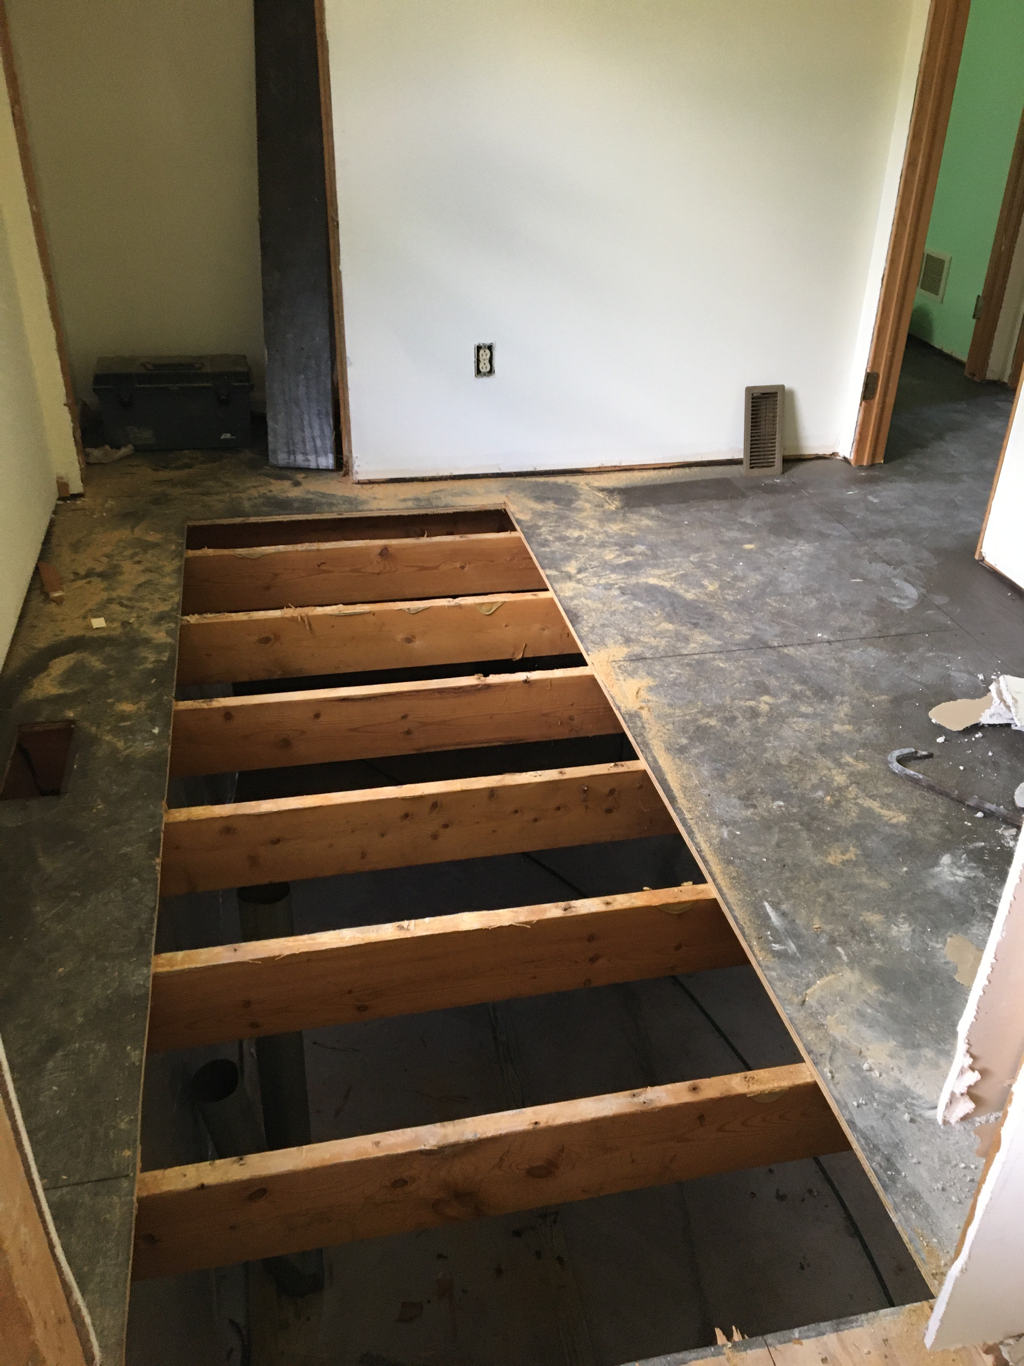 Cut a hole in the floor of spare bedroom for basement stairs to go We moved the basement stairs to their new home! 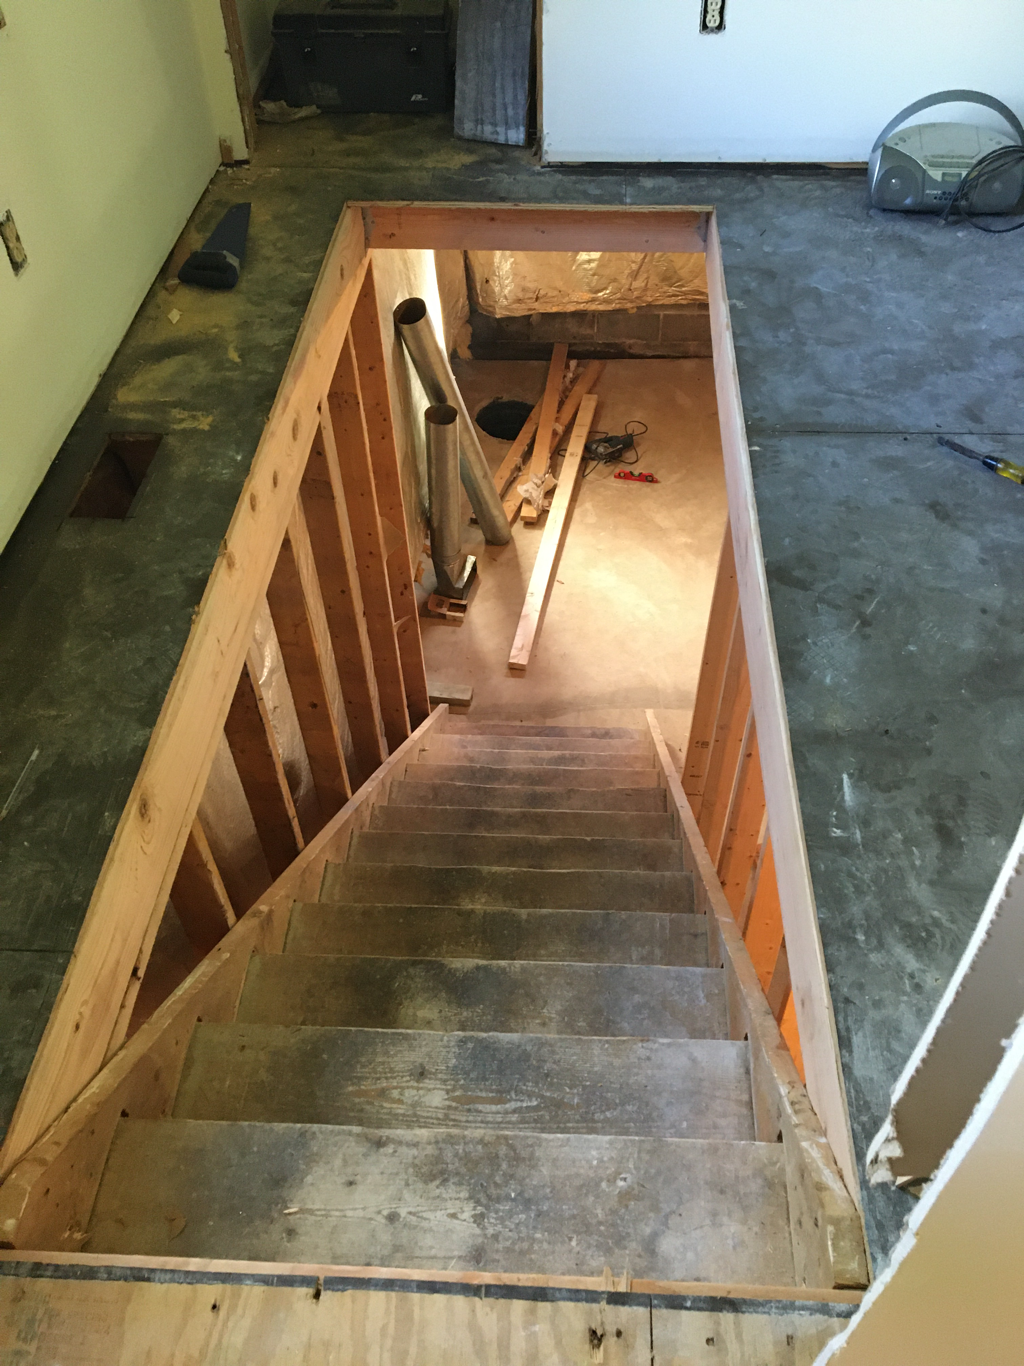 After!after we took out the center wall where the basement stairs were and moved the stairs to the spare bedroom, we kept one wall up for added storage and electrical.added a new stove, new cabinet hardware, flooring, paint and microwave. 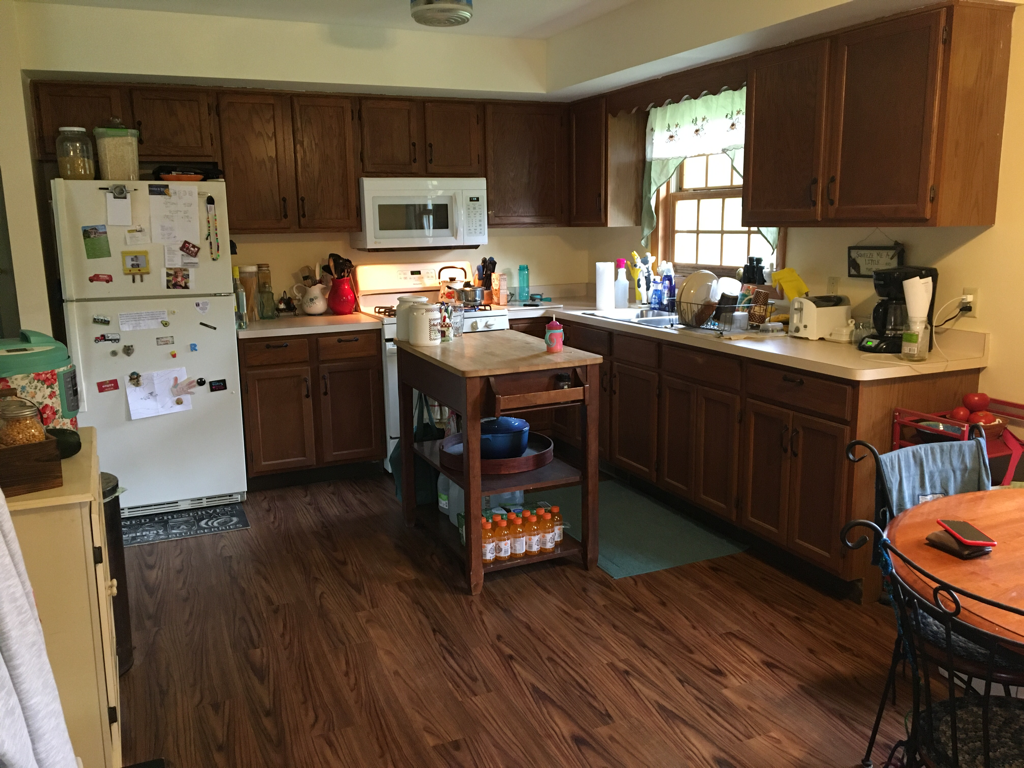 Living room before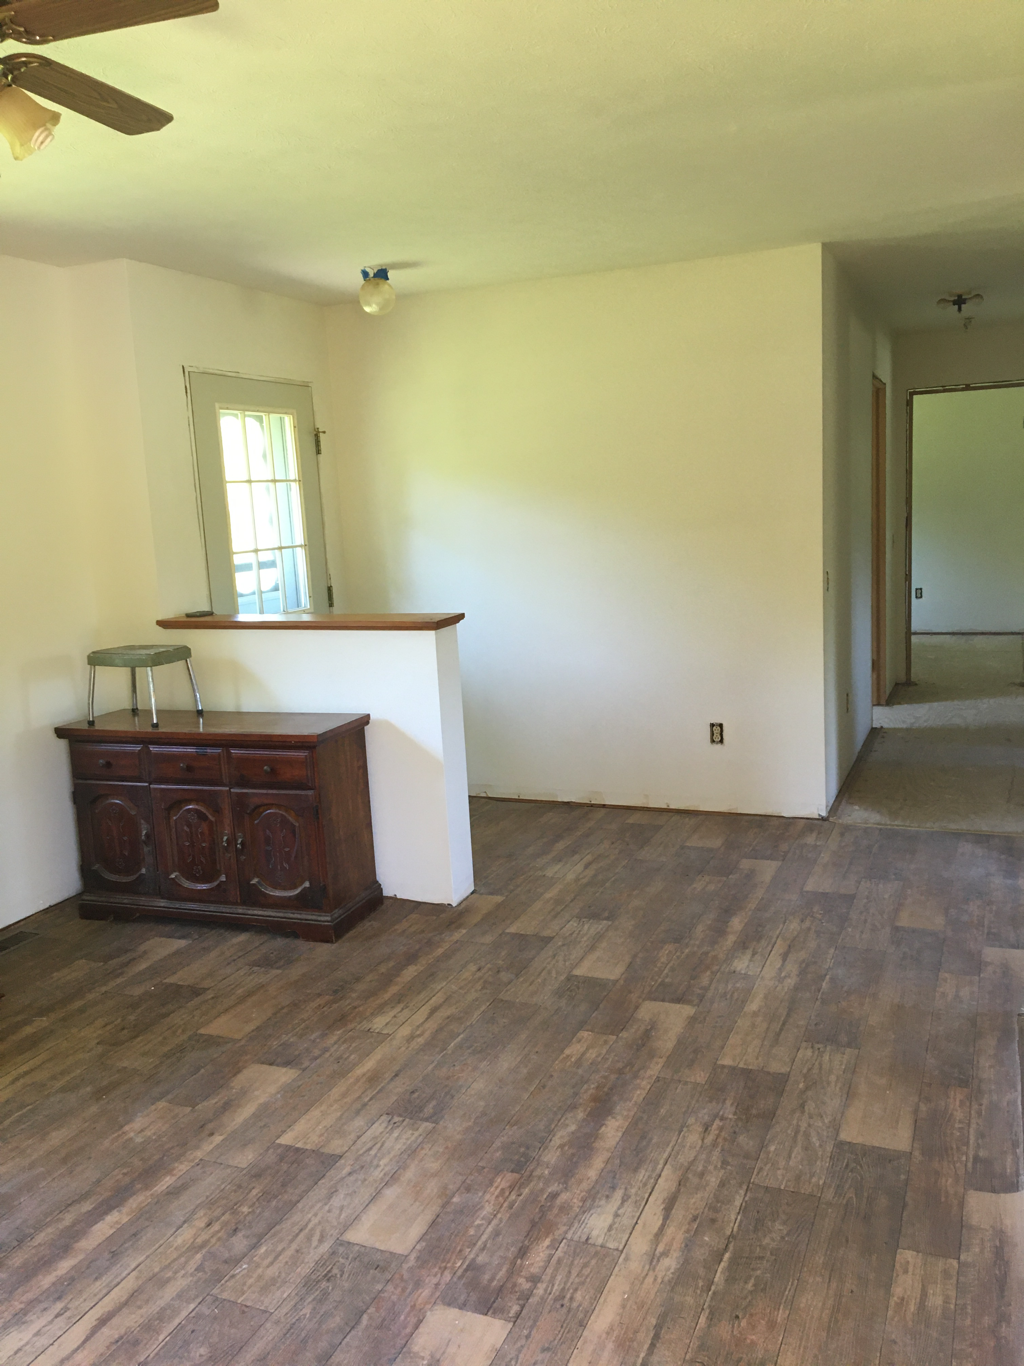 After!Living room-fresh paint, new floors, new fan, cut out wall to put door frame to go down into basement 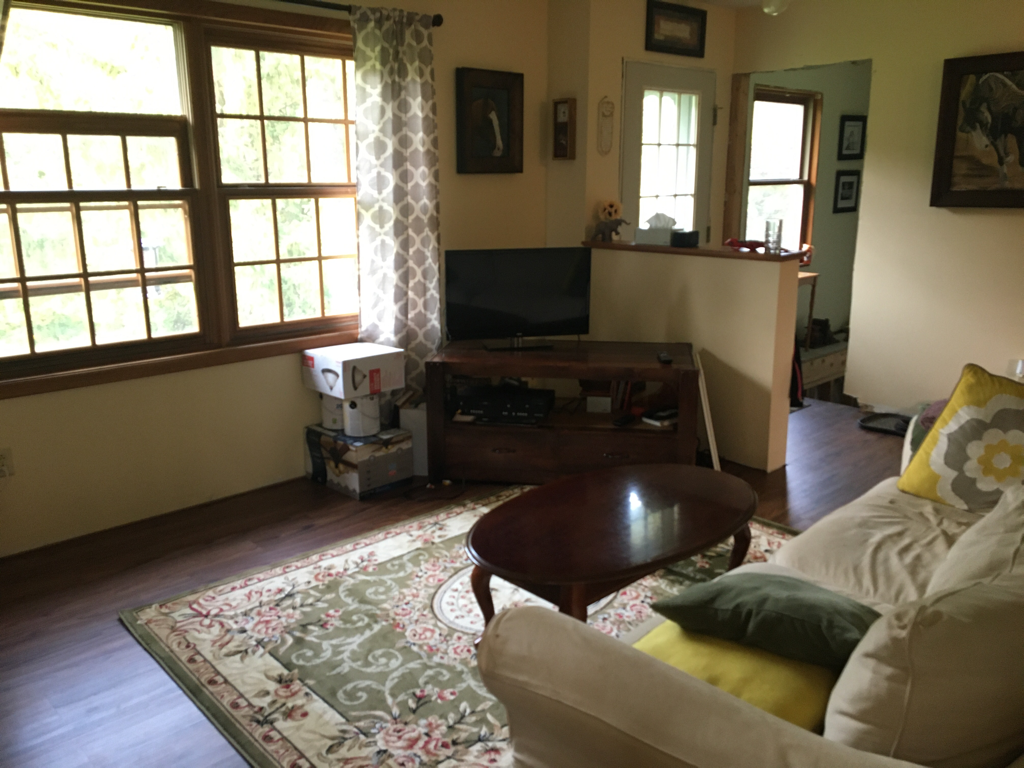 Hallway before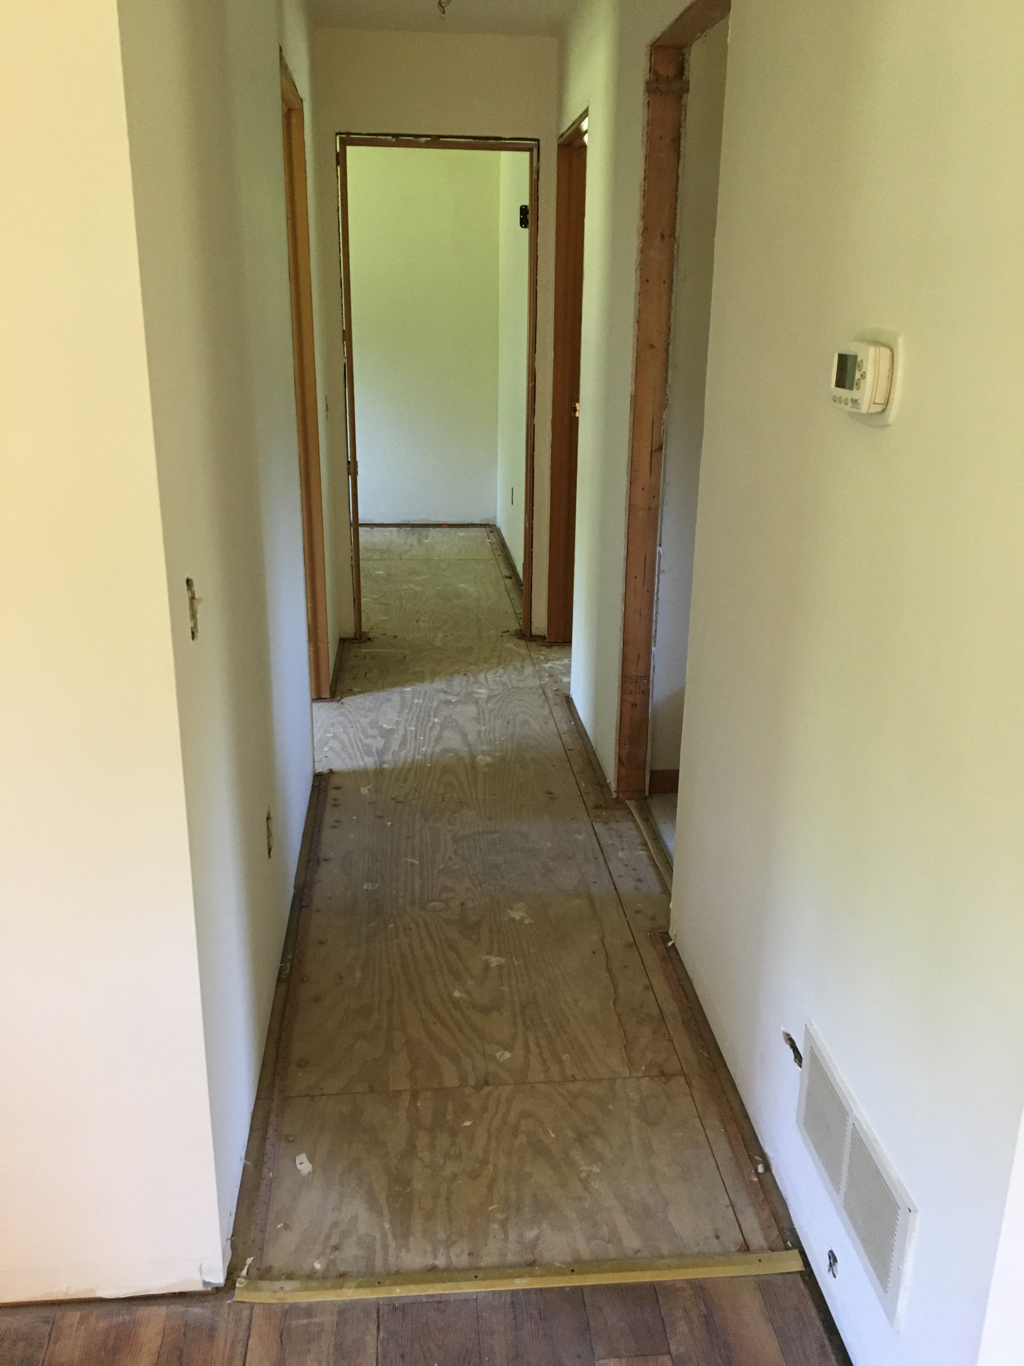 After!New flooring and paint with new doors in hallway  Bathroom before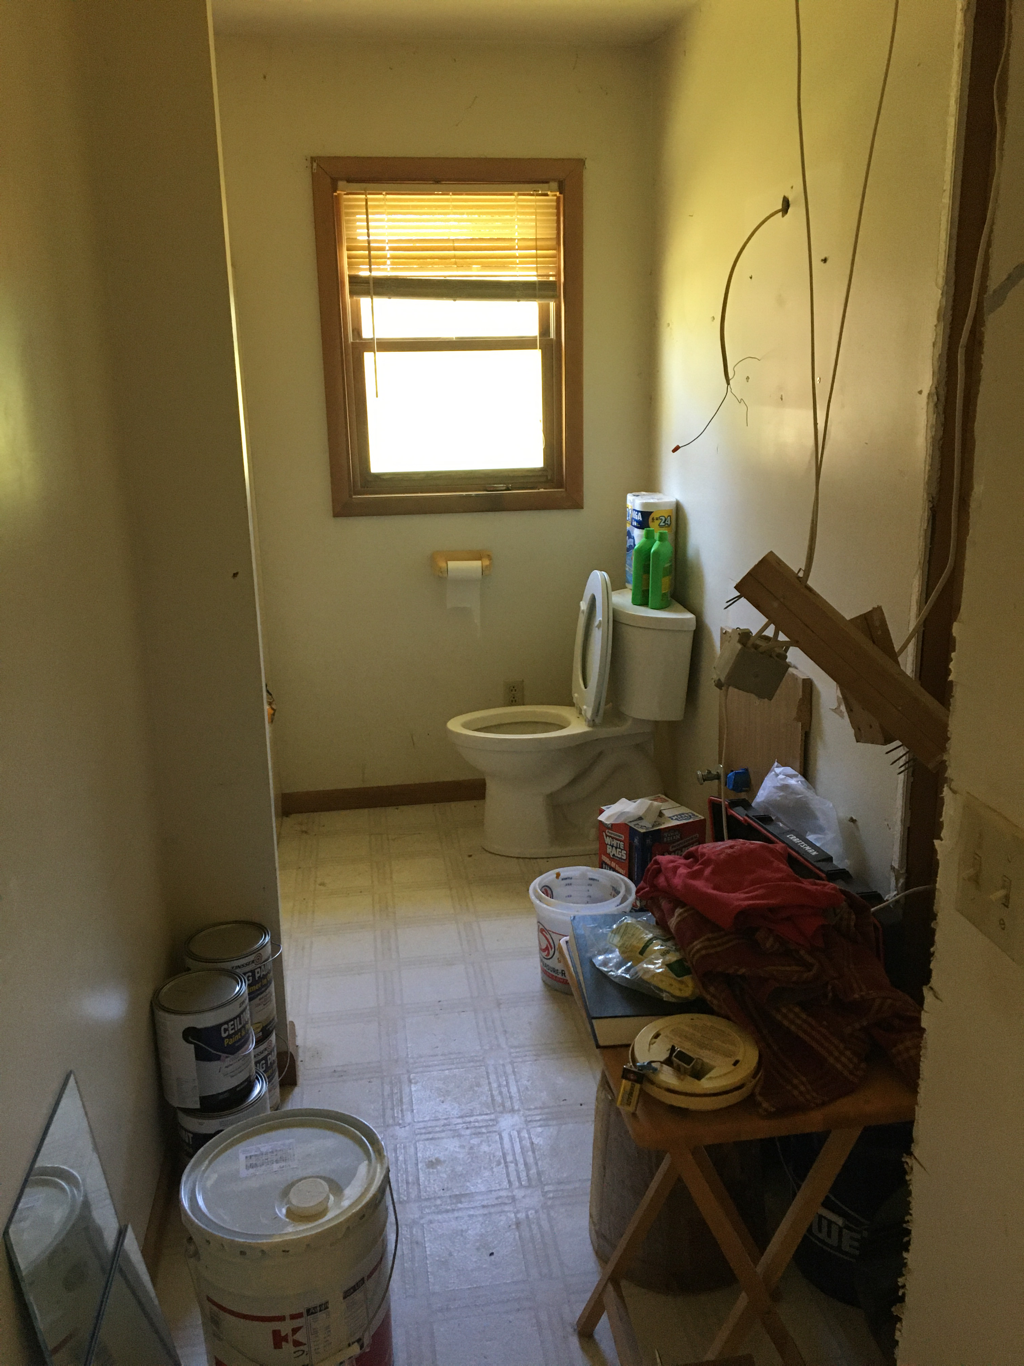 After!New vanity, painted floors and walls. New light fixture that’s not shown and linen closet installed which is behind the door. We have yet to add new vent and paint ceiling. 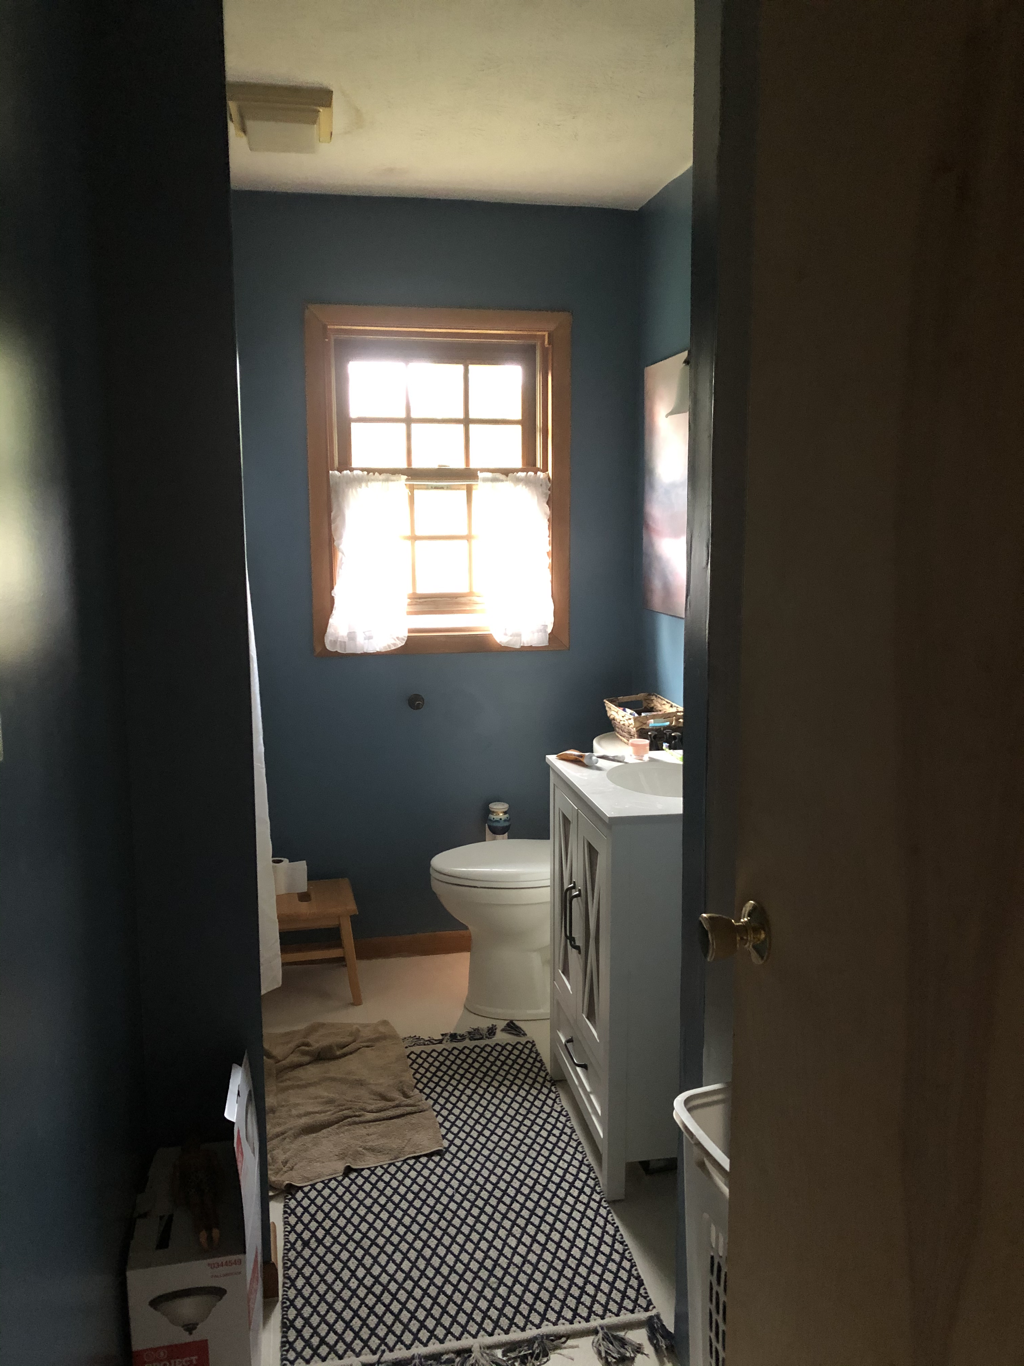 Roses room before 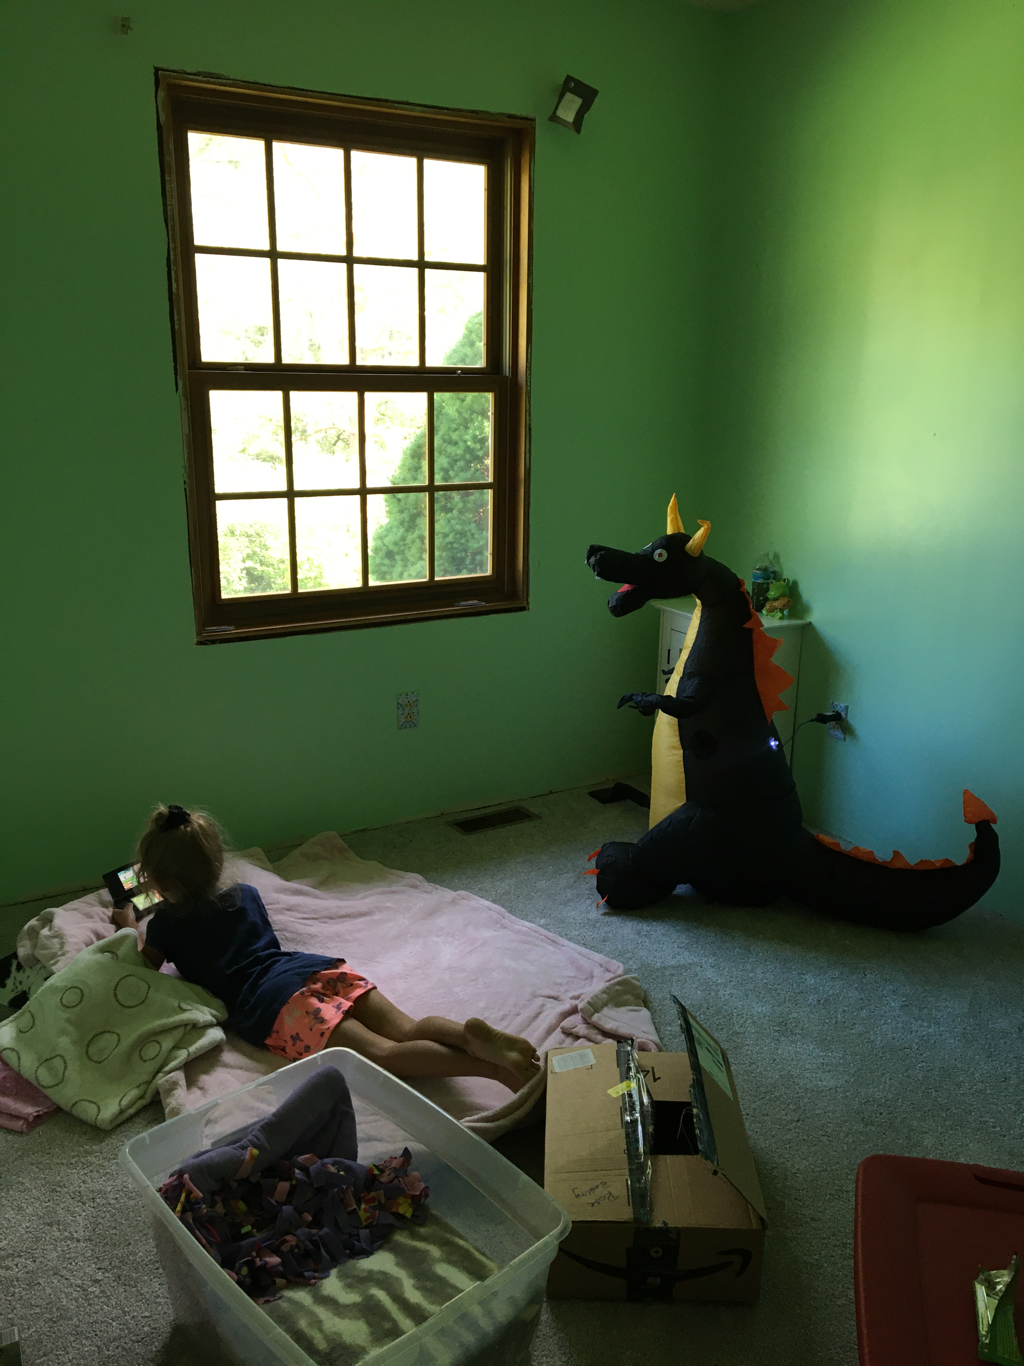 After! Renos continues in next blog post... Super easy pickling recipe! I make these pickled red onions to put on salads, and they are a hit at my house. Sweet in flavor and so crispy, you will love the texture it adds to a garden salad! Ingredients:
Note: Once the button seal pops, you can store on the shelf, but make sure you sterilized the jars and lids before hand. If you didn't sterilize, then store the jars in the fridge and once opened, use within 2 weeks. Enjoy!  This recipe uses simple ingredients to make a delicious meal! This recipe serves 2 people. Ingredients:
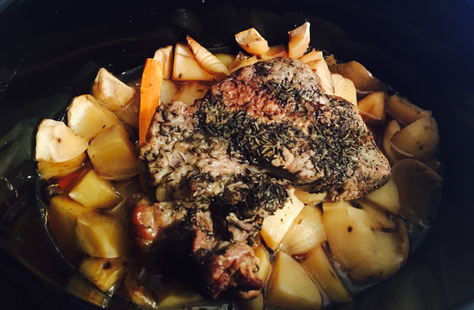 The easiest Pot Roast you will ever make! It's so savory and perfect for a fall or winter day. Prep Time: 10 mins
Cook Time: Low-6-8 hrs or on High-4-5 hours Serves: 6 Ingredients:
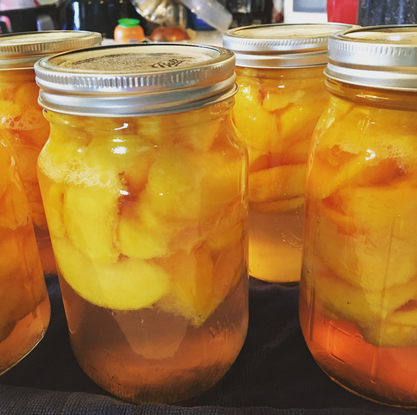 I love peaches, they are one of my favorite fruits but they are only priced right at their peak of season, which is now! (End of august into mid September in upstate NY.) Once their season ends, they go back to being pricier...and less tasty. So what's the best way to preserve that jucy summer goodness? By canning! I've tried freezing peaches and it's just not as good in flavor to me. So as labor intensive as canning can sometimes be, I've done this method :) and it preserves the peaches as if you had just bitten into one in September when it's the middle of winter! Follow this guide and you will have the freshest, most juiciest peaches, all year long! What You Will Need: • canner with basket and lid. • 5-6 cleaned and sterilized canning jars (with no chipped glass, pints or quarts) with new lids and rust free bands. Either wide mouthed or regular, your choice. • lifting tongs • funnel • small spatula •Citric Acid • 2 large bowls • wet towel for wiping off the peach drippings on the rims. • 20 or so peaches-yellow cling are the best choice for canning. • Large pot for boiling your water. 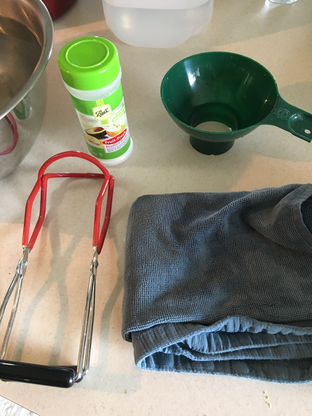 Step 1: Heat Up Your CannerYou will want to start boiling your water for the canner and for the boiling of the peaches. Fill your canner until the water is about 3 inches from the top and put on high heat with the lid on and basket inside. Then, fill your pot for boiling the peaches to almost full, about 2 inches from the top on high heat. 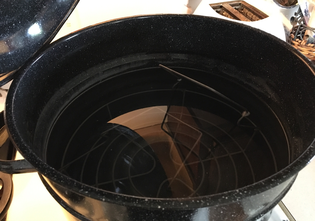 Step 2: Prepare Your Ice BathNext you need to fill up your largest bowl with cold water and have some ice trays ready filled with Ice in the freezer. Set aside next to your boiling pot of water. 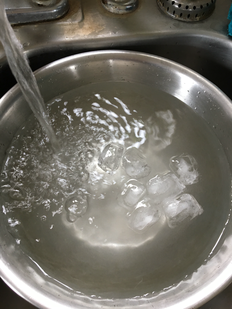 Step 3: Prepare Your Peaches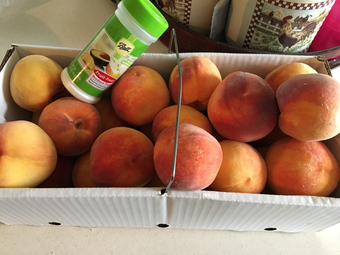 Fill your clean sink with cold water and drop your peaches in gently to make sure any residue on the peaches is cleaned off. 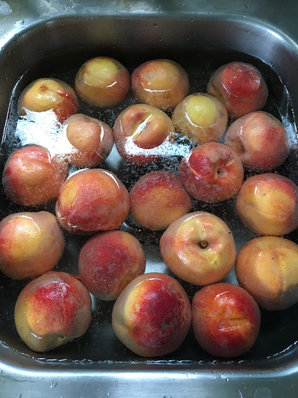 Step 4: Boil The PeachesTo easily remove the skins from the peaches, place your cleaned peaches in your boiling pot of water for about 1 minute. 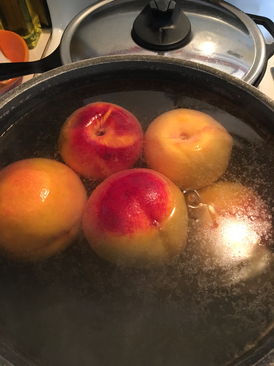 Remove the hot peaches with a slotted spoon and place quickly in the iced water bath you have prepared nearby. 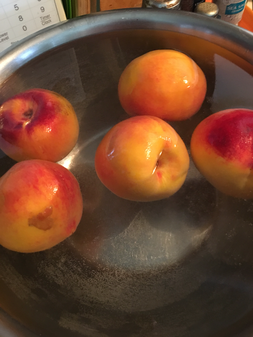 Step 5: Preparing Peaches For The JarsWorking in batches, you will be putting peaches in: boiling water, removing and placing into cold water, and then taking the chilled peaches and placing them into a large bowl to be prepared for your canning jars. Have the canning jars lined up like an assembly line to make the process smooth. Peel the skin off the peach with the back of a pairing knife or by using your fingers and put the skins and pits in another small bowl to be either given to your chickens or tossed in your compost. Then begin slicing up your peach however you see fit ( in half, in slices, or diced). Use your canning funnel to fill up your canning jar. Once the peaches have filled your jar, place the amount the instructions say on your citric acid into the jar atop the peaches.  Then fill your jar with room temperature or warm water, about a half an inch below the top of the jar rim. Remove your canning funnel and take a small spatula and slide it inside your canning jar along the glass sides to remove any bubbles so that the peaches are super compact. Then take your wet towel and gently wipe the inside and outside rim of your canning jar to be sure there isn't any residue on your jar. Seal up your jar with the lid then band and tighten it but don't over tighten. While you Prepare the other jars, place the completed ones as close to the boiling canner as possible to keep the jars warm. Note: You don't want to have the jars cool off and then placed into hot boiling water or they will burst. 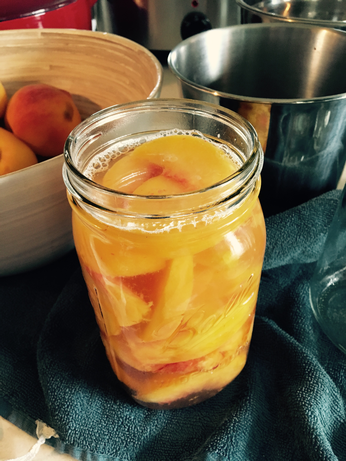 Step 6: Canning Your PeachesOnce all of your canning jars are filled, take your canning tongs and lift each jar into the lifted basket and place them gently into the basket without touching. (Before you do this step, make sure that your water is boiling at a cheerful boil beforehand.) Take some oven mits and lift the full basket carefully back into the hot water. Make sure the water covers the jars at least 2 inches above their tops. If it doesn't, just add some hot water from your sink into a cup and dump over the tops until it does. Close the lid and wait for your canner to reach a cheerful boil and then begin timing. You will time it for 25 minutes for pints or 30 minutes for quarts. 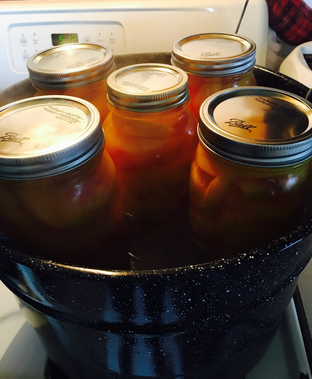 Step 7: Final StepAfter your Peaches are complete, use your canning tongs to lift them onto a dry laid out towel on your counter. Place them on that towel for a few hours, a few inches away from one another to allow for complete cooling. You should hear popping sounds of the lids sealing. After a few hours, check your seals and if they have popped in, you can tighten the bands completely and store ina cool dry place for up to 2 years! If you find that a lid didn't pop, refrigeraterate it as soon as possible and use within a week. Practice makes perfect and it is so rewarding in the end after all of your efforts :). Happy Frugal-ling! 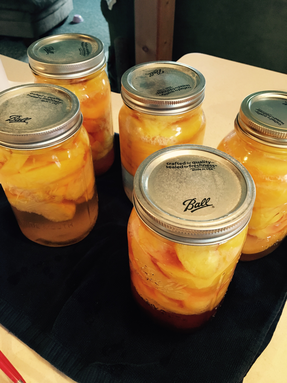 notes: upon opening, always check for spoilage. When in doubt, throw it out. Look for anything suspicious on the inside of the lids that seems funny colored or funny smelling. You should be able to open your jar and smell a delicious peach fragrance. If you see some crusting on the lid, it's fine, but brown or green coloring on the lid is not. If the lid was properly sealed, you should be fine but it's still always good to check:)
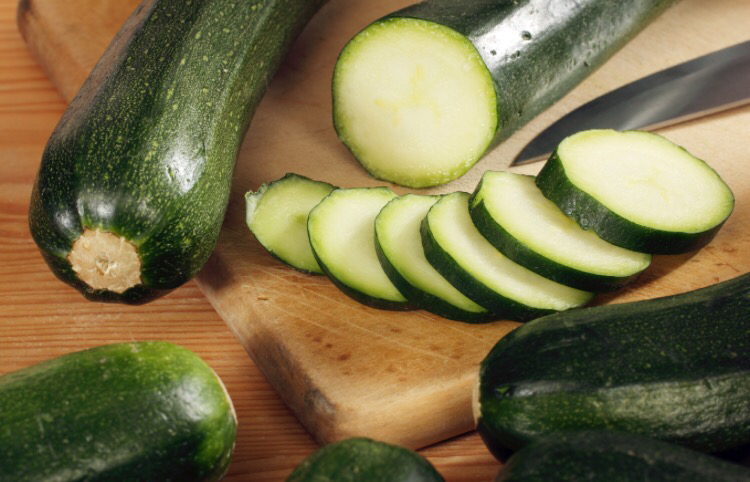 Zuchinni is such a fun veggie to grow and even more fun to freeze and eat! Here are some of my favorite preservation tips when you have a few zuchinni you've been given or grown yourself. Sliced, Then Frozen Zuchinni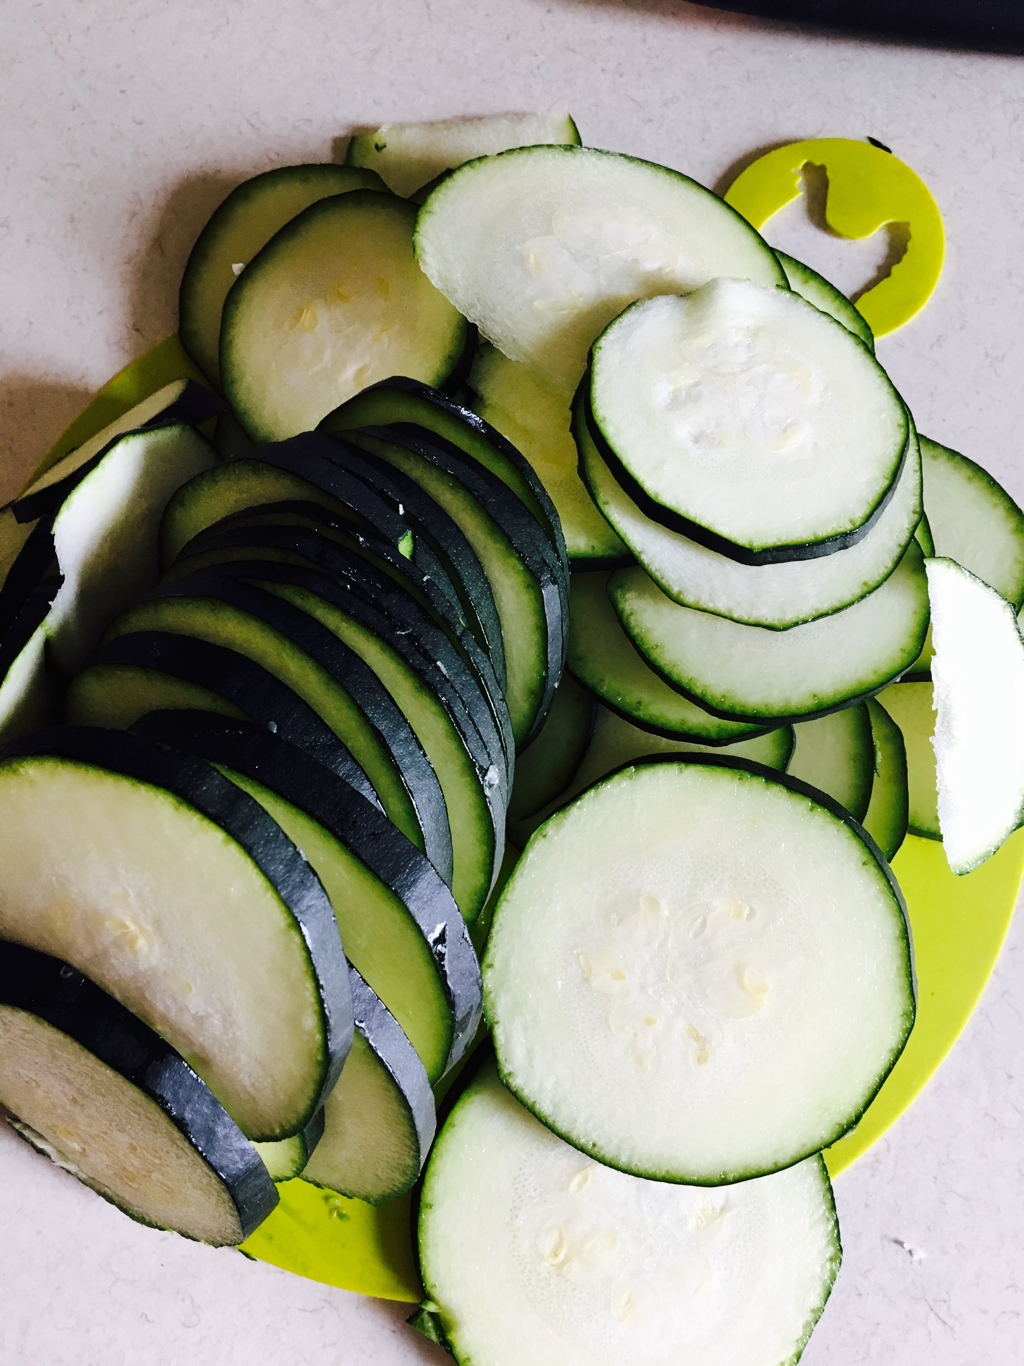 This method is super simple. Just wash your zuchinni, keep the skins on and slice up entire zuchinni. Then place in proportional ziplock freezer bags. You want to just freeze enough in one bag for one meal so that you can take it out of the freezer the night before and thaw overnight in your fridge to be used for grilling the next day. Date and label, squeeze out all of the air and pop into the freezer to be used for grilling along side summer dishes! Make sure you use up the zuchinni after it's thawed so that it doesn't get overly mushy. This will keep for up to a year! note: you can also do this as cubed and popped into a freezer bag :) 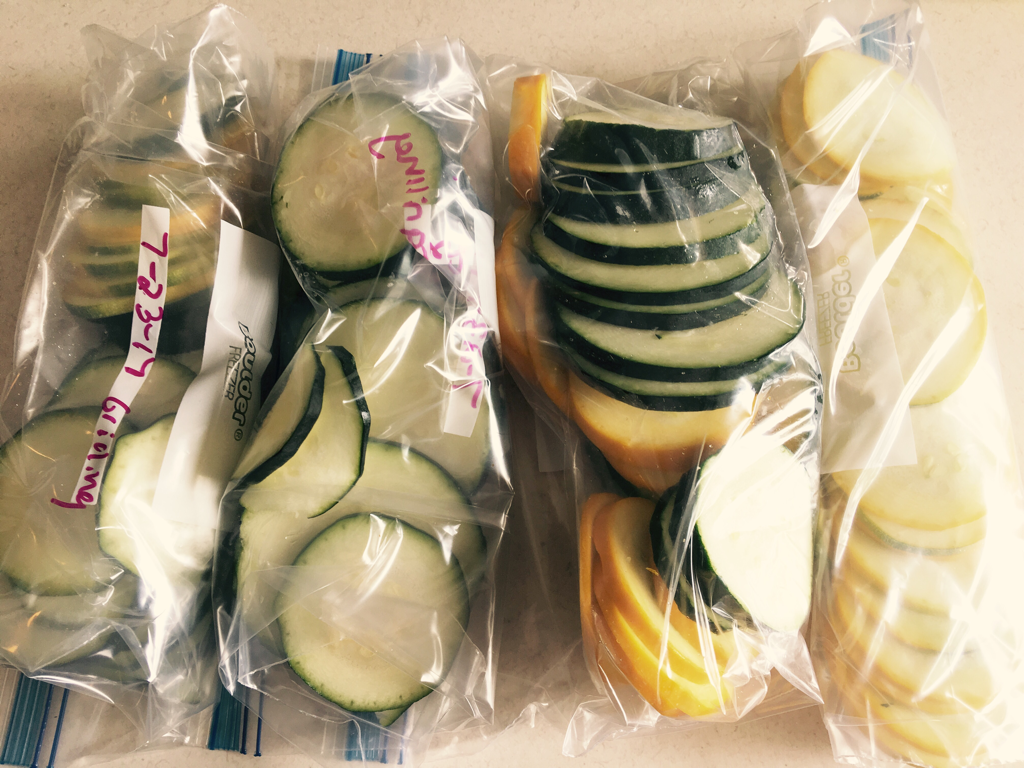 Grilled Zuchinni Recipe: 1) Place your thawed out zuchinni on paper towels to dry away the excess moisture. 2) Place them on an aluminum foil sheet with the edges lifted up. 3) Sprinkle with cracked black pepper, sea salt and drizzled with olive oil. 4) Place aluminum foil with the zuchinni on top rack of grill and cook in foil packed until desired doneness. I usually like to take them off the grill once the zuchinnis have turned translucent so that they have a bit of crunch but not over cooked. ENJOY! Shredded, Then Frozen Zuchinni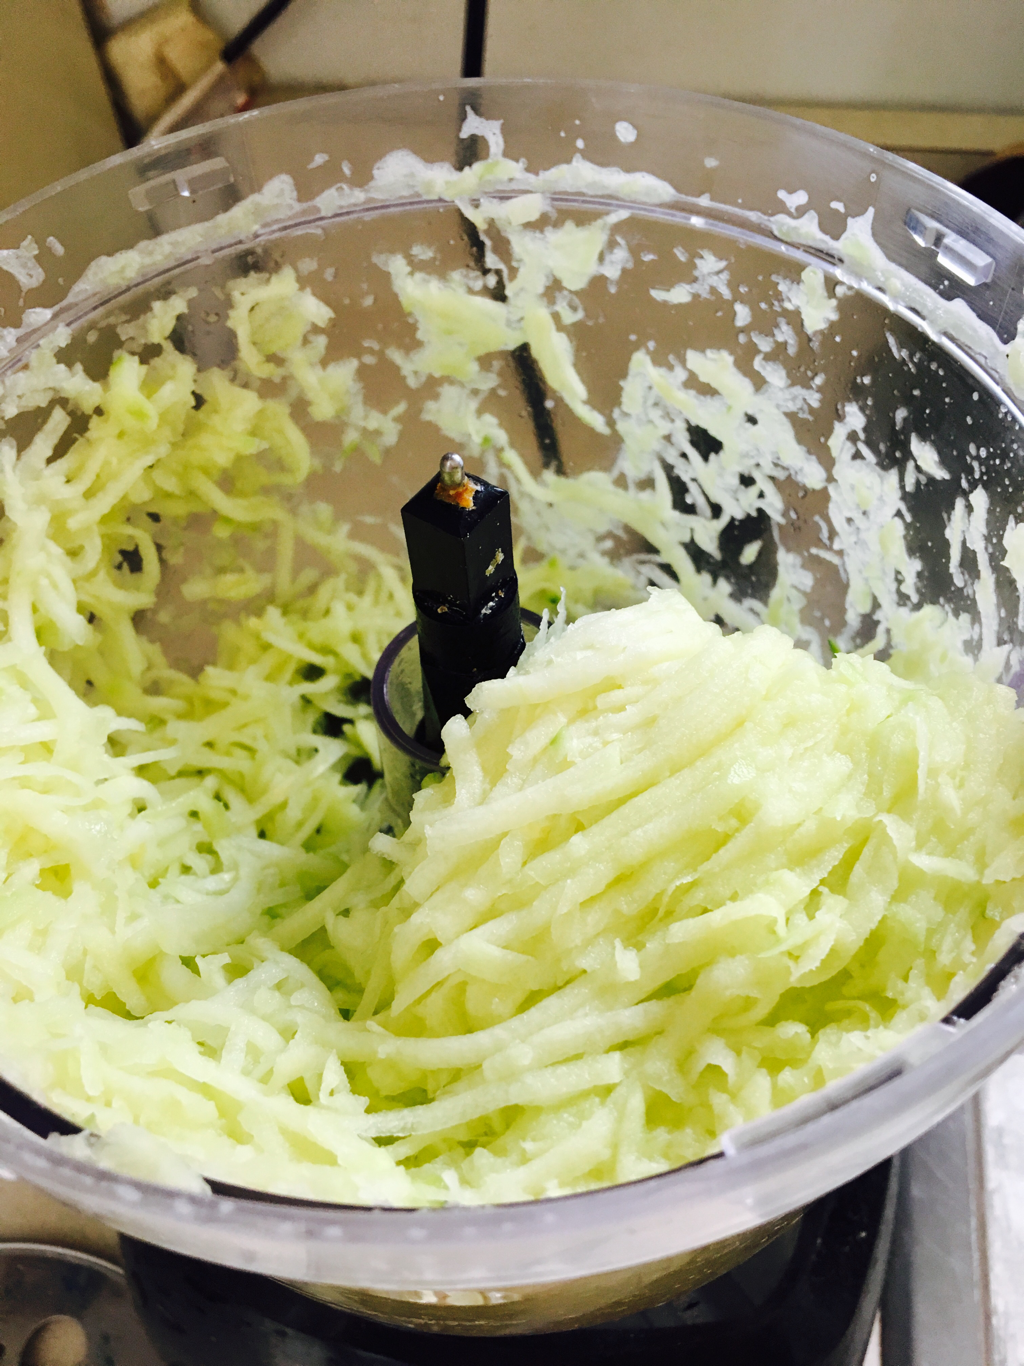 Shredded Zuchinni is perfect for zuchinni bread or zuchinni muffins. This is the simplest method for preserving shredded zuchinni. Step 1: wash and de-seed zuchinni. Step 2: place zuchinni in food processor and shred or use a cheese grater manually. 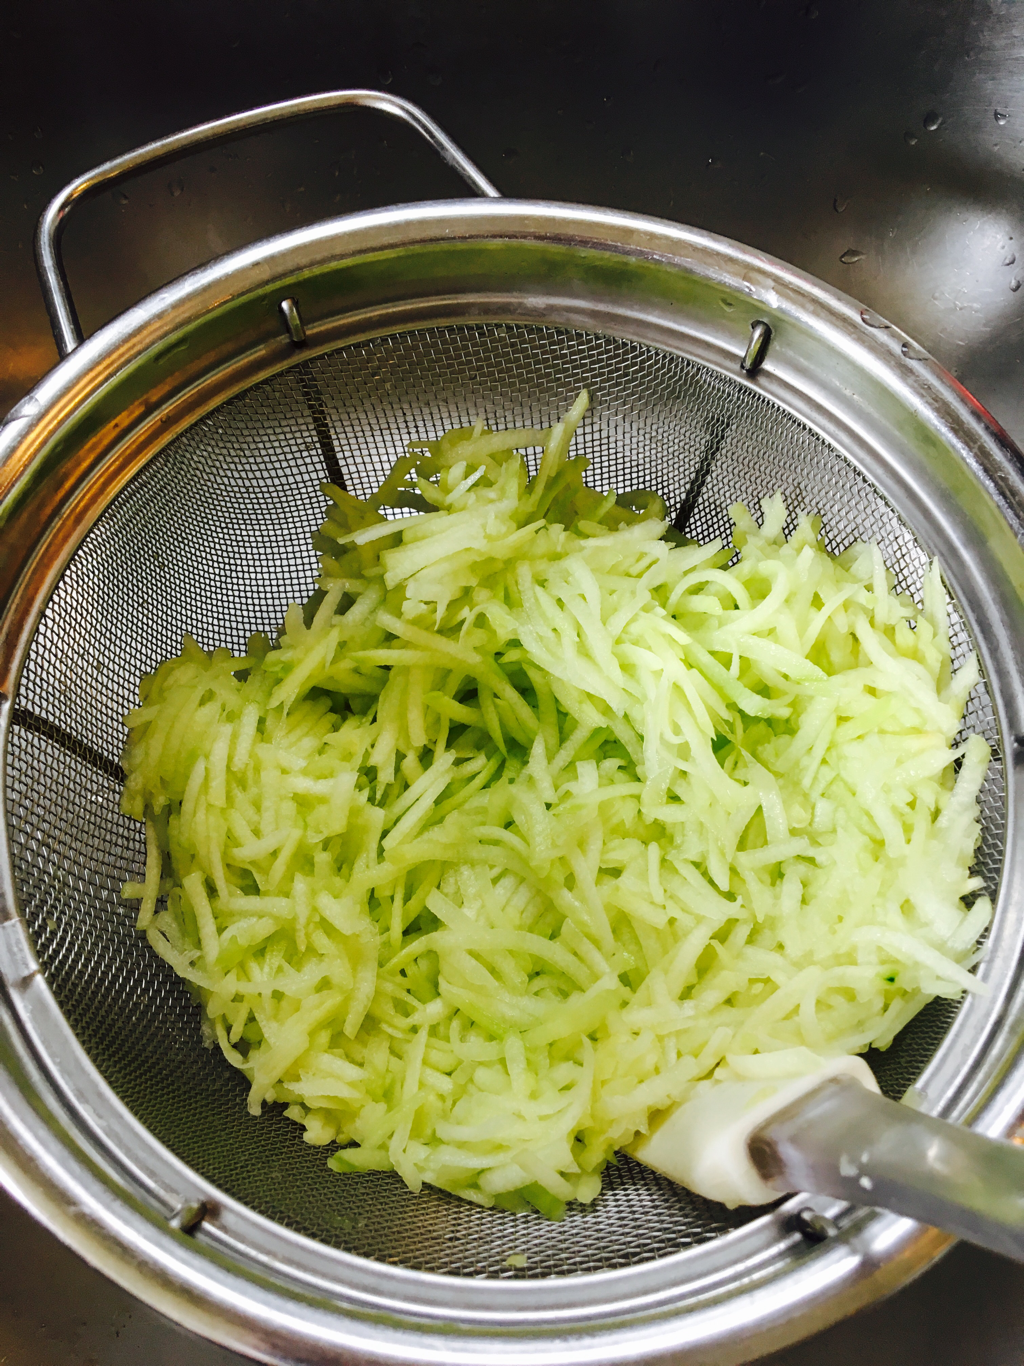 Step 3: place zuchinni in strainer and press into strainer to remove excess water. 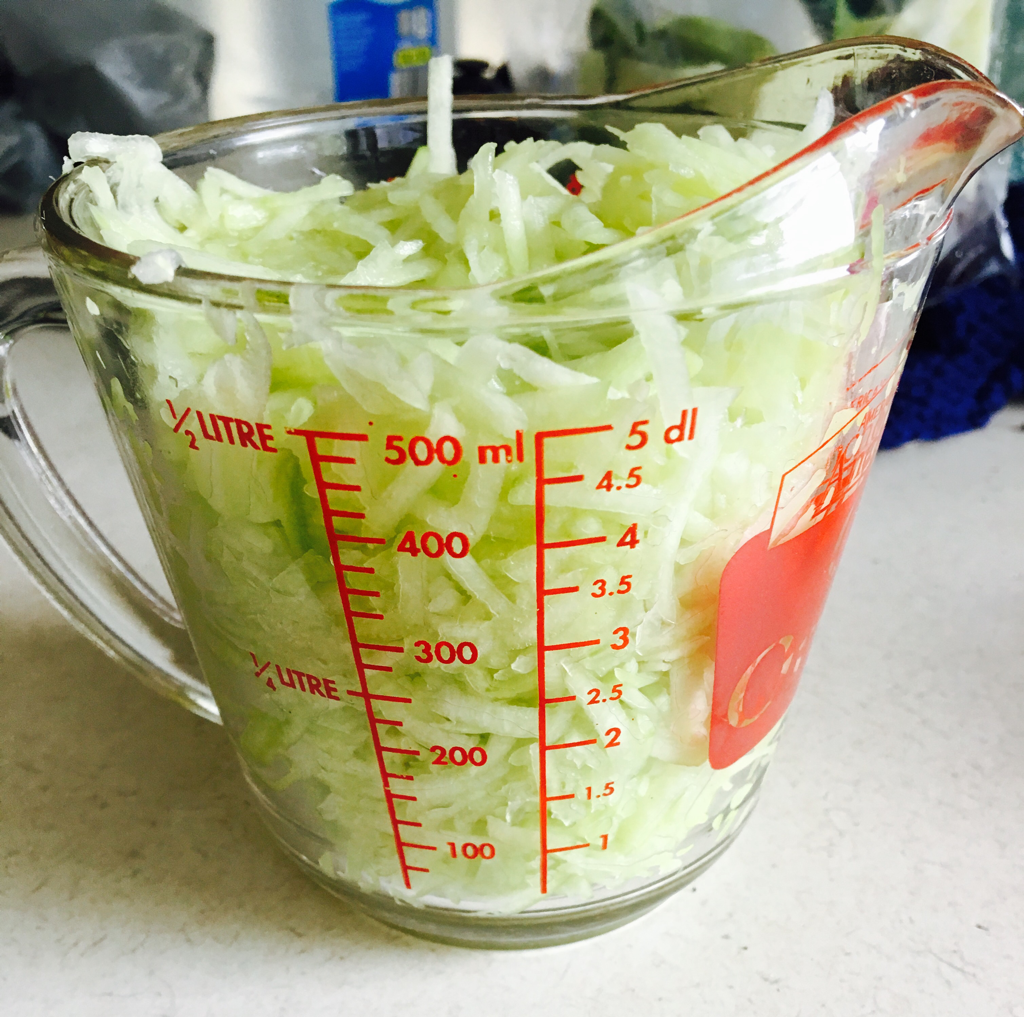 Step 4: once liquid is squeezed out, place shredded zuchinni in a measuring cup to measure out and place in freezer ziplock bags or freezer containers. Date and label and pop into freezer. This will keep for 6 months to a year ! When ready to use, just thaw overnight in fridge and squeeze out excess liquid and place into your recipe of choice! 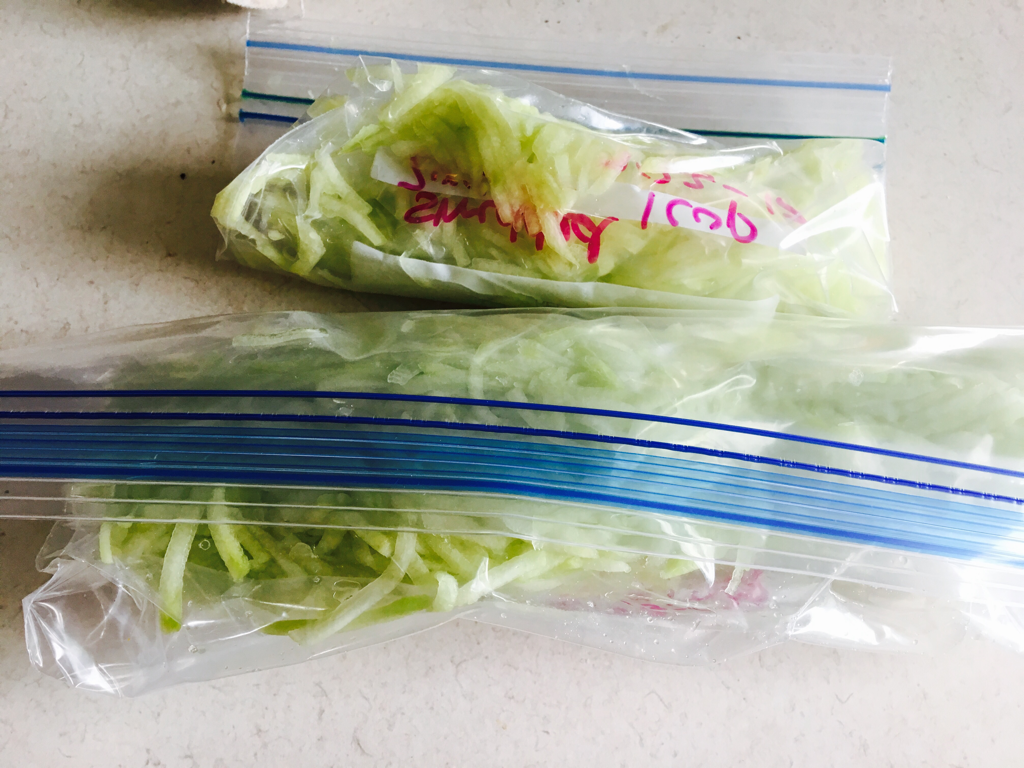 So those are my favorite ways of preserving Zuchinni! I will leave you with a tasty recipe that works well as an appetizer or snack, enjoy! Baked Parmesan Zuchinni Chips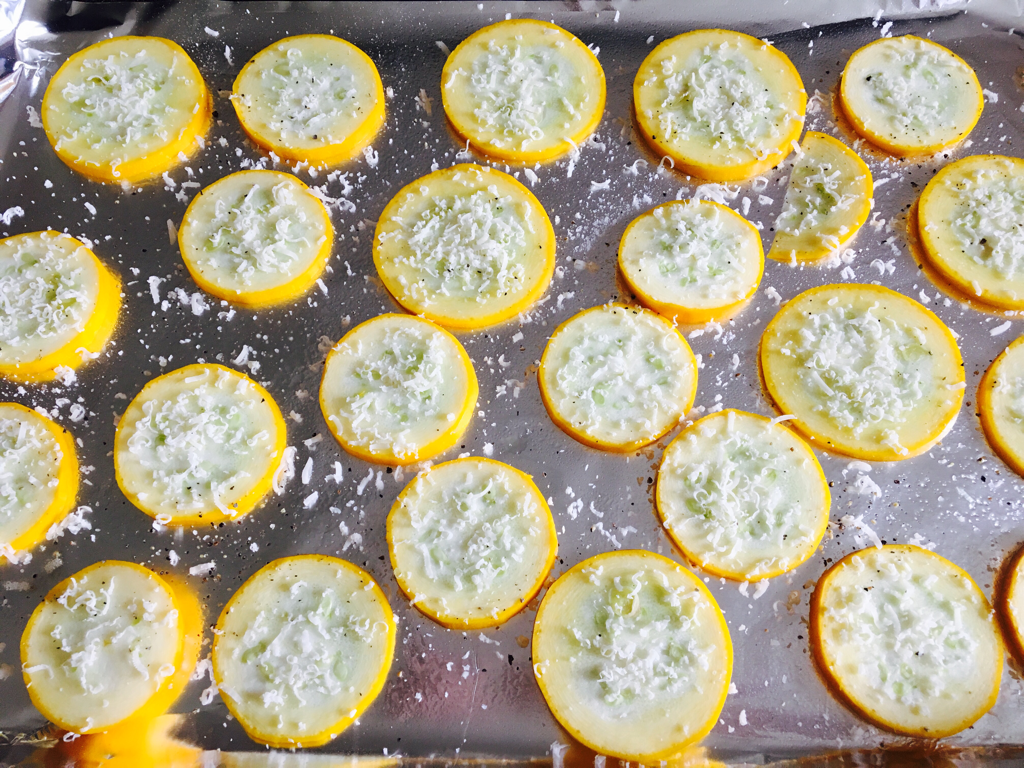 Slice your Zuchinni about 1/4" thick and place on a sprayed aluminum foil sheet on a baking sheet. Sprinkle with cracked black pepper, sea salt and grated Parmesan cheese and stick into a 425 degree oven for 15-20 mins. Once cheese is melted and lightly toasted, Allow to cool slightly and serve! 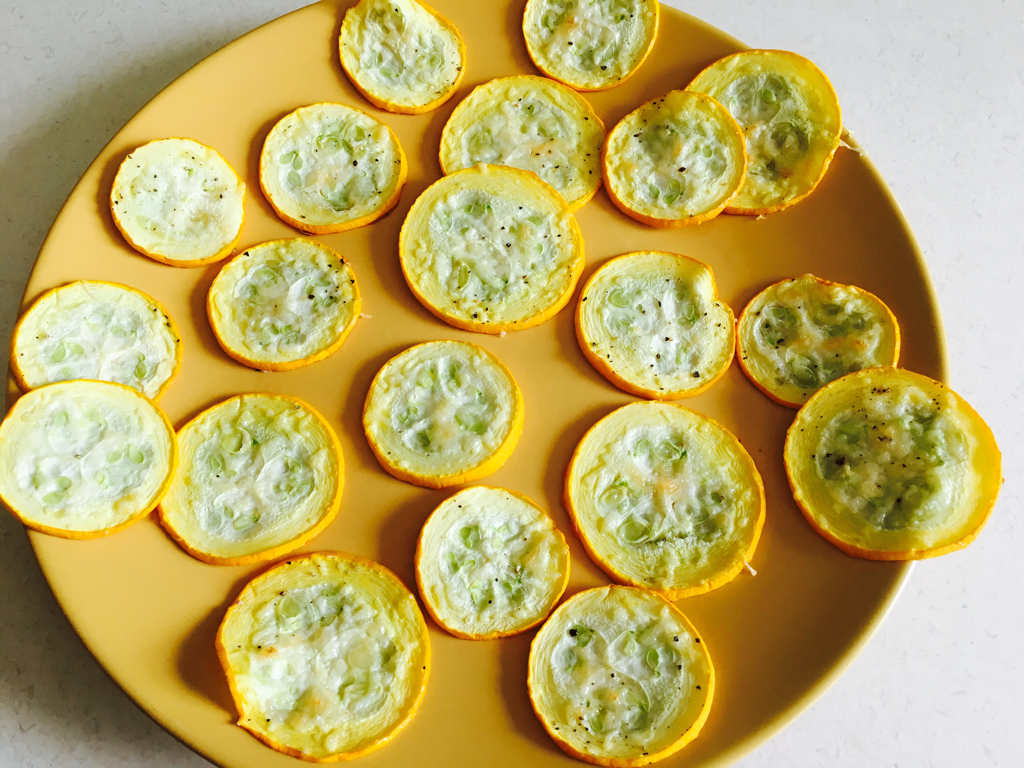 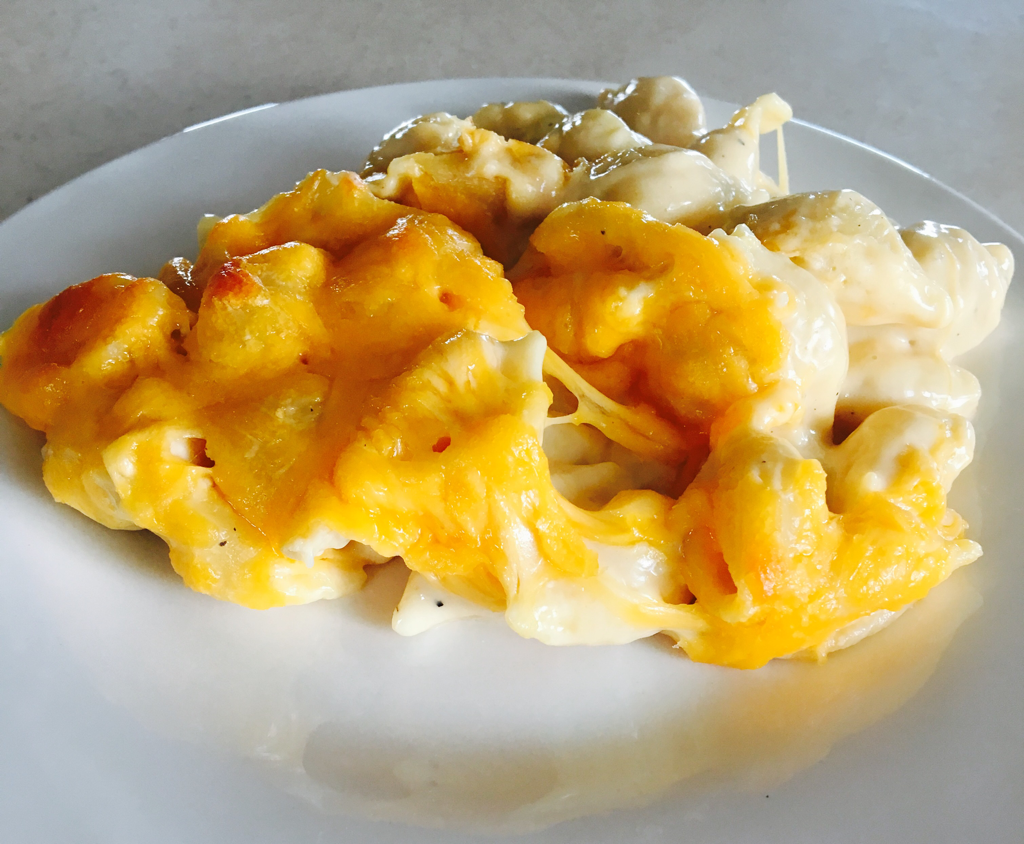 I'm a huge fan of Mac n Cheese, and this stuff is way better than Velvetta or Kraft's version. It's very easy to make and you can add whatever cheeses you'd like to this dish and it will work :) Ingredients:
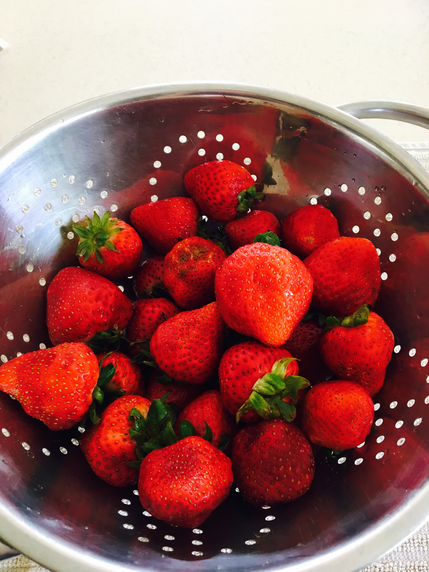 Strawberries are in peak season right now, so whether your picking them yourself or getting them on sale at the grocery store, now is the perfect time to stock up on them and either make jam or freeze them! This is my easiest method to freezing strawberries to be later used in desserts, in smoothies, or just as is! Step 1: Gather strawberries and wash well. Drain. Step 2: Cut off their tops and either put in your compost or feed to your chickens!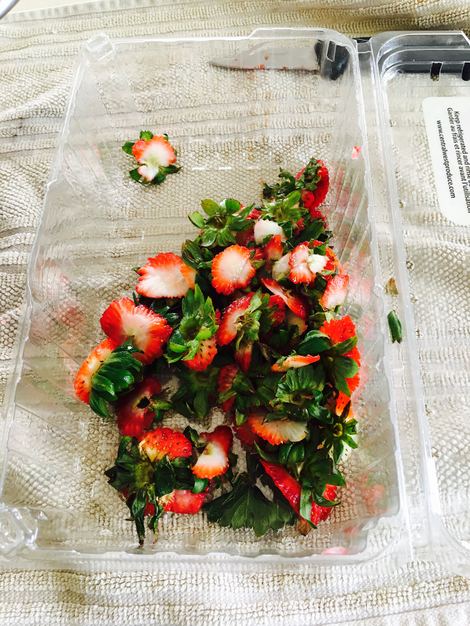 Step 3: Place strawberries top side down on a clean baking sheet, space them enough apart from each other so they can freeze thoroughly.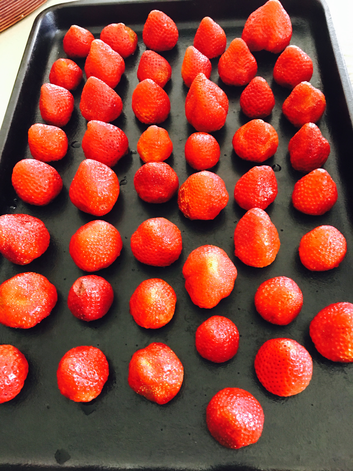 Step 4: Stick in your freezer for 5 hours or overnight.Step 5: Once they are completely frozen, pop into a zip lock freezer bag and date bag.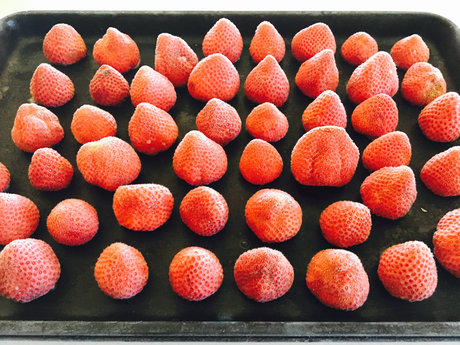 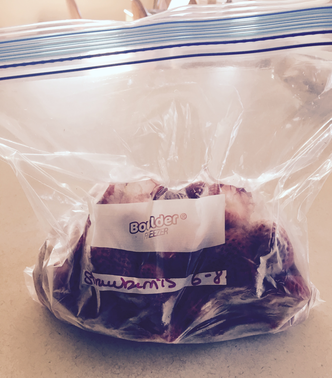 Tips for success: make sure all the strawberries are perfect without blemishes or bruises so that they keep longer. The bruised and blemished ones are perfect to mash in your blender and freeze in ice cube trays for smoothies. Be sure to get as much air out of your ziplock as possible to prevent freezer burn buildup. Use strawberries up to 6 months for peak flavor and nutritional value. Enjoy!
|
MarianI'm a lover of nature, food, and creating. Archives
January 2021
Categories |
 RSS Feed
